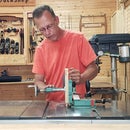
Introduction: Homemade Vertical Drill Press Clamp
Perfect for drilling pen blanks or any small pieces vertically in your drill press, easy to build and a must have drill press jig.
Step 1:
I always suggest watching the build video so that you have a better understanding of the project.
https://youtu.be/WEAv8imeBAQ
Step 2:
For this project I needed one 3/4 of an inch board, 3 inches wide by 3 feet long. Going through my scraps I found a board I could use for this project, and starting with my table saw by ripped the board down to the width I needed.
Step 3:
With my now 3 inch wide board, I needed to cut it to the right length. For this project I needed two pieces that measure 16 inches long, to achieve this I used my miter saw.
Step 4:
Next I needed to create a v-groove in both piece, this groove will run across the with of both pieces on one side only. I created this groove 7 inches from one end using a v-groove bit in my router table. With the groove completed and both pieces held together they should create channel as shown.
Step 5:
With my v-groove created I clamped my two boards together in the vise making sure the v-groove was lined up in both pieces, and then I attached a butt hinge at one end.
Step 6:
I now have a vertical clamping jig, perfect for things like pen blanks, dowels, small knobs, anything I need to safely hold in a vertical situation at my drill press. For example with a pen blank, I just insert the blank into the grove then with my hand apply squeezing pressure to the end of the jig with out the hinge.
Step 7:
Here is an example of me drilling out a pen blank, it works great.
This is a really easy clamp to build, and if you use your drill press as much as I do this is a must have in your accessories for it.
20 Comments
3 years ago
Great project! Please don't cut wood on a table saw with your hand on top of the wood over the blade. My friend lost a finger doing that when the blade caught the wood and kicked it back letting his hand drop onto the blade.
Reply 3 years ago
I am sorry to hear about your friend, but if you watch the video you would see I use a push stick to clear the blade. In this picture it may create an illusion that my hand is close to the blade, but again if you watch the video you would realize this is not the case.
Reply 3 years ago
What video?
3 years ago
The hinge arrangement doesn't inspire me. A strap hinge screwed to the inner faces of the planks would be better. I'm assuming that it's not important for the planks to have no gap between them when the hinge is closed.
Reply 3 years ago
I chose a butt hinge to avoid the chance of the screws being pulled out under any clamping pressure as would be the case with strap hinges screwed to the face, the clamping force would be directly on the screws with that type of hinge creating a high probability of this problem.
3 years ago
Great idea, I need something like this. Thanks for showing me to make it.
Reply 3 years ago
Thank you, and you're welcome.
3 years ago
Nice shop
Reply 3 years ago
Thank you
Tip 3 years ago
If one were to add a Spring Clamp to the hinged end (maybe with little 'pockets' routed out to help locate the clamp and keep it from slipping) . . . would that be considered 'an improvement?'
If, too, the intent is to maintain the blank at ninety degrees to the table, maybe the arms could be made with two pieces of wood at right angles along the length(s) such that the additional pieces laid flat upon the table as well as serving to allow the device to be clamped to the table once the blank was 'in position.'
Maybe OVER KILL for pen blanks!
3 years ago on Introduction
Looks like a really useful bit of kit. But please remove the intrusive music from your video. I wear hearing aids and I just couldn't get to the end of it. Hearing aids are optimised for speech and the background sound just turns the whole soundtrack to mush for me. It's not personal. I have the same issue with a lot of videos. I got enough of an idea to copy your process and thanks for that
Reply 3 years ago
I agree - with ur without my 'aids' some videos suffer from the addition of 'background' music that competes with the speech that is often essential. I turn the volume down and the cc on (when available). In this case, the project is relatively easy to re-create with a view or two of the finished product (in action) - I did not hear the 'intrusive music' or watch the video and found the instructable would stand alone w/o a video.
3 years ago
Sawing the opening picture I was wandering about what this project will be. Finally I got it. Usually the opening picture shows the finished product...
Question 3 years ago on Step 4
My question is why is are
Answer 3 years ago
Huh?? "My question is why is are". What does that mean or what referring to, please??
Answer 3 years ago
?
3 years ago
Brilliant! I was thinking about making a jig to do this, but hadn't managed to come up with a design. I'm stealing this one. Thank you very much :-)
Reply 3 years ago
Thank you, and you are welcome
3 years ago
Simple, clever, effective. Great little jig, thank you for sharing the idea!
Reply 3 years ago
Thank you