Introduction: How to Burn Bootloader Onto Atmega328p-AU(SMD)

Hello Everyone!!
In this Instructables I will Show youHow to burn Bootloader ontp Atmega328p-AU (SMD) chip and How to make an Arduino NANO from start to finish.
The procedure written in this instructables can be used to make any arduino boards for your custom project requirements.
Please Watch the Video For better understanding
There are three parts in this tutorial.
1. Designing and gathering all the Components
2. Burning Boot-loader onto new Chip
3.Uploading the Test Code
I Have attached the PCB Files at the End of this article.
So lets get Started!
Step 1: Material Required


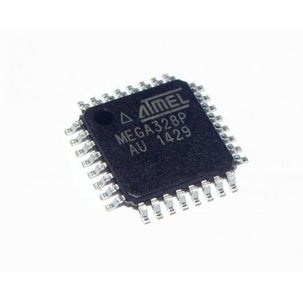

Atmega328P-AU Chip
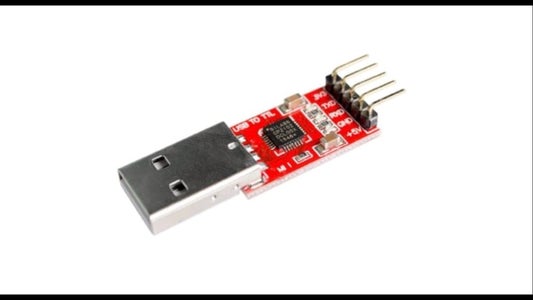
CP2102 USB to TTL Module(or similar like CH340)
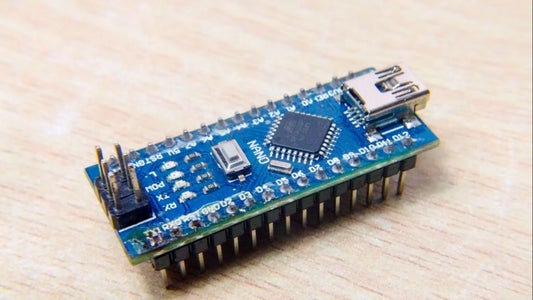
Arduino NANO
Jumper Wires
AMS1117 5V Regulator
16MHz Crystal
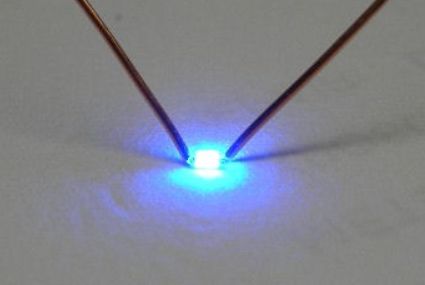
SMD LED
SMD Resistor ( 330R, 10K) (0604 package)
Button Switch
Capacitors ( 0.1uF, 22pF, 10uF) (I Used Ceramic type, but the board is designed for SMD_0612 Package)
Terminal Strip
All the tools and accessories for SMD Soldeing.
Step 2: Circuit Diagram and Making the Circuit Board


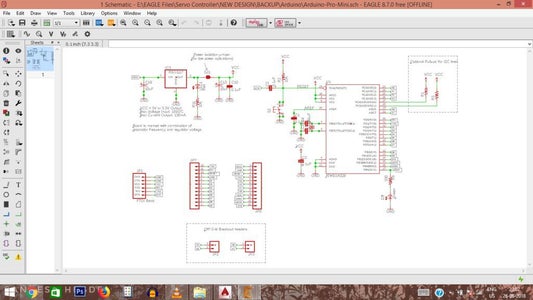


The Circuit diagram and PCB layout was downloaded from the Arduino Website. Later I modified a little bit as all the components used in the original board was not available with me. I ordered the Circuit board online.
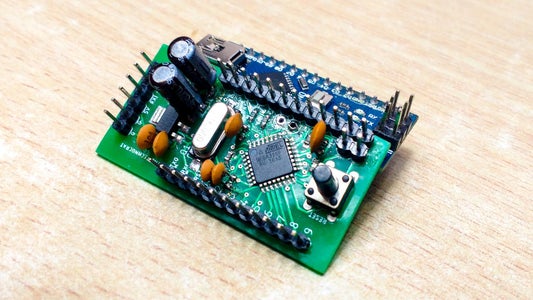
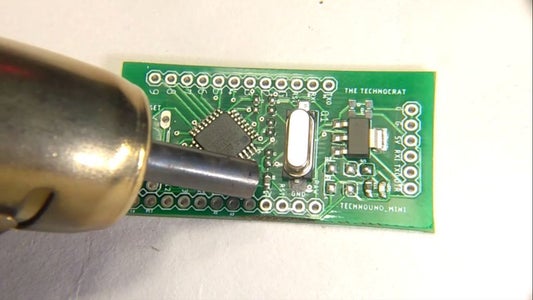
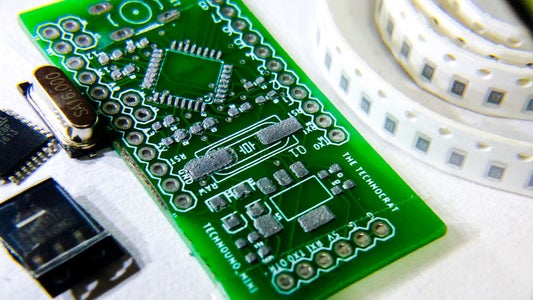
Once received the PCB, I used my hot air Blower soldering station to solder the components and ICs. The images of the finished board is attached.
I have not explained the soldering process now as it is a topic of scope for a different instructables. I Applied the solder paste on PCB using stencil, Placed the components, and soldered using Hot air Blower.
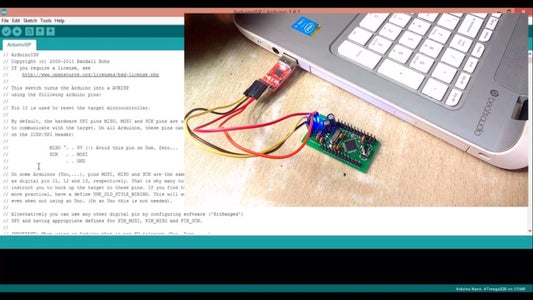
Step 3: Connections and Procedure to Burn Bootloader
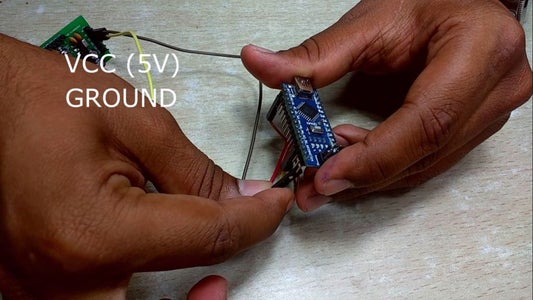

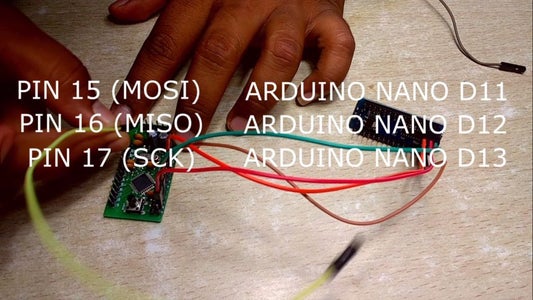
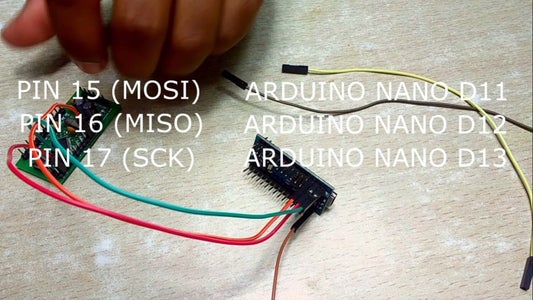
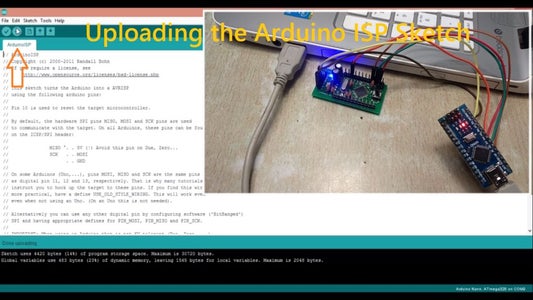


Please Follow this Connection Details(Refer the Images/Video link For easy understanding*)
Homemade ArduinoMINI .................Arduino NANO
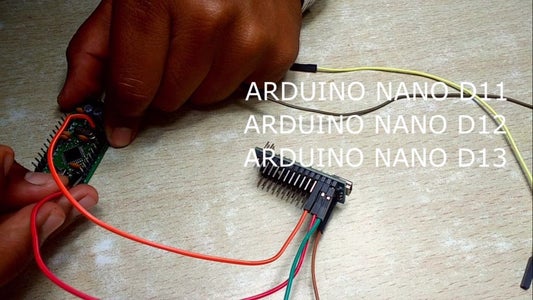
Pin 15 (MOSI).....................................D11
Pin 16 (MISO).....................................D12
Pin 17(SCK).......................................D13
Pin 29(RESET)...................................D10
VCC....................................................VCC(5V)
GND...................................................GND
Procedure To burn Boot loader after making the correct connections.
1) Connect the Arduino NANO to USB of your PC
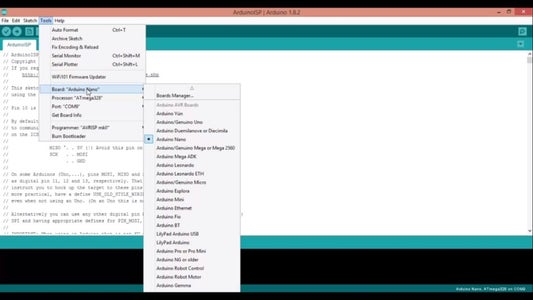
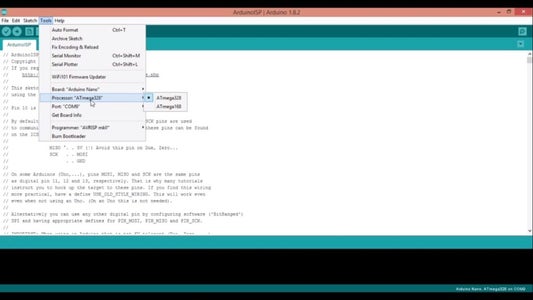
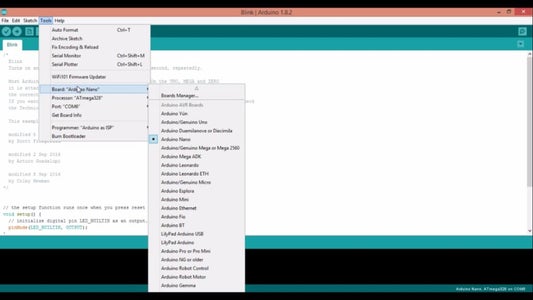
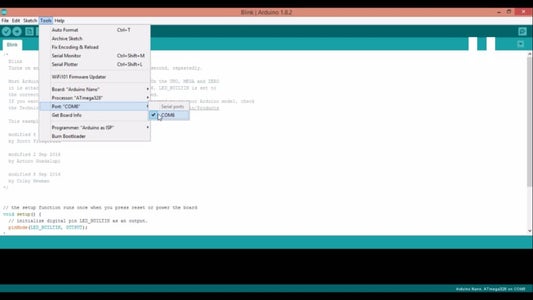
2) Select the appropriate Board and Com Port
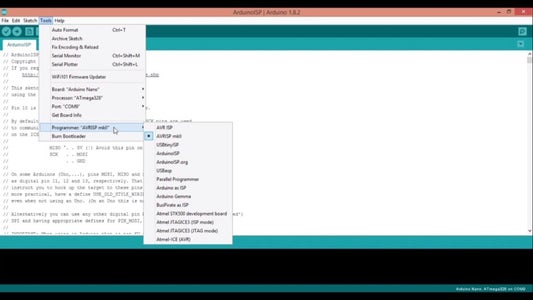
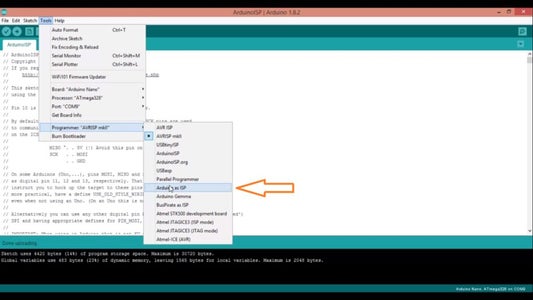
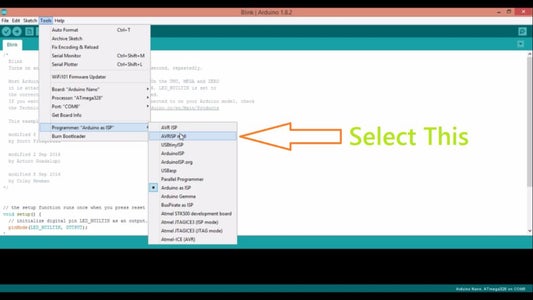
3) In tools menu select ARDUINO AS ISP Programmer. Path: Tools>Programmer>Arduino As ISP
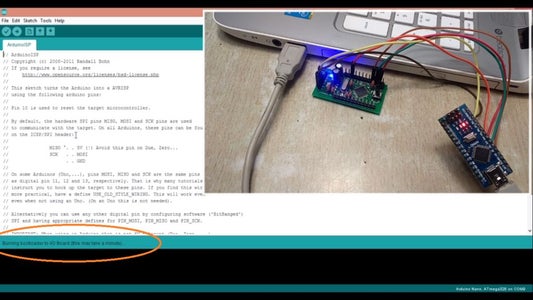
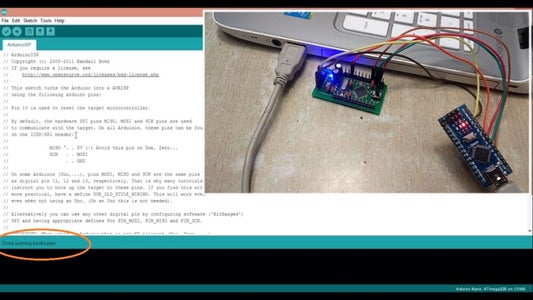
4) Go to Tools and select Burn Boot Loader. Path:Tools> Burn Boot Loader
5) This may take up to a minute and the message " Done Burning Boot Loader" will be displayed.
After this you can remove all the connecting wires and connections and your new AVR Micro-Controller is ready to be used as standalone device for your projects.
*All the images are in order according to procedure
Step 4: Testing by Uploading the Code


In this step we will learn to upload the code onto new Homemade Arduino MINI. You Will have to follow this procedure every-time to upload the code.
Refer the Images/video link for easy Understanding.
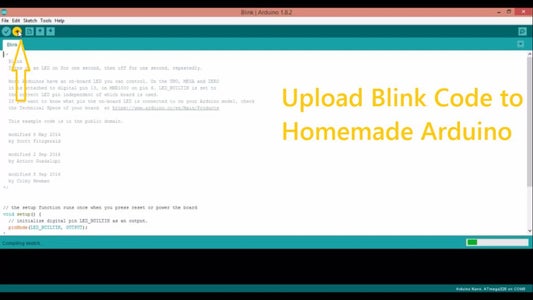
I will upload the blink LED sketch to test if the new micro-controller is working properly.
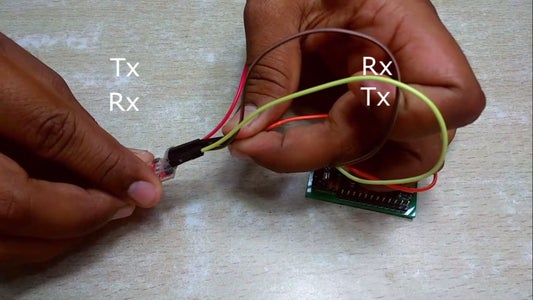
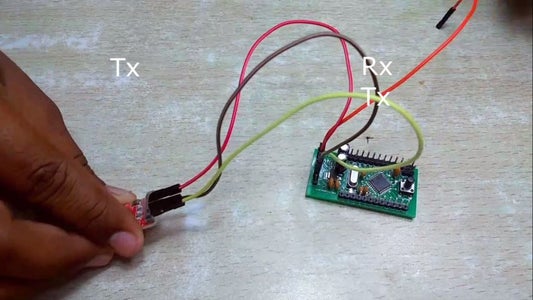
Connections Details:
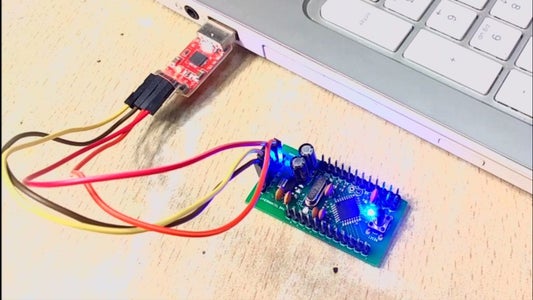
Homemade Arduino MINI .................CP2102
Rx......................................................Tx
Tx.......................................................Rx
VCC....................................................VCC(5V)
GND...................................................GND
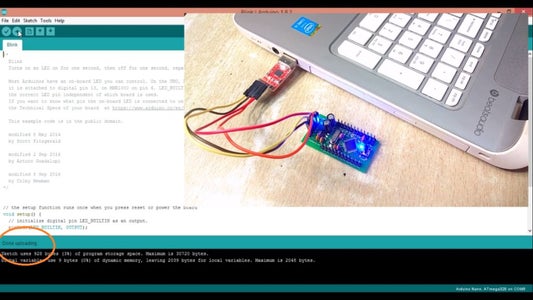
1.After Making the connections, Connect the USB to TTL Converter Board(CP2102) to your Computer.
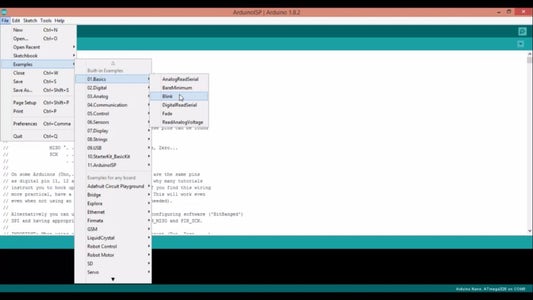
2. Open the Blink LED Sketch from the Examples Menu.
3. In the tools menu, select AVRISP programmer and upload the code.
4. Select the appropriate COM port and Board Settings.
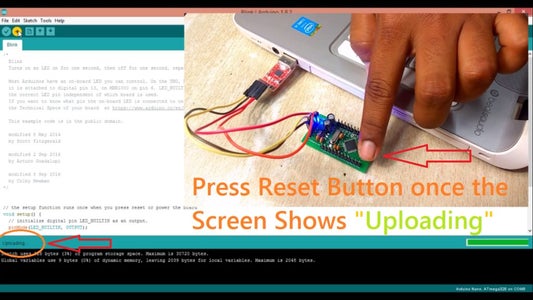
5. Once the computer screen shows uploading, press the reset Button as we have not connected the DTR Pin to reset.
The Blinking LED indicates that the micro controller is working properly, and this Arduino Mini equivalent board can be used for your projects. Therefore we have learnt how to boot-load a brand new ATMEGA 328P-AU chip.
Step 5: Troubleshoot and Finishing

We have successfully completed making the Arduino Nano. Yet there are chances for errors to occur. Here are list of things you can do to rectify the errors.
1) Check your Circuit connections and components (mainly Crystal) if burning Boot loader does not work.
2) Make sure you have mentioned correct board and COM port in software
3) Check for faulty USB Cable.
4) If the Micro Controller is heating up when powered probably you have a faulty IC.
5)Check for Continuity in PCB and unwanted solder Bridges as we are using SMD Components.
Thankyou
HS SANDESH HEGDE