

Introduction: How to Connect NodeMCU ESP8266 to MySQL Database


MySQL is a widely used relational database management system (RDBMS) that uses structured query language (SQL). At some point, you may want to upload Arduino/NodeMCU sensor data to the MySQL database. In this Instructable, we will see how to connect NodeMCU ESP8266 to the MySQL database.
Here I am going to use 000webhost to host MySQL database because of simplicity and free availability. However, you can use any platform with LAMP (Linux, Apache, MySQL/MariaDB, PHP) stack installed on it. Even you can use XAMPP to host MySQL database locally on your Windows PC.
In this instructable, I am not going to use any sensor. I will just increment two variables and insert them into the database. However, you can connect any sensor with your board.
Requirements:-
- NodeMCU ESP8266 development board
- Free version of 000webhost account (or MySQL installed on localhost)
- Filezilla FTP client (free version)
Step 1: Create Web Application
- Navigate to 000webhost.com and login to your account.
- Locate Create New Site button on the top right corner of the window.
- Enter desired site name and password and then hit the create button. (Note down site password in a safe place because we are going to use it in upcoming steps).
- Proceed to Manage Website option.
Step 2: Create MySQL Database
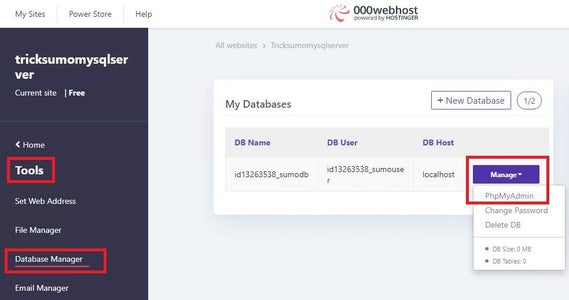
Navigate to Tools >> Database Manager and then create a new database.
After successfully creating the database, proceed to Manage >> PhpMyAdmin.
Step 3: Create MySQL Database Table
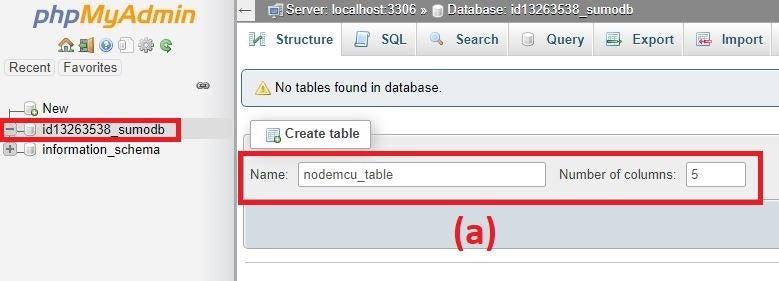
- Locate and click on the database name in the left panel of PhpMyAdmin Window (as shown in screenshot a).
- Enter table name and number of columns (let it be 5). Then hit the Go button.
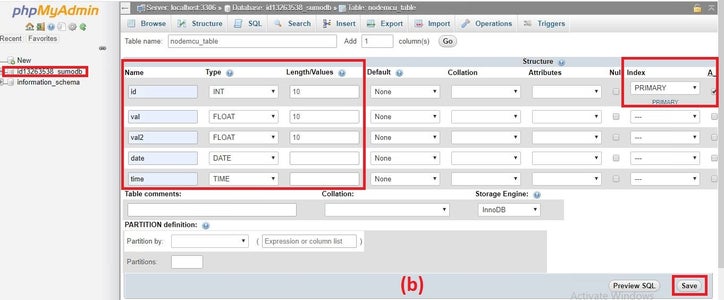
- Create columns (as per schema shown in screenshot b) and then hit save button.
Alternatively, you can create table by running the below command:-
CREATE TABLE `id13263538_sumodb`.`nodemcu_table` ( `id` INT(10) NOT NULL AUTO_INCREMENT , `val` FLOAT(10) NOT NULL , `val2` FLOAT(10) NOT NULL , `date` DATE NOT NULL , `time` TIME NOT NULL , PRIMARY KEY (`id`)) ENGINE = InnoDB;
Step 4: Download and Edit PHP Files
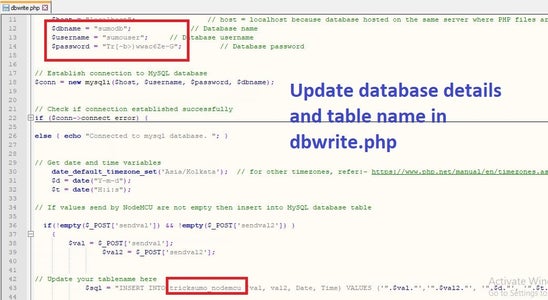
- Download dbwrite.php and dbread.php file from Github (or download attached files).
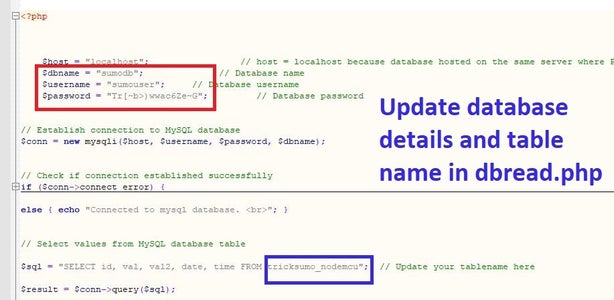
- Update database details and table name in dbwrite.php and dbread.php (as shown in screenshot).
Attachments

Step 5: Upload PHP Files to the Server
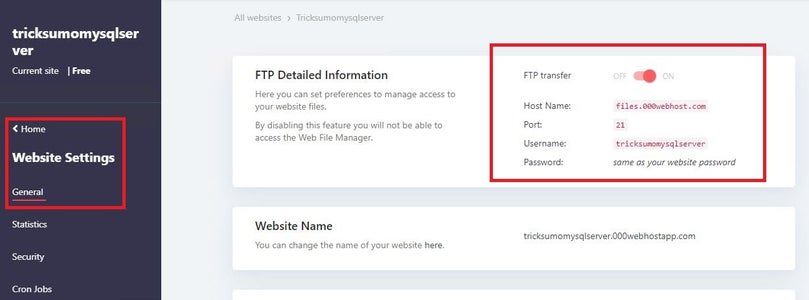

- Navigate to Manage Website >> Website Settings >> General.
- Note down hostname, username, port and password (password is same as site password created in step1).
- Use these details to connect to the server using Filezilla FTP client (as shown in screenshot).
- Navigate to public_html folder and upload dbwrite.php and dbread.php files.
Step 6: Edit and Upload Arduino (.ino) File to NodeMCU ESP8266
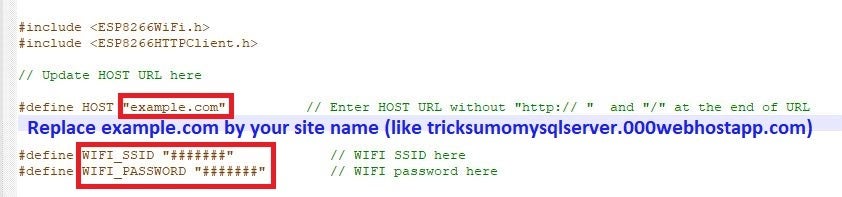

- Navigate to Manage Website >> Website Settings >> General and note down Website_Name (site URL).
- Edit .ino file to replace example.com with the name of your site. Also don't forget to update WiFi SSID and password.
- Finally, Upload code to NodeMCU.
Attachments
Step 7: Check Connection to MySQL Database
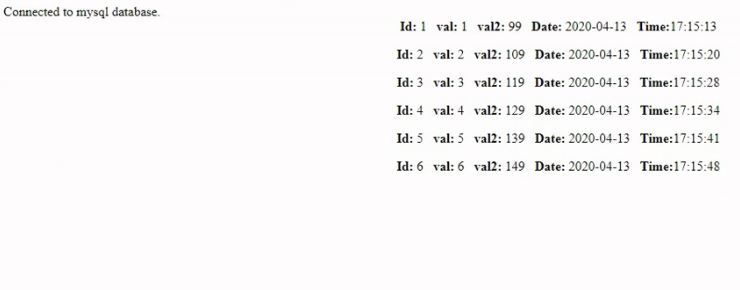
Once code is uploaded to NodeMCU, it will start sending data to MySQL database.
Visit "example.com/dbread.php" to view database values.
Hope you find this tutorial helpful. Enjoy!

Participated in the
Arduino Contest 2020


