Introduction: How to Draw Perspective II: for Makers
This instructable will cover the basics of drawing curvilinear shapes in 2 point perspective.
The previous Instructables in this series covered:
- Basics of selecting drawing tools, drawing posture and making a straight line
- Drawing rectilinear shapes in 2-point perspective
Here's a link to my other drawing Instructables:
https://www.instructables.com/id/How-to-Draw-For-Makers/
https://www.instructables.com/id/How-to-Draw-Perspective-For-Makers/
https://www.instructables.com/id/How-to-Draw-Rendering-For-Makers/
https://www.instructables.com/id/How-to-Draw-Constructing-For-Makers/
Step 1: Deriving a Circle From a Square
As I mentioned in the previous drawing Instructable. Most other geometry can be derived from a cube.
We will use one surface of a cube, a square, to derive a perfect circle.
Learning to derive a shape is important to understanding the underlying rules of geometry and ensure you are creating correct forms in the future and not impostor shapes pretending to be true forms.
Spend your time learning and practicing these basic shapes before trying to jump into anything more complicated.
It might seem boring and repetitive but it'll be worth it in the end. I can't even count the number of pages of cubes, planes, circles, lines and cylinders I've drawn to get to the drawing level I am at today.
Follow the steps below to construct a perfect circle from a square.

Practice this a few times until you get the hang of it, then try removing some of the guide marks and see how close you can get.
A good tip for getting smoother circles is to hover above the page and practice the circle you're trying to draw then drop your pen to the page when you feel you've got the motion right.
Don't be afraid to draw quickly, speed will help keep your lines smooth. Don't draw so fast that you can't control your motions. Test it out and see what you're comfortable with.
Step 2: Drawing Ellipses
Now that you're mastered the circle let's tilt the square into 2-point perspective, as I explained in the previous drawing Instructable, and use it to derive an ellipse.
It works much the same way as deriving a circle from a square but this time it's tilted back in space.
Your hand motion for creating the ellipse will feel a bit different than the circle.

Now practice this for a few pages. Try eliminating some of the guide marks and see how accurate you can get it.

Practice it more....

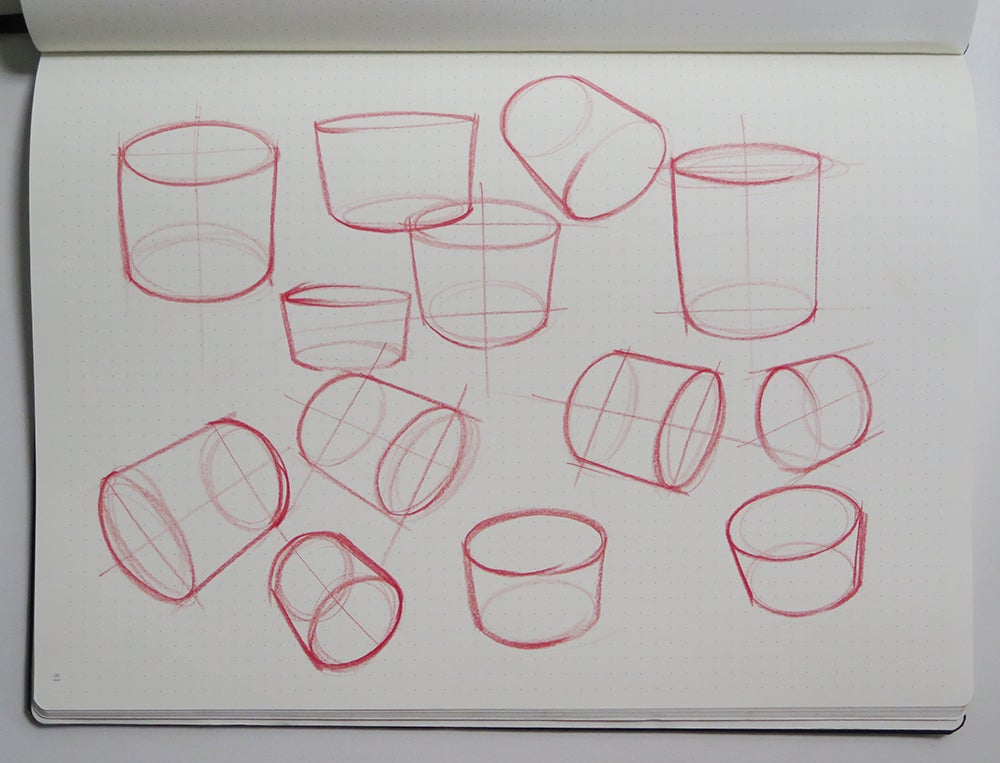
Another quick way to structure and check your ellipses is with a major and minor axis.
draw two perpendicular lines centered in the ellipse. the top bottom and sides of the ellipse should be equidistant on either end from the center for the ellipse to be correct.

Once you've mastered drawing ellipses derived from a plane, try drawing them completely freehand.
It might help to stand up and remember draw from your shoulder!
Step 3: Deriving a Cylinder From a Cube
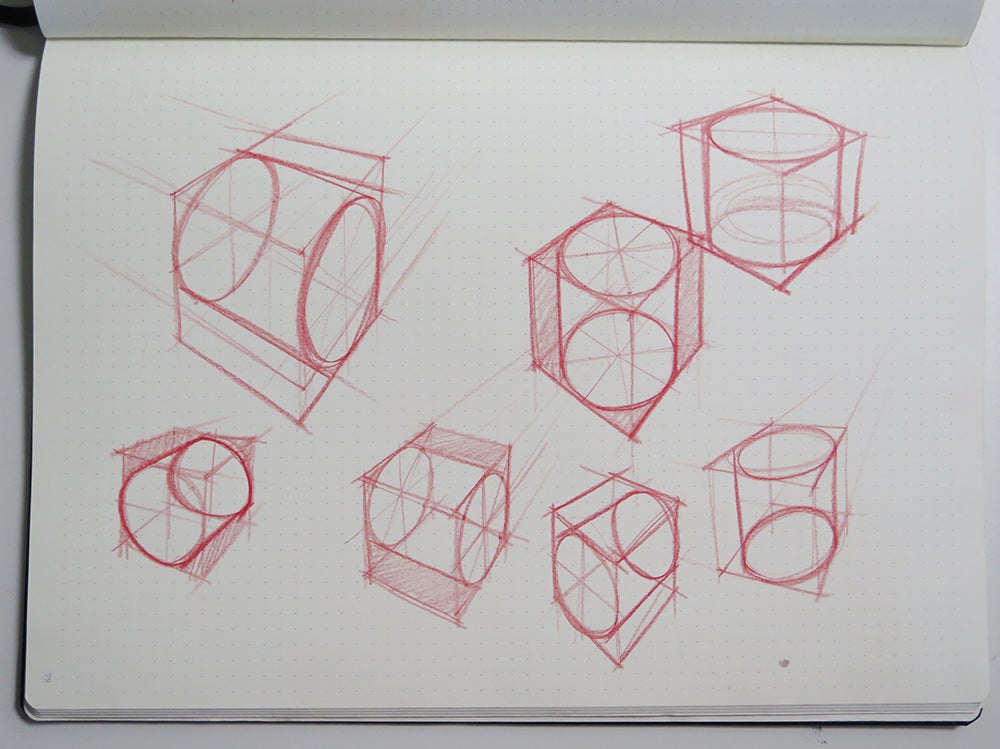
Now let's see what an ellipse looks like derived on a face of a cube.
Start by drawing a cube in 2-point perspective as described in my earlier drawing Instructable.
Then derive an ellipse on one of the faces.
Then do the same on the opposite face and extrude lines to connect the two ellipses.

Practice this on all faces in different orientations.
Remember if you're drawing the cylinder laying on its side the lines connecting its top and bottom should be in perspective (go to a vanishing point)

Try removing guide lines as you go along.
Here's some cylinders drawn using major and minor axis.

You might also want to play around with moving ellipses around in space to get yourself familiar with how they behave.
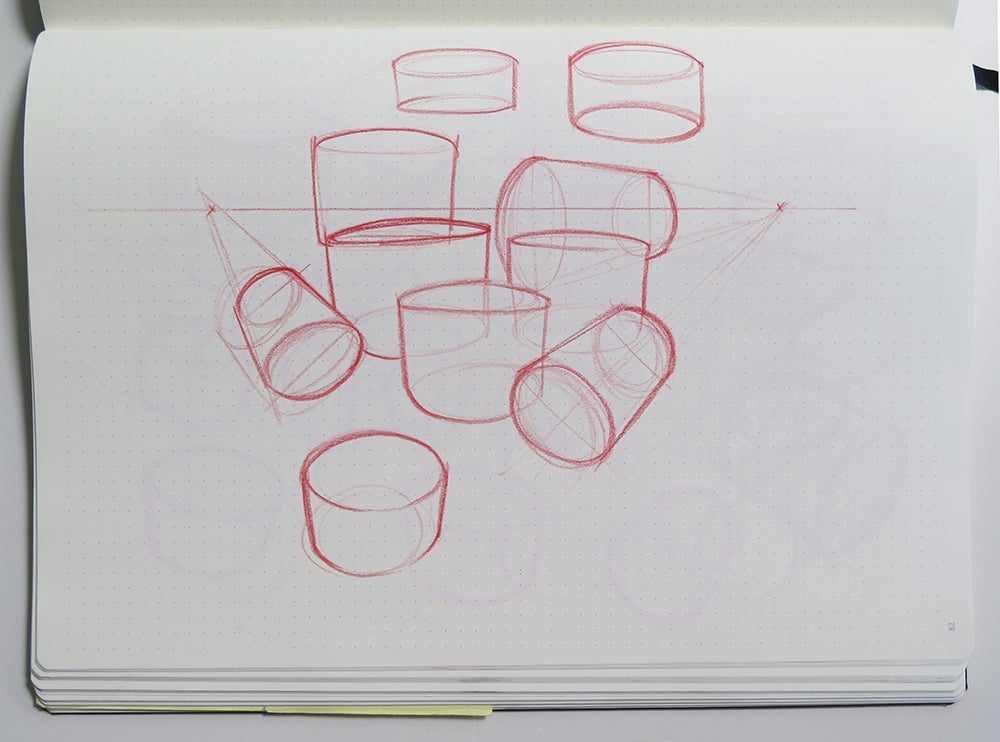
Notice how they become more and more circular the higher or lower they are in relation to the horizon line.

Step 4: Field of Cylinders
Practice drawing a field of cylinders just as I explained in the previous Instructable for cubes.
There's no need to get fancy, focus keeping your perspective as accurate as possible.

Continue practicing drawing cylinders.


