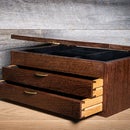
Introduction: How to Finish Reclaimed Wood Like a Pro
Tips and tricks to finish your reclaimed wood projects like a professional
In this build I show you how to quickly up your game, and build better reclaimed wood furniture. With a few simple tools it is easy to go from “standard” to a professional grade finish. I talk about preparation, application, and finishing techniques. Check out the video below!
Featured Tools / Materials
Step 1: Prep the Surface
This stage is where you make your money. You're going to want to remove all of the dirt and grime from the wood. But you do not want to eliminate the saw marks and character. The trick is using the right tool. I recommend the Makita Brush Sander and/or anAngle Grinder with a Wire Wheel.
Step 2: Sanding
After you remove the heavy dust, its time for the finer stuff. Use your random orbit sander to sand the surface to a nice 220 grit finish. You want the surface to be smooth, but do not press too hard and grind into the wood
Step 3: Clean the Surface
Simply blow off or vacuum all the particles you can on the surface for a nice consistent clean area to finish.Spraying Finish
Step 4: Pick Your Finish and Spray Your Work
Final step. Pick the finish of your choosing, and go to work! I like two products. Minwax Poly Acrylic and General Finishes Endurovar . Both have a nice high build and are able to be smoothed out to a high grade professional finish!

Participated in the
Woodworking Contest 2017


