Introduction: How to Finish a Live Edge Slab
How To Finish A Live Edge Slab
Live edge slab furniture is all the rave right now, even though it has been around for a long long time. Finishing it can be a bit trick. I wanted to share some of my tips on how I get it done. I use three simple steps to cruise through my Live Edge Slab Projects Check out the blog article HERE.
Recommended Products for this technique
Step 1: Fill Voids
- Start out by taping off the top of your slab. Yes, the top. I prefer to back fill the voids in order to save time flattening as well as save cost on the amount of epoxy needed to fill the void.
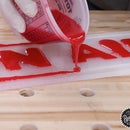
- Mix up a 2 part Slow Setting epoxy. I use West Systems 2 part, I tinted mine for this application with Black Noir . Once tinted You want to pour into the top voids on the bottom of the slab. Slowly allow for the epoxy to seep into the void. Bubbles will rise. Use a MAP Gas or Propane Torch to pop the bubbles.
- Sand the hardened finish with 80 grit. This will show any bubbles on the surface. Use a tinted FAST Setting epoxy to fill these holes.
Step 2: Sanding & Surface Prep
- Once the epoxy is flattened continue with your aggressive sander. I recommend a Festool Rotex 125 or 150 for this application. A belt sander works as well. Sand the whole surface with 80 grit, continuing to 120 on the aggressive setting. Then sand the sap wood (live edge) with a smaller headed sander to bring out the color and remove any bark or dirt.
- Once the surface is prepped to 120 grit with the aggressive sander, Move onto a random orbit finishing sander. Mark the whole surface with a pencil and slowly remove the pencil with 120 grit.
- After Sanding to MAX 120 grit. Remove all the dirt from the surface with a Tack Cloth.
Step 3: Apply Finish
- Once the surface is prepared to 120 grit, you can apply your Monocoat Finish. I have been using this awesome product, Rubio Monocoat. It has saved me tons of time and gives an amazing finish.
- Finish the table in halves. Start on one side, then rub out the finish with a dry cloth. Continue this process over the whole top and apply to the edges with a rag.
Thank you so much for checking out my Finish A Live Edge Slab Tutorial. If you want to check out some more of my furniture project check some of these below!


