Introduction: How to Interact Alexa Dragonboard, Android Application and Coffee Machine


This tutorial provides the necessary steps to connect, integrate and use the Coffee Machine with the Alexa Dragonboard and the Android Application.
For more details about the coffee machine, please check this instructable.
Step 1: Hardware Connection
To make the hardware connection of the coffee machine and to learn the technical info about how the coffee machine works, please read and follow this intructable.
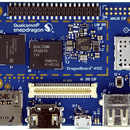
Step 2: Integrating Alexa on Dragonboard


To make the Dragonboard recognize voice commands and provide appropriate voice responses, it's necessary to set up some services that are responsible to run the Alexa on the Dragonboard.
On this instructable you learn the correct way to do it.
Step 3: Android Application

One of the control and monitoring modules of the coffee machine is the Android Application. With it the user can control the power supply of the coffee machine, order a long or short coffee and monitor the levels of the different parameters necessary to make the coffee (coffee level, water level and the cup position). The coffee machine control is done either by voice commands (Speech Recognizing API) and either by the UI Components (switches, buttons and views).
To connect the application with the AWS IOT Server and connect it correctly, please check this instructable.
Step 4: API Gateway
To establish the Client/Server connection from the coffee machine to invoke the Lambda function is necessary to implement an API Gateway. This will provide the status update of the coffee machine.
Now, to create the API Gateway:
- Access your the Console on your AWS Account.
- On the "Services" tab, access the "API Gateway" section.
- Click on "Create API".
- Give it a name, a description, and leave the "Regional" option checked.
- Select "Actions" and create a new resource named "status" with path "/status".
- Create a POST method.
- Select the Lambda function your created on the option "Lambda Function" and click on "Save".
- On the confirmation window, copy the generated address and click on "OK".
To the Lambda recognizes the correct endpoint:
- Access the lambda function on your AWS Account.
- Look for the FunctionName variable on line 332.
- Change it's value to the address copied on the Step 8.
To Dragonboard send the coffee machine status to the correct endpoint:
- Open the "ServiceHTTP.py" file on the Dragonboard.
- Look for the variable API_ENDPOINT (line 6).
- Change it's value to the address copied on the Step 8.
For more information for how to create an API Gateway, please read this doc.
Step 5: Set Lambda Environment Variables
Considering that Lambda Code runs only when needed, to store some values like the Coffee and Water levels of the coffee machine is necessary to create some environment variables.
To learn how to create the environment variables, please check this link.
Now, create the environment variables on the Lambda function you created with the following names:
- coffeelevel
- glassposition
- on_off
- waterlevel
Step 6: Usage
After following correctly the steps above, the coffee machine is ready to be used. There is two forms to control it: directly on the Dragonboard by Audio Input or by the Android Application.
Audio Input: one of the ways to control the coffee machine, is connecting an audio input on Dragonboard. This can be done directly through the Alexa Voice Service, considering the script is running and listening to the your microphone.
First, is necessary to speak the wake up word "Alexa" and then control it through the commands below:
- Ask coffee Machine turn on: turns on the coffee machine
- Ask coffee machine turn off: turns off the coffee machine
- Ask coffee machine make short coffee: the coffee machine start the short coffee making.
- Ask coffee machine make long coffee: the coffee machine start the long coffee making.
The system also provides feedback messages to the commands, confirming the requested action.
Android Application: the Android Application provides two forms of sending the user commands to the coffee machine: voice and UI Components.
- Voice: to enable voice commands it's necessary to click on the app's microphone button and speak the following commands:
- Turn on the coffee machine: turns on the coffee machine
- Turn off the coffee machine: turns off the coffee machine
- Make long coffee: the coffee machine start the short coffee making.
- Make short coffee: the coffee machine start the long coffee making.
- UI Components: controls the coffee machine by the UI Components below:
- On/Off Switch: controls the coffee machine power.
- Make short coffee button: the coffee machine starts the short coffee making.
- Make long coffee button: the coffee machine starts the long coffee making.
- Status text view: displays the status of the connection with coffee machine.
- Coffee level view: displays the coffee level on percentage at the home screen.
- Water level: displays the water level of the coffee machine (full or empty).
- Glass image: displays the status of the glass on the coffee machine (positioned or not positioned).
Step 7: Conclusion
Considering you done all the steps above, now you're able to use the coffee machine. In case of any doubts, please comment below or access the following forums and documentations:


