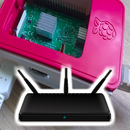
Introduction: How to Make File Server Using Raspberry Pi
Now a days it is common to have multiple computers in one house with music and videos spread between them. Another way to organize your stuff is to keep it on a centralized server aka FILE SERVER.
In this instructables, we will create a file server using raspberry pi.
Let's get started.
Step 1: Video
Have a look at comprehensive video. If you like it, don't forget to subscribe.
Step 2: Components
For this miniProject we will need following components.
- Raspberry pi, preferably raspberry pi 3 for its built in wireless LAN,
- 5V USB power supply,
- microSD card and
- microSD card reader.
You will also need a laptop/desktop to setup raspberry pi.
Step 3: Getting Raspberry Pi Up and Running
First order of business is to get raspberry pi up and running. Following steps guides you to do exactly that.
- Download latest raspbian from raspberrypi.org,
- Insert microSD card in microSD card reader,
- Connect it to your home machine (laptop/desktop) and
- Install and open etcher to burn raspbian on microSD card.
Step 4: Enabling Remote Login to Raspberry Pi
Once raspbain is burnt to microSD card. Copy raspbian root directory address, open terminal on home machine, change directory to copied root directory address. Modify file named interfaces in etc/network directory to look like one shown in attached image. Once done, create an empty file named 'ssh' in raspbian boot directory. Finally takeout microSD card from card reader and insert it in raspberry pi. Following that turn on your raspberry pi.
Once Raspberry pi boots up find IP address of raspberry pi using network scanning application like angryIPScanner. Using obtained IP address you can remote login to raspberry pi with ssh from terminal in linux and software like putty in windows.
Step 5: SAMBA
Once you remote login to raspberry pi create a folder named Share that contains folder named 'Test_folder' in the home directory. We will use 'Test_folder' for file server demo.
Samba is the name of the software that lets you easily share files over network.
On raspberry pi we can install samba with-
sudo apt-get install samba samba-common-bin
Step 6: Configure SAMBA
Once SAMBA is installed we need to edit configuration file so it knows where to look for our 'Test_folder'. Open configuration file with
sudo nano /etc/samba/smb.conf
and to the bottom of this file add following settings.
[Pi share]
comment = Pi shared folder
path = /home/pi/Share
browseable = yes
writeable = Yes
only guest = no
create mask = 0777
directory mask = 0777
public = yes
guest ok = yes
Once done, save and exit.
Following this we need to reset SAMBA password using
sudo smbpasswd -a <username>
Finally restart SAMBA with
sudo /etc/init.d/samba restart
and we are done.
Step 7: Done
Now open up file browser on your home machine. Click on 'connect to server' on side menu and type
smb://<Raspi IP address>
You should see 'Test_folder' appearing.
That's it folks.
Thanks for reading.


