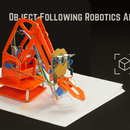
Introduction: How to Make XIAO ESP32S3 Board Based Robotic Arm
Greetings everyone, and welcome to my Instructables tutorial. Today, I'll guide you through creating an XIAO ESP32S3 board-based Robotic Arm.
Project Overview:
In this project, the robotic arm will execute actions corresponding to the commands received from the web server. For example, if the Servo 2 slider moves, the robotic arm will respond by moving to the left, and similarly for movements to the right, up, and down.
I want to thank Seeed Studio for their sponsorship in making this project possible.
Without further ado, let's dive into the project and get started!
Supplies
Below are the components required for making this XIAO ESP32S3 board-based Robotic Arm:
- Seeed Studio XIAO ESP32S3: BUY NOW!
(International: amazon.com)
- SG90 Servo Motor: https://tinyurl.com/3y9x3wsa
- Robotic DIY Arm Kit: https://tinyurl.com/23drbvvy
- PWM/Servo Driver I2C interface PCA9685: https://tinyurl.com/bdfz6bra
(India: quartzcomponents.com)
- SG90 Servo Motor: https://tinyurl.com/e4j2tb8k
- Robotic DIY Arm Kit: https://tinyurl.com/2wsv76z6
- PWM/Servo Driver I2C interface PCA9685: https://tinyurl.com/2zrbewh5
Step 1: Assemble the Robotics Arm Kit:
Watch the attached video for a complete step-by-step assembly of the Robotics Arm Kit.
Step 2: Servo Motors & PWM Servo Motor Driver Wiring:
Refer to the attached image and connect all four servo motor wires to the PWM servo motor driver pins.
| Component | PWM Servo Pin |
|---|---|
| Figure Servo | 0 |
| Right side Servo | 1 |
| Left side Servo | 2 |
| Base Servo | 3 |
Step 3: SEEED Studio & Seeed Fusion Service
SEEED Studio gave me an XIAO ESP32S3 board and a PCB Board to make my circuit easier.
SEEED Studio helps people make their projects. They work with other tech companies and offer many hardware parts that can be used in IoT projects. They can also make custom parts, from one piece to over 10,000 pieces. They are based in Shenzhen, China, but they also have offices in the US and Japan.
Their products, like the PCBs & XIAO ESP32S3 board, are very good and they were delivered very fast. The PCBs were also cheap.
SEEED Fusion is a service that makes and assembles PCBs quickly. They handle everything from making the PCBs, getting the parts, assembling them, and testing them.
After you have a working prototype and people are interested in it, SEEED’s Propagate Service can help you sell your product.
Want more details Check here: https://www.seeedstudio.com/fusion.html
Step 4: XIAO ESP32S3 & PWM Servo Motor Driver Wiring:
The Seeed Studio XIAO Series is a tiny development board with a thumb-sized size and a comparable hardware design.
Check out the well-written wiki provided by Seeed Studio at the link below to learn more about how to use this device.
https://wiki.seeedstudio.com/xiao_esp32s3_getting_started
Refer to the attached image and connect XIAO ESP32S3 to the PWM servo motor driver pins.
XIAO ESP32S3 Pin PWM Servo Motor Driver Pin
- XIAO ESP32S3 D5 PIN PWM servo motor driver SCL PIN
- XIAO ESP32S3 D4 PIN PWM servo motor driver SDA PIN
- XIAO ESP32S3 GND PIN PWM servo motor driver GND PIN
- XIAO ESP32S3 5V PIN PWM servo motor driver VCC PIN
Step 5: Time to Upload the Sketch:
- Now connect the USB cable to the XIAO ESP32S3.
Next, upload the following code:
#include <WiFi.h>
#include <Adafruit_PWMServoDriver.h>
#include <Arduino.h>
#include <Wire.h>

Adafruit_PWMServoDriver PWM = Adafruit_PWMServoDriver();


const int servo1 = 0;
const int servo2 = 1;
const int servo3 = 2;
const int servo4 = 3;

int Servo1Degree = 150;
int Servo2Degree = 150;
int Servo3Degree = 150;
int Servo4Degree = 325;


int S1newPos;
int S2newPos;
int S3newPos;
int S4newPos;

// Variables to store network name and password


const char* ssid = "*********************";  // Enter your network name


const char* password = "**************";  // Enter your network password


// Set the server port number to default 80


WiFiServer server(80);


// Variables to store slider positions


String valueString1 = String(0);


String valueString2 = String(0);


String valueString3 = String(0);


String valueString4 = String(0);


String valueString5 = String(0);


String valueString6 = String(0);


void setup() {


  Serial.begin(115200);  // Define serial communication with baud rate of 115200


  PWM.begin();
  PWM.setPWMFreq(60);
  PWM.setPWM(servo1, 0, Servo1Degree);
  PWM.setPWM(servo2, 0, Servo2Degree);
  PWM.setPWM(servo3, 0, Servo3Degree);
  PWM.setPWM(servo4, 0, Servo4Degree);
  delay(3000);


  Serial.print("Making connection to ");  // Display message on serial monitor


  Serial.println(ssid);


  WiFi.begin(ssid, password);


  while (WiFi.status() != WL_CONNECTED) {


    delay(500);


    Serial.print(".");
  }


  // Print the IP address value on serial monitor


  Serial.println("");


  Serial.println("WiFi connected.");


  Serial.println("IP address: ");


  Serial.println(WiFi.localIP());


  server.begin();  // Start the server
}


void loop() {


  WiFiClient client = server.available();  // Listen for incoming clients


  if (client) {  // If a new client connects


    String header = client.readStringUntil('\r');


    client.println("HTTP/1.1 200 OK");


    client.println("Content-type:text/html");


    client.println("Connection: close");


    client.println();


    // Display the HTML web page


    client.println("<!DOCTYPE html><html>");
    client.println("<head><meta name=\"viewport\" content=\"width=device-width, initial-scale=1\">");
    client.println("<link rel=\"icon\" href=\"data:,\"> ");
    client.println("<style>");
    client.println("body {");
    client.println("text-align: center;");
    client.println("font-family: 'Trebuchet MS', Arial;");
    client.println("margin-left: auto;");
    client.println("margin-right: auto;");
    client.println("}");
    client.println(".header {");
    client.println("background-color: #2196F3;");
    client.println("padding: 20px;");
    client.println("display: flex;");
    client.println("justify-content: space-between;");
    client.println("align-items: center;");
    client.println("}");
    client.println(".header-logo {");
    client.println("width: 100px; /* Adjust the logo size as needed */");
    client.println("}");
    client.println(".social-links {");
    client.println("display: flex;");
    client.println("}");
    client.println(".social-link {");
    client.println("margin-right: 10px;");
    client.println("}");
    client.println(".footer {");
    client.println("background-color: #2196F3;");
    client.println("padding: 20px;");
    client.println("}");
    client.println(".video-embed {");
    client.println("/* Style the video embed as needed */");
    client.println("}");
    client.println(".slider {");
    client.println("width: 300px;");
    client.println("}");
    client.println(".button {");
    client.println("font-size: 24px;");
    client.println("padding: 10px 20px;");
    client.println("}");
    client.println(".youtube-subscribe-button {");
    client.println("max-width: 100%;");
    client.println("}");
    client.println("</style>");
    client.println("<script src=\"https://ajax.googleapis.com/ajax/libs/jquery/3.3.1/jquery.min.js\"></script>");
    client.println("</head><body>");
    client.println("<div class=\"header\">");
    client.println("<img class=\"header-logo\" src=\"https://firebasestorage.googleapis.com/v0/b/watersaver-8062f.appspot.com/o/20231012_192030.png?alt=media&token=7b915a4a-e693-443b-93c9-7b3a849f4fb5\" alt=\"Roboattic Lab\" />");
    client.println("<h1>Roboattic Lab</h1>");
    client.println("<iframe src=\"https://www.youtube.com/subscribe_embed?channel=UCwHfVArICTdpOulpHwv60Lg\" width=\"200\" height=\"60\" style=\"border:none;overflow:hidden\" scrolling=\"no\" frameborder=\"0\" allowTransparency=\"true\" allowfullscreen=\"true\" class=\"youtube-subscribe-button\"></iframe>");
    client.println("</div>");

    // Slider 1


    client.println("<h1>XIAO ESP32S3 Robotic Arm Controller</h1>");


    client.println("<p>Position 1: <span id=\"servoPos1\"></span></p>");


    client.println("<input type=\"range\" min=\"0\" max=\"180\" class=\"slider\" id=\"servoSlider1\" onchange=\"servo(this.value, 1)\" value=\"" + valueString1 + "\"/>");


    client.println("<button class=\"button\" onclick=\"decrementValue(1)\"style=\"font-size: 24px; padding: 10px 20px;\">-</button>");


    client.println("<button class=\"button\" onclick=\"incrementValue(1)\"style=\"font-size: 24px; padding: 10px 20px;\">+</button>");


    // Slider 2


    client.println("<p>Position 2: <span id=\"servoPos2\"></span></p>");


    client.println("<input type=\"range\" min=\"0\" max=\"180\" class=\"slider\" id=\"servoSlider2\" onchange=\"servo(this.value, 2)\" value=\"" + valueString2 + "\"/>");


    client.println("<button class=\"button\" onclick=\"decrementValue(2)\"style=\"font-size: 24px; padding: 10px 20px;\">-</button>");


    client.println("<button class=\"button\" onclick=\"incrementValue(2)\"style=\"font-size: 24px; padding: 10px 20px;\">+</button>");


    // Slider 3


    client.println("<p>Position 3: <span id=\"servoPos3\"></span></p>");


    client.println("<input type=\"range\" min=\"0\" max=\"180\" class=\"slider\" id=\"servoSlider3\" onchange=\"servo(this.value, 3)\" value=\"" + valueString3 + "\"/>");


    client.println("<button class=\"button\" onclick=\"incrementValue(3)\"style=\"font-size: 24px; padding: 10px 20px;\">-</button>");


    client.println("<button class=\"button\" onclick=\"decrementValue(3)\"style=\"font-size: 24px; padding: 10px 20px;\">+</button>");


    // Slider 4


    client.println("<p>Position 4: <span id=\"servoPos4\"></span></p>");


    client.println("<input type=\"range\" min=\"0\" max=\"180\" class=\"slider\" id=\"servoSlider4\" onchange=\"servo(this.value, 4)\" value=\"" + valueString4 + "\"/>");


    client.println("<button class=\"button\" onclick=\"incrementValue(4)\"style=\"font-size: 24px; padding: 10px 20px;\">-</button>");


    client.println("<button class=\"button\" onclick=\"decrementValue(4)\"style=\"font-size: 24px; padding: 10px 20px;\">+</button>");


    client.println("<script>");


    client.println("var slider1 = document.getElementById(\"servoSlider1\");");


    client.println("var servoP1 = document.getElementById(\"servoPos1\");");


    client.println("slider1.oninput = function() { servoP1.innerHTML = this.value; }");


    client.println("var slider2 = document.getElementById(\"servoSlider2\");");


    client.println("var servoP2 = document.getElementById(\"servoPos2\");");


    client.println("slider2.oninput = function() { servoP2.innerHTML = this.value; }");


    client.println("var slider3 = document.getElementById(\"servoSlider3\");");


    client.println("var servoP3 = document.getElementById(\"servoPos3\");");


    client.println("slider3.oninput = function() { servoP3.innerHTML = this.value; }");


    client.println("var slider4 = document.getElementById(\"servoSlider4\");");


    client.println("var servoP4 = document.getElementById(\"servoPos4\");");


    client.println("slider4.oninput = function() { servoP4.innerHTML = this.value; }");


    client.println("$.ajaxSetup({timeout: 1000});");


    client.println("function servo(pos, servoNum) {");


    client.println("$.get(\"/?servo=\" + servoNum + \"&value=\" + pos + \"&\");");


    client.println("}");


    client.println("function incrementValue(servoNum) {");


    client.println("var slider = document.getElementById(\"servoSlider\" + servoNum);");


    client.println("slider.value = parseInt(slider.value) + 5;");


    client.println("servo(slider.value, servoNum);");


    client.println("}");


    client.println("function decrementValue(servoNum) {");


    client.println("var slider = document.getElementById(\"servoSlider\" + servoNum);");


    client.println("slider.value = parseInt(slider.value) - 5;");


    client.println("servo(slider.value, servoNum);");


    client.println("}");


    client.println("</script>");


    client.println("</body></html>");


    if (header.indexOf("GET /?servo=") >= 0) {


      int servoPosition = header.indexOf("servo=") + 6;


      int valuePosition = header.indexOf("&value=");


      int servoNum = header.substring(servoPosition, valuePosition).toInt();


      int value = header.substring(valuePosition + 7).toInt();


      // Set the servo position


      setServoPosition(servoNum, value);
    }


    client.stop();  // Disconnect the client


    Serial.println("Client disconnected.");


    Serial.println("");
  }
}


void setServoPosition(int servoNum, int value) {
  // Declare variables outside the switch statement
  int S1, S2, S3, S4;


  switch (servoNum) {
    case 1:
      // Move Forward:
      Serial.println("Move Forward");
      S1 = value;
      S1 = map(S1, 0, 180, 150, 600);
      S1 = S1 - Servo1Degree;


      for (int a = 0; a <= S1; a++) {
        delay(10);
        Serial.println(a);
        S1newPos = Servo1Degree + a;
        Serial.print("Servo");
        Serial.println(S1newPos);
        PWM.setPWM(servo1, 0, S1newPos);
      }


      for (int b = 0; b >= S1; b--) {
        delay(10);
        Serial.println(b);
        int c = b * -1;
        S1newPos = Servo1Degree - c;
        Serial.print("Servo");
        Serial.println(S1newPos);
        PWM.setPWM(servo1, 0, S1newPos);
      }


      Servo1Degree = Servo1Degree + S1;
      Serial.print("curntPos:");
      Serial.print(Servo1Degree);
      break;


    case 2:
      // Move Forward:
      Serial.println("Move Forward");
      S2 = value;
      S2 = map(S2, 0, 180, 150, 600);
      S2 = S2 - Servo2Degree;


      for (int a = 0; a <= S2; a++) {
        delay(10);
        S2newPos = Servo2Degree + a;
        PWM.setPWM(servo2, 0, S2newPos);
      }


      for (int b = 0; b >= S2; b--) {
        delay(10);
        int c = b * -1;
        S2newPos = Servo2Degree - c;
        PWM.setPWM(servo2, 0, S2newPos);
      }
      Servo2Degree = Servo2Degree + S2;
      break;


    case 3:
      S3 = value;
      S3 = map(S3, 0, 180, 150, 600);
      S3 = S3 - Servo3Degree;


      for (int a = 0; a <= S3; a++) {
        delay(10);
        S3newPos = Servo3Degree + a;
        PWM.setPWM(servo3, 0, S3newPos);
      }


      for (int b = 0; b >= S3; b--) {
        delay(10);
        int c = b * -1;
        S3newPos = Servo3Degree - c;
        PWM.setPWM(servo3, 0, S3newPos);
      }
      Servo3Degree = Servo3Degree + S3;
      break;


    case 4:
      S4 = value;
      S4 = map(S4, 0, 180, 150, 600);
      S4 = S4 - Servo4Degree;


      for (int a = 0; a <= S4; a++) {
        delay(10);
        S4newPos = Servo4Degree + a;
        PWM.setPWM(servo4, 0, S4newPos);
      }


      for (int b = 0; b >= S4; b--) {
        delay(10);
        int c = b * -1;
        S4newPos = Servo4Degree - c;
        PWM.setPWM(servo4, 0, S4newPos);
      }
      Servo4Degree = Servo4Degree + S4;
      break;
  }
}
Step 6: Working Video:
Thank you for your interest in this project. If you have any questions or suggestions for future projects, please leave a comment and I will do my best to assist you.
For business or promotional inquiries, please contact me via email at Email.
I will continue to update this instructable with new information. Don’t forget to follow me for updates on new projects and subscribe to my YouTube channel (YouTube: roboattic Lab) for more content. Thank you for your support.

Participated in the
Robotics Contest


