Introduction: How to Make a CubeSat That Can Measure Temperature

Come with and you'll see a 11x11x11x11 cube of pure imagination, take my hand and you'll see Mars' temperature! (to the tune of Willy Wonka’s “Imagination”)
Today I'll be showing you have to build your very own CubeSat! Me and my partners Alyssa and Hannah designed a 11x11x11x11 cube sat with our goal of our measuring the temperature of Mars!
Step 1: Here Are the Tools and Materials You'll Need
CubeSat
Popsicle sticks: https://www.walmart.com/ip/Kids-Craft-Wooden-Craf...
Duck Tape: https://www.walmart.com/ip/Duck-Tape-Solid-Color-...
Hot glue: https://www.walmart.com/ip/Duck-Tape-Solid-Color-...
Cardboard: https://www.walmart.com/ip/Duck-Tape-Solid-Color-...
Cotton balls: https://www.walmart.com/ip/Duck-Tape-Solid-Color-...
Arduino: https://www.walmart.com/ip/AdTech-Hi-Temp-Mini-Ho...
Bread board: https://www.walmart.com/ip/AdTech-Hi-Temp-Mini-Ho...
Wires: https://www.walmart.com/ip/AdTech-Hi-Temp-Mini-Ho...
220 Resistor: https://www.walmart.com/ip/AdTech-Hi-Temp-Mini-Ho...
LED: https://www.walmart.com/ip/AdTech-Hi-Temp-Mini-Ho...
SD Card: https://www.walmart.com/ip/AdTech-Hi-Temp-Mini-Ho...
Temperature Sensor: https://www.walmart.com/ip/AdTech-Hi-Temp-Mini-Ho...
Step 2: Instructions


First things first let's start with the the arduino for the CubeSat!
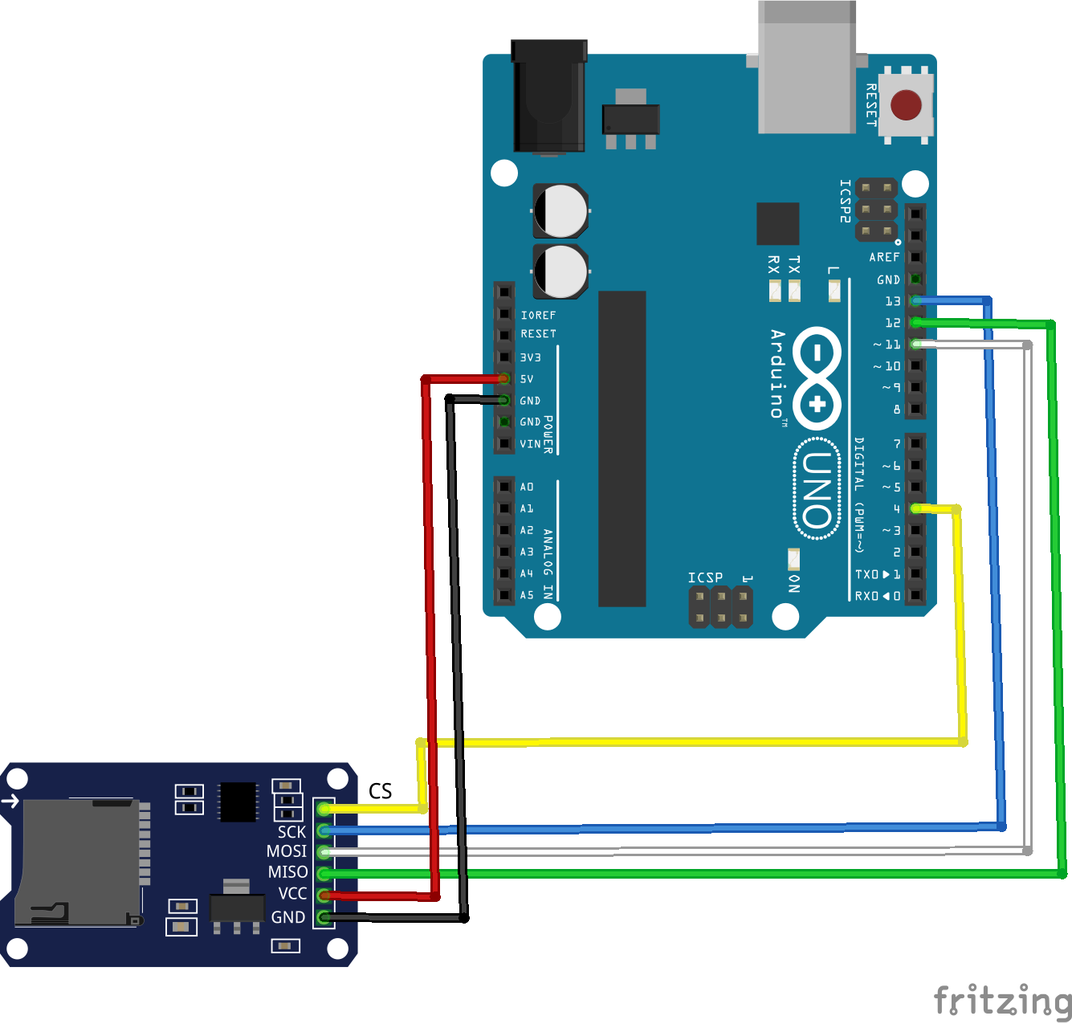
1.The first step to programming your Arduino is hooking up the temperature sensor. (refer to picture above)
2. (for the sake of the SD card later, replace 5V with 3.3V)
3. Next, you’ll go to this website: https://arduinomodules.info/ky-028-digital-temper... And copy the code listed.
4. There are no extra libraries required to verify the code, so you should be able to transfer the code right away.
5. After transferring the code to your arduino, you need to open the Serial Monitor to see the numbers your temperature sensor is picking up. **This number is NOT an actual temperature**
6. Once you've ensured your sensor is running fine, record the number that you see and match it with the temperature of the room.
7. Next up is coding the SD Card (follow the picture above to hook it up). the changes to your code are highlighted in the pictures above.
8. After you've made the changes, make sure the LED lights up when you transfer your code. Plug in a battery to your arduino and remove it from the computer and you should be set!
Then we’ll move on the the actual structure of the CubeSat!
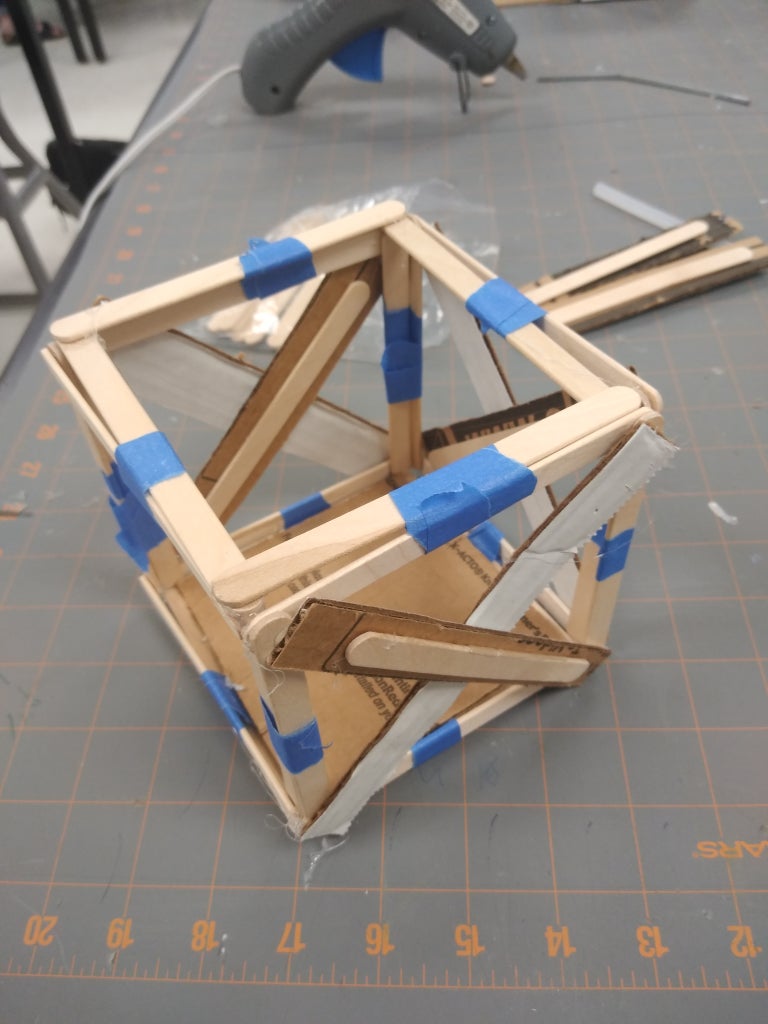
1. Using around 34 popsicle sticks hot glue 4 at a time to make a square (there should be some popsicle sticks left)
2. After Creating 6 squares, hot glue all the sides together to make a box
3. Then cut out a (11inX11in) piece of cardboard to make the base of our CubeSat
4. Using the remainder of our popsicle sticks and 4 (1inX4in) pieces of cardboard create 5 X’s for the walls of our CubeSat
5. Hot glue 4 of the X’s to the respective walls of our cube (leave the top that is opposite of our cardboard base open)
6. The remaining X will remain as our lid so the arduino can be taken in and out of its structure, simply duck tape the remaining X to remaining side when arduino is secured
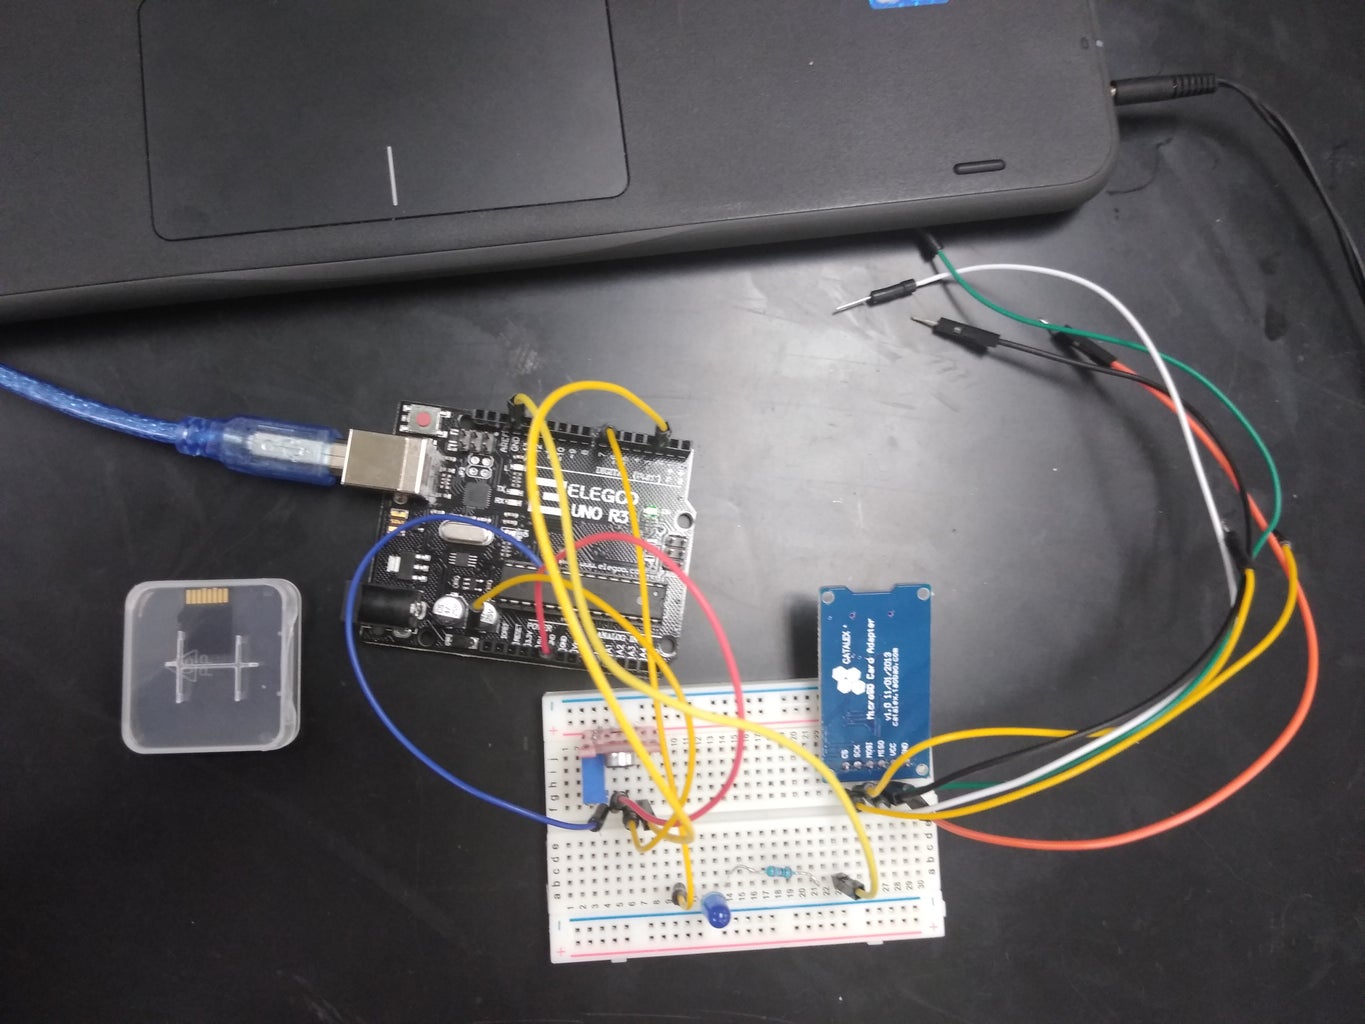
7. Then to keep the arduino stable, sandwich together the motherboard and the breadboard together using a rubber band (also do the same thing with battery as well)
8. Then put a piece of duct tape, on the bottom of the long side of the arduino
9. Put into the secured arduino on to the base of the structure and surrounded the side where the temperature sensor is not with cotton balls for protection
10 . Duck Tape the remaining X to the last open part of the structure to complete your CubeSat!
Step 3: Results and Lessons Learned

The data you'll be collecting should look like the graph above and like I stated before the numbers you see are not your actual temperatures (you'll need to covert them by adding 100 to get you actual temperature). Our CubeSat for example spun near a heater for 38 seconds and the results rose from 240 up to 340 the temperature, however, rose from 75.5 degrees to 175.5.
Some problems you might face while building your arduino is If your LED doesn't light up after coding your SD Card. Make sure to double check code changes and that your LED is placed correctly. If your LED is still not working replace your LED.
When building the actual structure of the CubeSat some difficulties you might face are troubles of securing the arduino inside of the structure. Take precautions to make sure your wires are still in place and try to maneuver it in way were parts of the arduino aren't sticking out of the holes. Duck tape, rubber bands and the cotton balls are your best friend in this situation and depending on you arduino and your structure you might need use less more of the other. Also remain cautions while using the hot glue as you don't want to cause any accidental burns.
Some physics applied while creating this project are circular motion and researching arduino analytics


