Introduction: How to Make a Machette or Corn Knife Handle
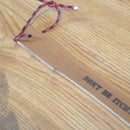
As you can see, this corn knife handle has seen better days. It was missing one of the rivets and was wrapped in electrical tape to hold it together. The handle being in such poor shape made it a dangerous tool to use. It was definitely way past time to replace the handle.
This is my first Instructable so I hope I do it right and that you all like it.
Step 1: Lessons From My Grandpa
My family grows many of our own vegetables. This year while helping to cut a large field of corn, I noticed that the corn knife handles where in terrible condition. The wood in the handles was dry and cracked and the handles were being held together with electrical tape. I could just see one of these flying apart and someone getting hurt by a large blade flying through the air. So, I decided it was time to fix the corn knives.
My grandpa taught me how to repair tool handles when I was just a boy. He taught me the value in making do with what you have and not being wasteful. I learned how, by using tools such as a draw knife, rasps and saws, to make a lot of different tool handles. On the farm, whenever a tool handle broke, Grandpa would always have a stash of ash tree limbs ready to be made into new handles. He would have me get busy making a new handle. I have built shovel handles, axe handles, knife handles and many others over the years. I am thankful to have my grandpa's lessons and now hope to pass them on to others.
Step 2: Trace Out Your Handle Shape
The first step is to trace out your handle shape on a piece of stock. The handle needs to be about 1" thick and a very durable wood. Acceptable woods to use would be ash, hickory, or oak. I had some scraps of ash that were 1" thick in my wood bin that worked perfectly. An alternative source of wood for your handles could be a reclaimed pallet containing any of the above woods. Just remove the thick boards from the pallet and plane or re-saw to 1" thick.
Just lay the old handle on the block of wood and carefully trace around the handle with a pencil.
Step 3: Cut the Handle Shape
Now you need to cut out the rough shape of the knife handle. I used my band saw, cutting just outside the pencil lines to allow for later refinement of the shape. If you don't have a band saw, you could cut the shape out with a jig saw, scroll saw, or a coping saw. Just use whatever you have available.
Step 4: Refine the Shape Round Over the Edges and Smooth
A tool handle needs to be comfortable in your hand. Take some time with this part testing the handle in your hand to make sure it feels right. The more comfortable the handle is in your hand, the longer you will be able to work without getting too tired.
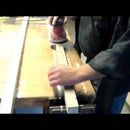
I refined the shape of the handle using a four-in-hand rasp until the contour felt just right. Then I sanded the edges smooth on my belt sander. After that, I used my router and a round over bit to ease the edges and make a nice round over.
Now just smooth everything out with some 100 grit, then 150 grit sandpaper.
Step 5: Prepare the Handle to Insert the Knife
The handle must be secured to the knife nice and tight. To accomplish this you need to mark the edge of the handle to cut a kerf for the knife's tang. The tang is the part of the knife that is not sharpened and is inserted into the handle.
So the knife is nicely balanced, the tang needs to go right in the center of the handle. Using my tri-square, I marked the handle with a pencil at 1/2". Then I carefully cut the kerf for the tang on my band saw. If you don't have a band saw you could also cut the kerf with a coping saw, back saw or a hand saw.
I cut the kerf to be just shy of the thickness of the knife tang so it would fit nice and tight. I tested the kerf by inserting the knife into the handle; it required a few mild blows with a rubber mallet. Just what I was looking for.
Step 6: Drill Holes for the Rivets
Now you need a way to secure the handle to the knife. This is accomplished by installing rivets through the handle and tang. All you need to do is line up the knife where you want it to be in the handle and mark the holes in the knife's tang. Now just drill the holes with a drill press or hand held drill.
Step 7: Add Any Details and Final Sanding
I wanted to make this handle a bit more special so I decided to add my last name engraved into the handle. Using my Epilog Laser Engraver, I created a file to engrave my name into the handle. I am lucky to have a laser engraver at my disposal because engraving is what I do professionally.
I know not everyone has a laser engraver so be creative with your handle. You could sketch a design or your name onto the handle with a pencil and then use a wood burner, paint a design or even maybe use carving knives to make your handle unique. Use what tools you have and your imagination.
And finally, the all important step of finish sanding the handle. Take some time with this. All you need is a piece of 150 grit or 200 grit sandpaper and your two hands. Smooth everything up really nice and make sure the handle feels good in your hand.
Step 8: Assemble and Finish
All that is left to do now is assemble the handle and knife. I put the tang in the handle and got the holes lined up. Pushed nails through and peened them with a ballpeen hammer. I used nails because I did not have any brass rod the correct diameter to make rivets. The nails didn't work as well as brass would so next time I will use brass.
To finish it all off, I applied several coats of Tung oil to the handle. Let the Tung oil dry between coats.
I have three more knife handles to make and I already have some cool ideas to make them even better. For now, back to work making handles.


