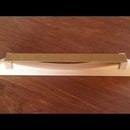
Introduction: How to Make a Simple Marking Gauge
A marking gauge is a tool used to layout joinery in woodworking, or to establish a cut line. My version is based on the English pattern. The gauge consists of a beam and a fence, which is locked in place with a wedge. There are many variations of this tool, and this one would be referred to as a "cutting gauge". I've used a sharpened nail instead of a pin or pencil.
I made it from a length of "square dowel" that can be found with the round dowels at any of the big box home centers. The stock I used comes in pine or poplar, in varying lengths, and measures 1/2" x 1/2". The ones I bought were 36" long. They cost less than $2 apiece.
You'll need approximately 11 3/4" of stock to make one of these gauges, so three of them can be made from a 36" length. It's good to have a couple of them on hand so that you don't have to keep changing settings in the middle of a project.
Embedded videos don't always work on mobile devices, so use this link if you can't play it.
For this project you will need:
- 1/2" x 1/2" x at least 12" pine or poplar (unless you mill the stock yourself, and then it can be made of whatever you like)
- Cut tacks #12 x 11/16"
- Drill with 1/16" bit
- Hammer
- Clamps / rubber bands / masking tape
- Sandpaper
- Glue
- Finish (of your choice)
Step 1: Cut Out the Wedge
The wedge is 1 1/2" long overall. The lip is 3/16" wide and 5/16" tall, and the angle goes from 3/16" to 5/16". I used a Japanese pull saw to make the angled rip cut down to the lip. After you cut the wedge free from the stock, trim the lip down with a knife or chisel. Obviously, a bandsaw or scrollsaw makes quick work of this part of the project.
Step 2: Cut the Beam and Fence Pieces
Cut two pieces at 2", one at 3/4" and one at 5". You'll get the length for the angled piece in the next step.
Step 3: Cut the Angled Fence Piece
Lay the wedge across the end of the stock and mark the angle, then make the cut. Put the pieces together as shown in the picture, making sure that the lip of the wedge is up close to the fence. The reason for this is that when you've sanded it all at the end, the whole assembly will loosen up. The wedge wants to tighten up at about half its length in regular use. If you sand it too much, the wedge may become too loose to work well. Lay one of the 2" pieces across to determine the length for the last cut.
Step 4: Glue Up the Fence Assembly
It's important to get the orientation of the angled piece right. The angle is barely noticeable, and it's easy to get this piece turned wrong when you're gluing the fence assembly together. I drew an arrow lightly with a pencil, pointing to where the lip on the wedge would be.
I used a spring clamps, but you could use rubber bands or even masking tape to hold the assembly until it dries.
Step 5: Drill the Pilot and Drive the Nail
These cut tacks are perfect for the cutter. They are just the right length and are hard enough to hold a good edge. I used a 1/16" bit to drill the pilot. A bigger hole might cause the nail to loosen up eventually. You might get away without this hole if you use pine, but poplar will split for sure. It's best to play it safe.
Step 6: File the Point
I used 220 grit sandpaper to shape the tip and 400 to polish it. You could also use a file.
Step 7: Sand and Finish
Sand all surfaces and finish with oil, wax or whatever you please.


