Introduction: How to Store Floats,integer,text and Struct Types Persistently in Arduino Internal EEPROM Memory
Here we will learn
How to store various datatypes like Chars, Integers, Floats, Strings and structs inside the internal EEPROM of Arduino Board for persistent long term storage.
Please note that EEPROM is ideal for storing values that do not change often like calibration values or Serial Numbers.
The Code is written in Arduino C and is available on GitHub
Supplies
- Download the Source Codes for Arduino EEPROM Read and Write
- Original Article for Arduino EEPROM Programming
Hardware requirements
- Any Arduino Board (UNO or Mega)
- Arduino IDE
Here we are using the internal eeprom of Arduino
Step 1: Logical Structure of Arduino Internal EEPROM
Here we will be using Arduino UNO which is the most common variant available on the Market.The code will work on other models like Arduino Mega.
The ATmega328P on Arduino UNO has 1024 bytes of internal EEPROM, which means that we can store 1024 eight bit data on it .
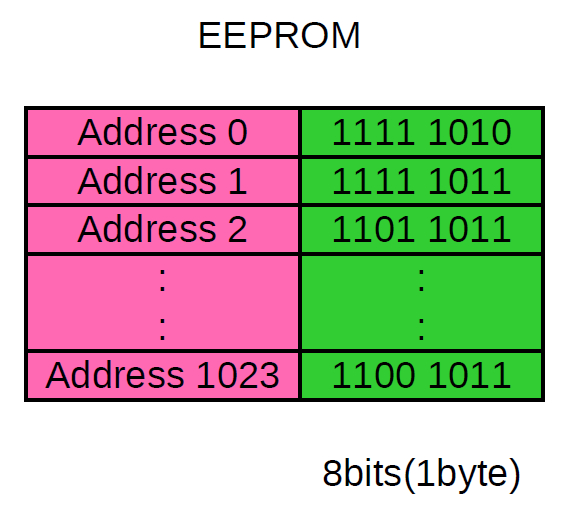
Logical structure of the EEPROM is shown below.

There are 1024 memory cells (Green Cells) and each can store a byte
We can access the specific memory location using addresses which are numbered from 0 to1023.
Each memory location can store a decimal number from 0 - 255 or a ASCII character
Step 2: Finding Out the Size of Internal EEPROM Memory of Arduino
To access the EEPROM functions you have to call the EEPROM library from your Arduino IDE as shown below.
#include <EEPROM.h> // Library for accessing internal EEPROM
void setup() {}
void loop(){}
EEPROM.length() function is used to find out the size of the internal eeprom of Arduino.
It returns an int value.
The below code shows how to use it
#include <EEPROM.h> // Library for accessing internal EEPROM
void setup()
{
   Serial.begin(9600); //to send data to serial monitor

   unsigned int EEPROM_len = 0;

   EEPROM_len = EEPROM.length(); //Get the total number of bytes on the eeprom

   Serial.print(EEPROM_len);
}
On Arduino UNO it will return 1024 while Arduino Mega will return 4096.
Size of the EEPROM is then printed on the Serial Monitor as shown below.

Step 3: Storing a Byte (Character) to the Arduino Internal EEPROM
EEPROM.write() function is used to write a byte to a specific memory location.
EEPROM.write(EEPROM_location_address,value_to_write);
The value has to be a byte so numbers from 0-255 or 8bit ASCII characters.
Write() function takes around 3.3ms to complete which the user should be aware.
EEPROM.read() function is used to read back the value from a specified memory location.
Syntax below
int returned_value ;
returned_value =  EEPROM.read(address_location_to_read);
The below Partial code uses the above functions to read and write 25 to a specified memory location 0
  int EEPROM_location_address = 0;
  int value_to_write = 25;
  int value;
  EEPROM.write(EEPROM_location_address,value_to_write);
  value = EEPROM.read(EEPROM_location_address);
  Serial.print("EEPROM location = "); Serial.print(EEPROM_location_address); Serial.print(" Data = "); Serial.print(value);
Use the full code from our GitHub repo
The output is shown below.

Step 4: Reading and Writing a Float Value to Arduino EEPROM
Here we will write float value with decimal points to a specific memory location on the Arduino EEPROM and then readit back.
Arduino library provides 2 functions that would let you read and write datatypes that are larger than a byte to the EEPROM.
The two functions are
- EEPROM.put()
- EEPROM.get()
The syntax of the EEPROM.put() is shown below
EEPROM.put(EEPROM_address_to_write, variable_name); // write the float value to EEPROM
It takes two arguments,
the starting address at which the variable (EEPROM_address) is stored and the name of the variable (variable_name).
To read the float value from the Arduino EEPROM EEPROM.get() function is used which returns a multibyte value.
Syntax is shown below
returned_value = EEPROM.get(EEPROM_address_to_read, variable_name);//read from EEPR
The below code shows how to store a float value to the Arduino EEPROM. Please use the full code from Github (link above)
#include <EEPROM.h> // Library for accessing internal EEPROM
void setup()
{
    Serial.begin(9600); //to send data to serial monitor
    float float_value_1 = 24.56;  // float value to write to EEPROM (2 bytes)
    float read_value = 0.0;

    int EEPROM_address_1 = 4;     // Address of the location

   EEPROM.put(EEPROM_address_1, float_value_1); // write the float value to EEPROM

   read_value = EEPROM.get(EEPROM_address_1, float_value_1); //retrieve the value EEPROM

   Serial.print("Float Value    - ");Serial.print(float_value_1);
   Serial.print(" Stored at addr ");Serial.println(EEPROM_address_1);
   Serial.print("Data read Back - ");
   Serial.println((read_value));
}
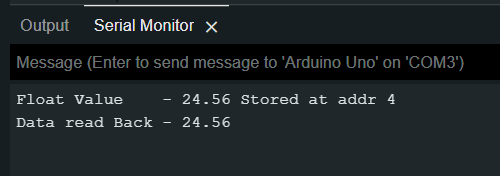
The output of the code

For storing multiple floats or doubles on the Arduino EEPROM Check this
Step 5: Storing a Struct Datatype on Arduino Internal EEPROM

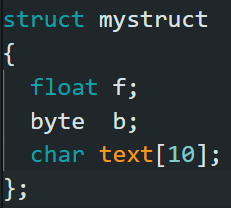
Here we will learn how to store a struct variable of the type shown above to the EEPROM of a Arduino UNO.
First thing is to create a struct
struct mystruct
{
 float f;        //float variables
 byte  b;         // 8-bit unsigned number, from 0 to 255
 char text[10];
};
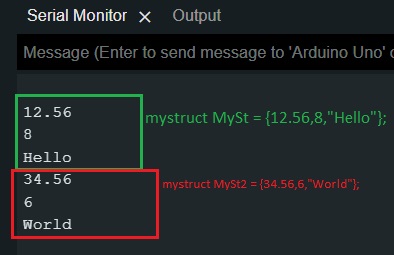
Then declare two variables of the type struct and populate the individual members as shown below.
mystruct MySt = {12.56,8,"Hello"};
mystruct MySt2 = {34.56,6,"World"};
You can then find out the starting address at which to store the two structs.
int EEPROM_address  = 0;//
int EEPROM_address2 = sizeof(MySt);
after which write the data using EEPROM.put()
EEPROM.put(EEPROM_address, MySt);//store the structure MySt
EEPROM.put(EEPROM_address2, MySt2);//store the structure MySt2
The data can be read out using EEPROM.get()
 EEPROM.get(EEPROM_address, MySt);
 EEPROM.get(EEPROM_address2, MySt2);
Output of the program


