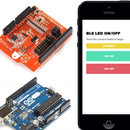
Introduction: How to Connect Your Arduino WiFi Shield to a Custom IOS/Android Application Developed in HTML5/JavaScript.
This instructable shows you how to build a mobile application that communicates with your WiFi shield, in this particular example we will create an application that can turn a LED on/off connected to your Arduino. The mobile application will be developed using nothing but web technologies, this is possible using the popular framework Cordova and fast turn-around using Evothings Studio, both open sourced under the Apache license. The framework supports cross platform development, meaning that the application that you create will function both on iOS and Android. You won't need xCode or Android SDK to do this instructable, only later if you want to publish your app on iTunes or Google Play. Lets get started!
In order to build this instructable you need a smartphone (iOS or Android), a computer and the following hardware:
- 1 x Arduino Uno
- 1 x Arduino WiFi Shield
- 1 x LED
- 1 x 220 ohm resistor
- Breadboard
- Jumper cables
Step 1: Prepare Your Hardware
Attach your Arduino WiFi-shield to your Arduino Uno (or similar) board and connect the LED and resistor in series according to the following fritzing sketch [fritzing.org/]. In this instructable you connect the LED to digital pin 2, but you can of course change that to whatever fits your purposes. Avoid pins 0 and 1 though, as they're also used in conversation between the computer and Arduino during when sketches are uploaded.
Step 2: Compile and Upload the Arduino Sketch.
Open the attached sketch in your Arduino environment and compile and upload to the board. In order to get your WiFi board to connect to your network you need to change the network's ssid and pass variable to match the settings of your WiFi. If you have an open wifi, you can leave the password field empty.
When you have succeeded to upload the compiled sketch to the board, open a serial console (CNTRL-M or CMD-M on mac) and verify that the board indeed does connect to your WiFi. If everything is good it should look like this. Take note of the IP Address, since you need that later on in order to connect your application to the board.
Attachments
Step 3: Prepare the Mobile Application Development Environment
In this instructable you will use Evothings Studio to run the application. Evothings provides Cordova developers with a development environment that simplifies the development process. In order to run the mobile application you install Evothings Workbench (which is a node.js application also written in JavaScript) on your computer and Evothings client on your smartphone from one of the appstores. You can find detailed instructions on how to do that here.
Ensure that your computer, smartphone and Arduino WiFi shield are connected to the same network, so that they can find one another.
Step 4: Connect Client to the Workbench
Run the workbench on your computer and then start the client on your smartphone. Press the Scan for workbench button in the client. If everything works out as it is supposed to, you'll get a list of available workbenches. Click on one of them to connect to your computer. If there list shows up empty, you can try to connect direct to the IP Address of your computer. If that does not work either your network might have enabled a security feature called "Access Point isolation" or "client isolation", where computer on the same network aren't supposed to find one another, only the world outside. In order to run Evothings you have to disable client isolation, or start another access point invoked from your phone or computer instead.
Step 5: Run the Mobile Application
Now it is time for you to extract the attached mobile application on your computer. Locate the index.html and drag and release that file into the examples window. Then click the Run button on the example. Now the application loads directly on your mobile application.
Attachments
Step 6: Connect to the Arduino Board
Input the IP Address you previously wrote down to the field titled Enter IP-address and press the Connect button. When your are connected to the board press either the LED ON or LED OFF button to set pin 2 high or low, which turns the LED on respectively off. Easy as pie.
Step 7: Start Tinkering!
You can use this instructable as a starting point for your own project, it should be simple to expand on it to fit your needs. If you modify any code of the mobile application you will notice that the application is automatically updated on the smart phone, just by saving the file. This is a neat feature that the Evothings Studio adds to the development process, less mouse clicks and more fun.


