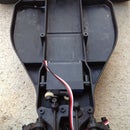
Introduction: How to Install Electronics in a Offroad RC Car
So, there are many ways to get a RC car without electronics like used, or buying one without, etc. I will show you how to install electronics in a rc car. The exact model I am using is a Team Associated RC10B4.1 Electric Model, but the installation will be next to the same on most rc buggies.
Step 1: What You Will Need
You will need:
A assortment of small hex drivers.
RC car preinstalled with servo
motor
speed controller prefitted with plugs
battery
RC controller
radio transmitter
A assortment of small hex drivers.
RC car preinstalled with servo
motor
speed controller prefitted with plugs
battery
RC controller
radio transmitter
Step 2: Motor Installation
1. Remove the blue screw in picture 1.
2. Remove the tire in picture 2.
3. Remove the second screw in picture 3.
4. Slide the motor into the motor holder, like in picture 4.
5. Align the motor in the motor holder until the screw hole appears like shown in picture 5.
6. Add the first screw into the hole like shown in picture 6.
7. Rotate the motor until the pinion is aligned with the spur like in picture 7.
8. Now add the second screw while making sure the pinion doesn't fully touch the spur.
9. Re-install the motor cap.
10. Re-install the wheel.
Step 3: Install the Speed Controller
1. Put the esc (electric speed control) in the place that you would like to install it.
2. Thread the radio transmitter cables to the place where you will put the radio transmitter like in picture 2.
3. Connect the esc and motor wires the order your manual states, in my case, I could put it in any order.
2. Thread the radio transmitter cables to the place where you will put the radio transmitter like in picture 2.
3. Connect the esc and motor wires the order your manual states, in my case, I could put it in any order.
Step 4: Install the Radio Transmitter
Follow the pictures in this step, as it is hard to explain.
Step 5: Add and Mount the Battery
Use the mounting system built into your car and mount your battery into place.
Step 6: Your Done
Your Done! Now take a good look at what you accomplished!
Step 7: Turn It On!
Now turn it on! Remember to always turn on the controller before you turn on your car!

Participated in the
Remote Control Challenge


