Introduction: How to Make & View 3D Stereograms With Your IPhone
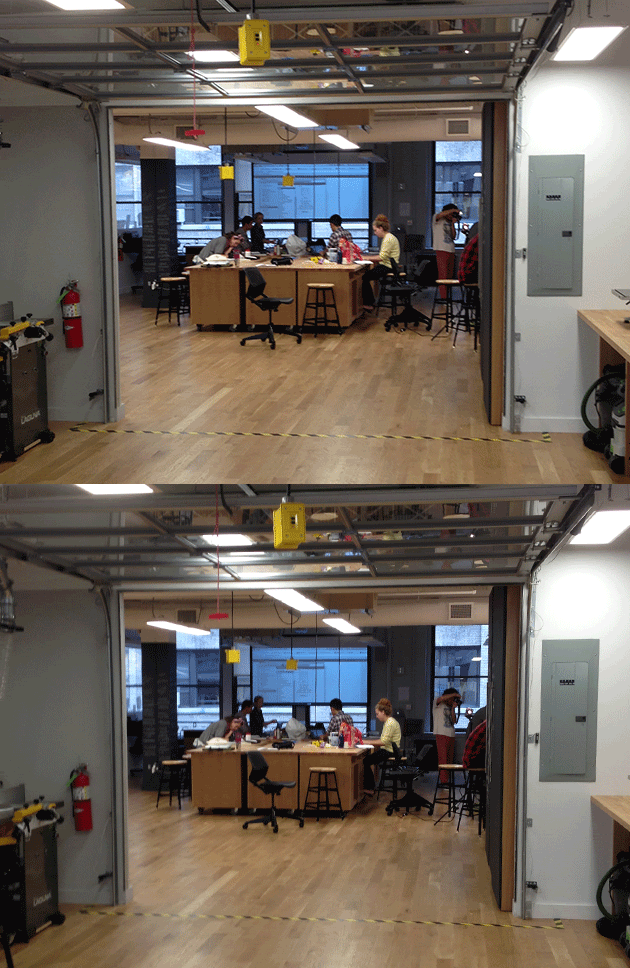
A Stereogram is an image that can be perceived with depth perception via one of several viewing techniques. This is the basis of 3D imaging and is in essence assisting one eye to see one image and the other to see a slightly different image. The above gif is a wiggle Stereogram which can simulate the effect but is done with a different technique see here.
Naked-eye Stereogram viewing can be a lot of fun and is made much easier to learn with this viewing assistant. After a bit of practice you might be able to view the 3D image without the viewer at all by using the same cross-eyed to uncross-eyed technique explained in this tutorial.
This is a very easy 2 part tutorial to create a stereogram
Part 1 Take images for stereogram.
Part 2 Make Stereogram Viewer.
For Part 1 you will need:
1. app for iPhone: Pic Stitch
For Part 2 you will need:
1. corrugated cardboard
2. pencil
3. craft knife or X acto knife
Step 1: Part 1. Taking the Images
Choose a space or subject to photograph. For best results the space or object should have some layers of depth to it, some examples of subjects that work well are long corridors & hall ways, city streets, and living rooms. Ideally the subject should not closer to the camera than 3 feet and should be not moving. For examples of some stereograms visit here.
Using the camera on your iPhone take a photo then quickly but carefully move the camera 6 inches to the right and take a second photo.
Using the camera on your iPhone take a photo then quickly but carefully move the camera 6 inches to the right and take a second photo.
Step 2: Part 1. Downloading and Using Pic Stich
Download Pic Stitch and open.
Choose the layout in the very center, two portrait orientated, equal-sized rectangles.
Double tap the left rectangle and locate & select the 1st image you took for the Stereogram.
Double tap the right rectangle and locate & select the 2nd image you took for the Stereogram.
Export to photo albums.
Open Photos app and open the image you just saved.
Step 3: Part 2. Cut Out the Slot for the Iphone.
Cut your piece of corrugated cardboard into a rectangle 12 x 4 in.
Place your iPhone in the center of the cardboard and draw two lines that follow the sides of the iPhone and extend to the edge of the cardboard.
Hold the iPhone on its side and draw a line on either side of it 1 inch from the end of the card
Use the craft / X acto knife to carefully cut out the resulting rectangle. Make sure that you cut on the inside of the drawn lines as you want the slot to be very snug so your iPhone won't slip.
Step 4: Part 2. Finishing the Stereogram Viewer
Draw and cut out a nose hole at the opposite end of the cardboard from the iPhone slot.
On the iPhone open the "stereogram" image in your Photos app and change the viewing orientation to landscape.
Push the iPhone through the cardboard slot to its midpoint (i.e half the iPhone is on the left side and the other half on the right side.
(The phone should not feel like it is going to fall out of the slot, if it feels losse then start again and cut the slot smaller. I will take no responsibility for phones falling out of the slot)
Step 5: Viewing the Stereogram
The technique to view the Stereogram in 3D is called Parallel Viewing and is basically tricking your eyes to think you are staring into the horizon but focusing on something close up.
Hold the Stereogram Viewer up to your face so your nose fits into the nose hole.
Go cross-eyed then slowly uncross-eyed. You should see two images. Find a reference point in each image, something small that stands out, such as the yellow extension boxes in the example. Continue to go cross-eyed then slowly uncross-eyed until you can bring the two reference point objects together so that they overlap. As soon as they overlap and the two images turn into one and you are seeing in 3D!


