Introduction: Inside-Outside Vase


More by the author:


About: I've built houses, decks, custom cabinets, furniture of all types. Ive done furniture repair and restoration, residential and commercial remodels, restaurant seating and tables and hotel furniture. Ive been a …
Inside-Outside turning is a process in which 2 or more blocks of wood are glued together with craft paper (or newspaper) between each joint so that you can split them apart easily. Then once they are glued, the piece gets turned to a specific shape, sanded and finished. Then the glued up blank is split apart with a chisel and each block is turned 180 deg and permanently glued without the craft paper, re-mounted on the lathe and finish turned.
Follow along and I'll show you how I made this inside-outside vase with maple on my lathe.
Follow along and I'll show you how I made this inside-outside vase with maple on my lathe.
Step 1: Gather Your Materials

I found a nice long stick of maple. I cut 4 blanks 1"x1"x9". These need to be square on all four edges. This required me to cut all sides of the blocks on the table-saw to ensure square.
Moving on...
Moving on...
Step 2: Glue and Clamp the Blank


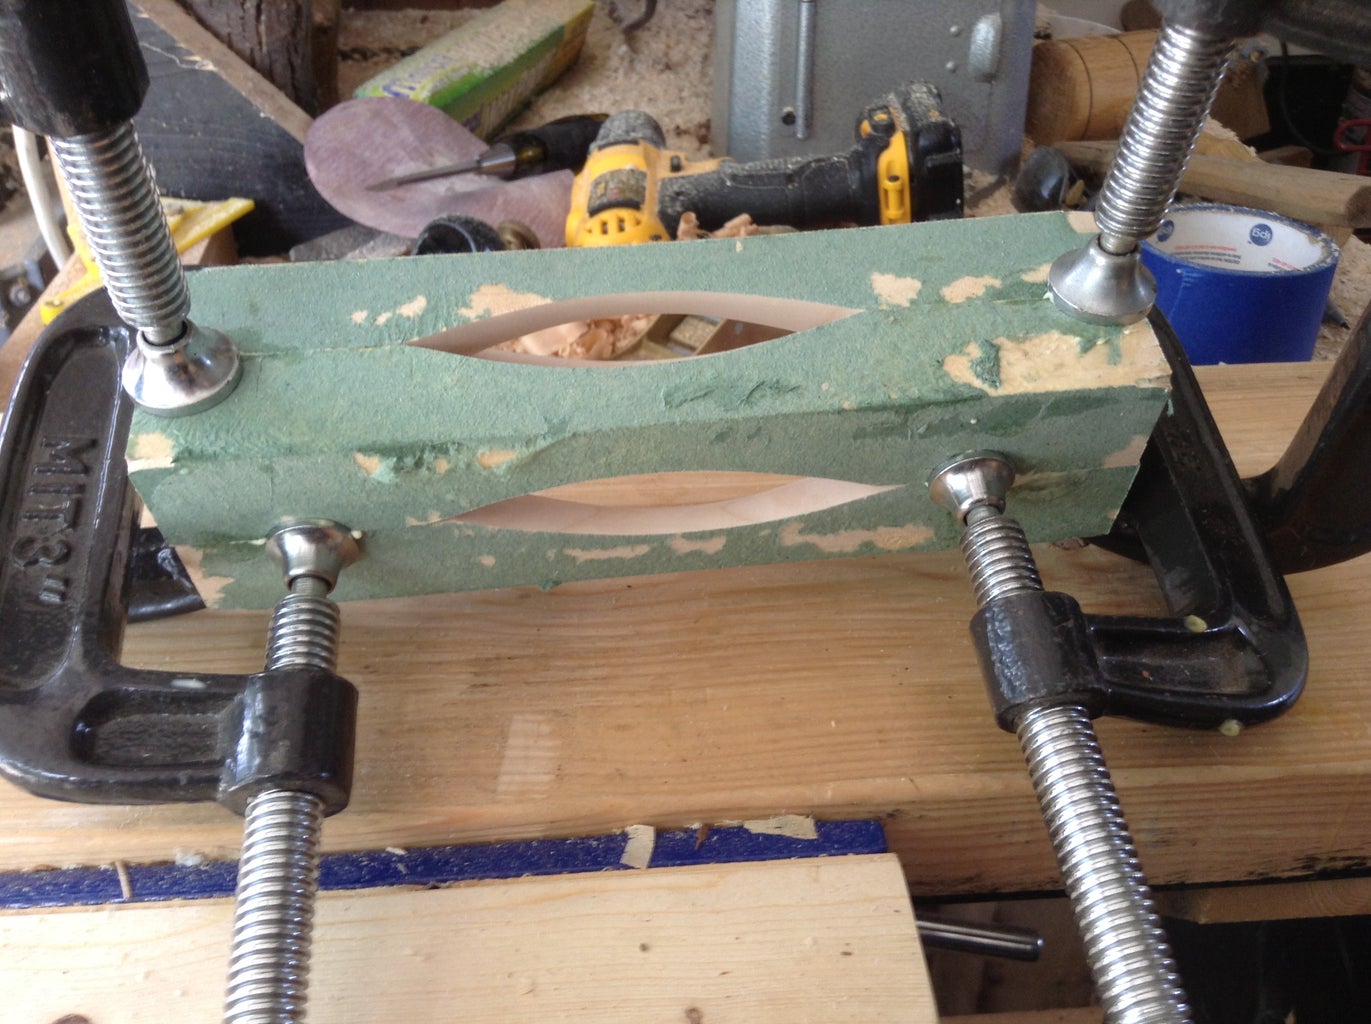
Now its time to glue the blank together with craft paper separating all glued surfaces. I found it easiest to take two of the blanks and wrap the paper around 2 adjacent sides. That leaves 2 blanks without paper. glue them together and clamp it up.
It is extremely important to ensure these are glued square. There can be no slipping or sliding. So when you are clamping, place the clamp pads on the separation line squeezing all the blanks centered to one-another. once you have them held in place square, add a couple more clamps to get even pressure across the blank.
Wait about an hour and unclamp the blank. Tear off as much of the paper as you can and scrape any glue off the blank.
Step 3: Mount It to the Lathe


Now on the ends look for the center mark on the blanks (the point where all four corners meet). Using an awl, or a spring punch make a divot on each end in the center. Once you have the divot, using a 1/8" drill bit, drill the ends about 1/4" deep to define the center.
Now place the drive spur into one end and using a hammer, pound it in about 1/8" deep.
NOTE: If you have a 4 prong drive spur, make sure you don't place the blades on the glue lines. This will separate the blanks and ruin the project.
Now, mount the blank between centers on the lathe.
Turn the blank to the desired shape. DO NOT TURN THE WHOLE THING ROUND! leave at least 1.5" on each end square. This is what will be glued after the separation.
Once you have the desired shape turned, sand it all the way to 400 grit.
Then remove it from the lathe.
Step 4: Seperate the Blank and Re-glue


Now grab a chisel and a hammer and place the chisel blade on the line separating the blanks. Now, lightly tap the end of the chisel. This will split the blank on the lines without cracking the wood. Split all four blanks apart, keeping them in the proper order.
Now one blank at a time, turn them 180 deg making the outside of the turned piece the inside. Glue and clamp these together ensuring a good square glue-up. Also make sure the ends are flush with each-other.
Let this sit for an hour to dry.
Now one blank at a time, turn them 180 deg making the outside of the turned piece the inside. Glue and clamp these together ensuring a good square glue-up. Also make sure the ends are flush with each-other.
Let this sit for an hour to dry.
Step 5: Finish Turn the Desired Outside Shape


Now install the 4 jaw chuck and mount the piece in the chuck at one end and bring the tail-stock up to the other end and tighten it in place.
Sharpen your gouge and scraper. I used the gouge and turned the blank round and shaped it to my desired vase shape.
Now its time to drill a hole in the tail end of the piece (the mouth of the vase). I started with a 1/8" bit and went all the way up to 1/2", using 3 bits to step up the hole. It is much easier to drill this 1/2" hole if you have a smaller hole to guide the bit.
Now using my round nosed scraper I finalized the shape and defined the mouth of the vase.
I then sanded the piece from 80 thru 400 grit.
Sanding this piece is a bit tricky. You can sand the entire piece like normal on the lathe, but the long skinny pieces require a bit more attention. I stop the lathe after each grit and hand sand the long skinny legs of the vase with the grain.
Finally, using my sharpened parting tool I parted the base of the vase from the chuck and removed it from the lathe. Sand the bottom up to 220 grit and get ready to finish it.
Step 6: Finish the Vase
I finished the vase by spraying 3 coats of polycrylic clear-coat (semi-gloss) sanding in-between with micro-mesh sandpaper.
You can get very creative with these pieces and they will always turn heads!
Thanks for looking!
You can get very creative with these pieces and they will always turn heads!
Thanks for looking!