Introduction: Introduction to ESP8266 - Getting Started & Arduino IDE Setup


The ESP8266 has become the centrepoint of many devices. If you are looking to build a DIY smart device in your home (check out my Instructables for ideas), then I am sure you heard the ESP8266.
This video provides you with a quick overivew of the ESP8266 echosystem. It also clarifies some terms that you may have heard associated with this device.
Step 1: Watch the Video
The video explains the difference between the ESP8266 microchip, module and board. It goes over the details of the microchip and shows you how to configure your Arduino IDE . Feel free to add your questions in the comment section of the YouTube video.
Step 2: Order the Components
-- LINKS -- (When available, I use affiliate links and may earn a commission)
Amazon.com:
Wemos D1 mini - https://amzn.to/308Sxoy
NodeMCU - https://amzn.to/3afeuWJ
ESP01 - https://amzn.to/3a7IzHp
ESP12 - https://amzn.to/3kl5TpX
Programmer USB to Serial (3.3V/5V) - https://amzn.to/30zZCPd
Programmer for ESP01 (with programing switch) - https://amzn.to/31v65dp
AliExpress:
Wemos D1 mini - https://s.click.aliexpress.com/e/_dVFriXM
NodeMCU - https://s.click.aliexpress.com/e/_dT4RUMA
ESP01 - https://s.click.aliexpress.com/e/_dZjmmoq
ESP12 - https://s.click.aliexpress.com/e/_d8PiNMS
Programmer USB to Serial - https://s.click.aliexpress.com/e/_dZsBi0m
Programmer for ESP01 - https://s.click.aliexpress.com/e/_d75W2aw
Step 3: Software


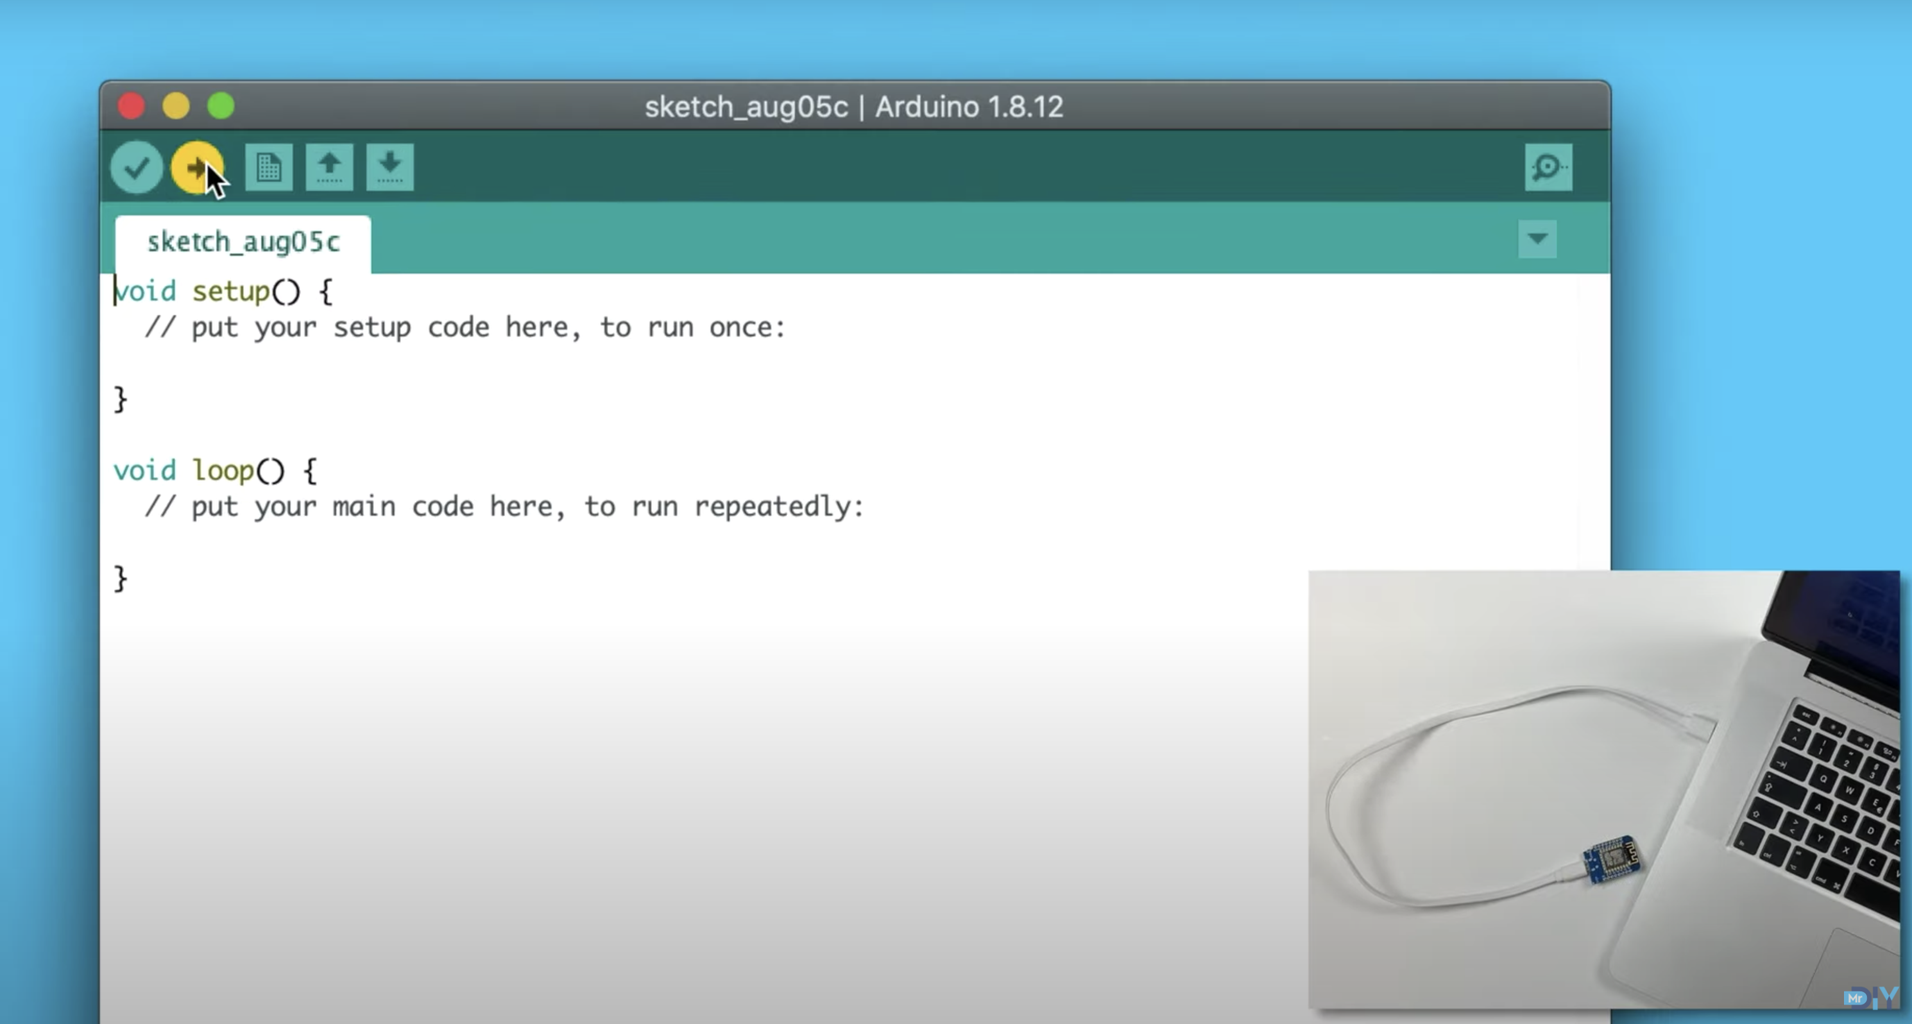
The most popular way to load your code to ESP8266 is to use the Arduino IDE. You will first need to set up and the following step-by-step instructions are shown in the video above:
1) Update your boards' URL
2) Install the ESP8266 boards
3) Pick your board
4) Upload your code
Step 4: Hardware

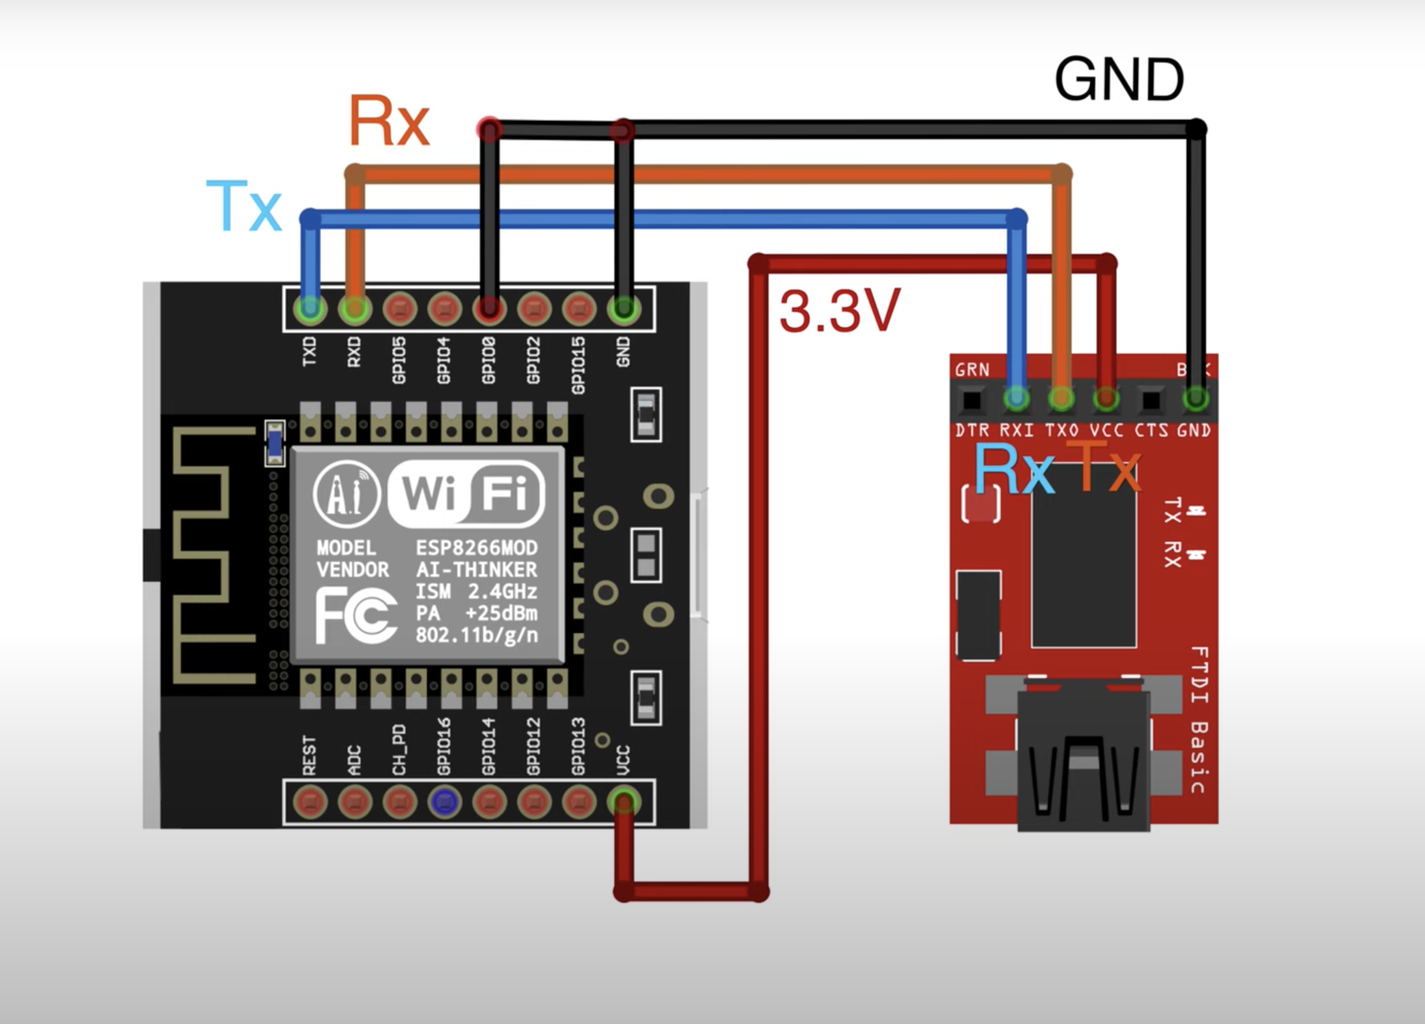
ESP8266 modules and some boards don't have a built-in USB-to-Serial converter. So you will need to get that converter in order to upload your code to these ESP8266 modules. The wiring is shown in the diagram above. Rx to Tx, Tx, to Rx, Power to Power (3.3v) and Ground to Ground.
Some modules, like the ESP01, have a special programmer to simplify things.
The links above detail which one to get and where to get it.
Step 5: Done
You should now be armed with the basic understandings to get you started with ESP8266. To help get you started, I recommend checking out my projects on my other instructables and on my YouTube channel.
If you found this useful, please consider subscribing to my YouTube channel - It helps me a lot.
If you are interested in supporting my work, you can check my Patreon page.


