Introduction: Introduction to Electronics
Before you start to design or build electronic circuits, there are fundamental lessons you should learn about electricity. This lesson goes over the basics of working with low voltage DC power, which is what you will be using to power your wearable projects. We will go over terms and concepts that you will use throughout the class.
You will learn:
+ what a circuit is and it's most basic components
+ how to use Ohm's Law
+ how to use the multimeter
Step 1: Materials
+ assorted LEDs
+ resistor kit
+ coin cell battery holder
+ 3V coin cell battery
+ multimeter
+ alligator leads
Step 2: What Is a Circuit?
In simplest terms, a circuit is a closed path, one that begins and ends in the same place. Take a look at the diagram above, it's beginning and ending place is the battery. The battery provides a source of power from which electrons flow around the circuit making a full circle, getting used up and manipulated along the way. This is the circuit you will build and get to know over the next couple of lessons. Let's take an even closer look and identify what makes up this simple circuit.
Source of Electricity
Mostly, you will be working with low voltage direct current (DC) circuits when building wearable electronic projects. This means the electrical source that will power your project will come from batteries. There are some instances a wall adapter can be used that converts and steps down the alternating current (AC) flow of electricity coming from a wall outlet to a safe level. However, when building wearables, you want your project to be mobile. So, instead of tethering your project to a wall, you would probably want to use batteries if more power is needed. In the above circuit, the source of electricity is a 3-volt coin cell battery.
A Conductive Path
An electrically conductive path allows electrons to flow around the circuit. It is typically wire, but in wearable electronics, the wire can be replaced by conductive thread and fabric. These are also called traces, which I will call them from now on.
Load
The electrical load is an electrical component that consumes electric power. In the illustrated circuit, the load is the LED.
Resistance
The ability to resist the flow of charge, in other words, the act of restricting current flow. In this circuit, a resistor is protecting the LED (which doesn't have much resistance on its own) from too much current. If too much current runs through it, the LED will burn out. A resistor is a small piece of hardware made from carbon that comes in many values. Its value is indicated by the colored stripes on its body. There are many online resources showing you how to read them. To figure out what value of resistor you need when building a circuit, you can use Ohm's law, some general rules of thumb or look for labels when building from a diagram or schematic.
Step 3: Voltage, Current and Resistance
Three terms that you will come across a lot when working with circuits are voltage, current and resistance. What do they mean and how do they apply to circuit building?
When electrons are flowing, this produces a charge, which we use to run devices, like the LED. Voltage is the difference in charge between two points, such as the two sides of a battery. Current is the flow of an electric charge which is how many electrons are passing through one area at one point in time. The restriction of flowing electrons through the circuit is called resistance. Different materials have different levels of resistance, including fabrics and plastics. All three relate to one another in a circuit.
When building circuits, sometimes you need to know how much current, voltage or resistance applies to a component or material. This is told by their units of measurement. Below is how each unit is defined.
Voltage - Volts (V)
Resistance - Ohms (Ω)
Current - Amperage/Amps (A)
A great way to visualize the relationship between these three things is to use the water analogy. That is what the image above illustrates. It's taken from an excellent book called Getting Started in Electronics, by Forrest M. Mims. I recommend picking up a copy to continue your education on the basics of electricity.
Step 4: Introducing the LED
The LED is a Light Emitting Diode, it comes in many colors, shapes, and intensities. It's a favorite of wearable electronic designers and an essential component when designing most circuits. This particular one is a 5mm domed LED and can be picked up at any electronic supply store.
One characteristic of diodes is that they only allow electricity to flow in one direction. This means that if electricity is not flowing in the right direction in a circuit, the LED will not light up. When a component needs to be connected to a circuit in a particular orientation, it's called polarized, meaning it's a part with polarity.
To know which direction to put an LED in you need to know what side goes to power (+) and which side goes to ground (-). There are a few different ways to do this. The simplest way to know is to look at its leads. You will notice one is shorter than the other. The shortest one is its cathode, it gets connected to ground (-), the longer one is its anode which connects to power (+).
How are you doing? This can be a lot of information to keep straight at first. Do not worry about keeping this all in your head while building your first circuits. A lot of what we just went through will click into place as you continue to build circuits.
Speaking of building, it is time to start putting a circuit together! Choose an LED, any other than red color will do.
Step 5: Component Ratings
To learn about component ratings we will focus on the LED you chose. If you haven't done that yet, grab an LED now.
For our circuit, we are using a 3-volt battery for the power source. If you go to a store to purchase a battery, you will notice that there are many kinds. Each kind provides a different voltage and a certain amount of current over time. Each component, including an LED, can only withstand so much voltage and current before it burns out and wears down. Not only can it get too much, but it can also get too little current and voltage which will prevent it from lighting up at all. So, how do you know which battery is right for your project? One way to know is by looking at the current and voltage ratings for the component. Let's find out what our LED is rated for.
Where do I Find the Ratings?
Each component will have a datasheet that provides the technical and electrical specifications. This should be found linked to wherever you purchased the component from. Or, you can search for the datasheet online using keywords and any part number found on the component.
The LEDs linked to in this class' material list come from Sparkfun. They provide datasheets on all of their product pages. I am using a red LED in my circuit. To find the datasheet for a 5mm red LED from Sparkfun, I go over to the product page. Here, I can see a link to the datasheet at the bottom. Go find the datasheet for the LED you want to use in your circuit and open it to take a look.
There is a lot of information in the datasheet, but right now you only need to pay attention to a couple things.

Forward Current
This is the amount of constant current the LED will use to light up. If using multiple LEDs (loads), current used adds up fast and if not considered carefully, will drain the battery prematurely or not allow the current to get to other parts of the circuit. Forward Current will most likely be next to Peak Forward Current, the difference is this: Forward Current tells you the maximum constant current the LED can take, Peak Current tells you the maximum current the LED can handle in a short burst, or when a power surge happens. The datasheet tells me the red LED needs up or 20 milliamps to light up. What does the datasheet tell you about your LED? Grab a paper and pen and write it down.
Forward Voltage (pictured above)
This is how much voltage the LED needs in order to operate, there are a minimum and maximum defined. If you give it too little, it will not light, if you give it too much, it could burn up or wear out faster over a period of time. My red LED needs a minimum of 1.8V and a maximum of 2.2V. What range of voltage does your LED need?
Step 6: Ohm's Law
Once you know the voltage and current ratings of your LED, what's next?
By looking at the datasheet in the previous step, I learned that my red LED needs 1.8V - 2.2V to operate. I will split the difference and say it needs 2 volts. The coin cell battery supplies 3 volts, which is higher than the maximum forward voltage of my LED. It's the battery that is closest to my operating voltage but giving the LED all 3 volts could burn it out.
This is where a resistor comes in. Remember it restricts the current flow, at the same time lowering voltage levels within circuits. So, Using one will protect my LED. Like batteries, resistors come in many values. How will we know what resistor value is needed for our circuit? We will figure it out using Ohm's Law!
Ohm's Law is made up of three equations that tell how resistance, voltage and current relate to one another.
V = I x R
I = V/R
R = V/I
V = voltage
I = current
R = resistance
You can see in the equations that as long as you have two values, you can find the third. To find out the value of resistor needed to protect the LED, we need to use the equation to find resistance. Which is:
R = V/I
The image above is a visual tool made to help you remember whether two values get divided or multiplied to get the third. If you have V and R or V and I the line separating them tells you to divide. If you have I and R, multiply to get V.
Doing the Math
From looking at the datasheet for the red LED I already know the voltage needed is 2V and the max current draw is 20 mA. Those are the two values I will use in the equation to get my third missing one, the resistance. At this point, you should know the forward voltage and current of your LED. Follow the steps below, plugging in your current and voltage and find out what value resistor you need.
Starting equation: R = V/I
1) Subtract the forward voltage needed by the LED from the battery supply.
3 volts (battery supply) -2 volts (forward voltage of LED) = 1 volt (left over voltage)
The 2 volts are used by the LED leaving 1 volt. The left over 1 volt is the amount that needs to be resisted and used up by the resistor. Otherwise it will run all through the LED and burn it out.
2) The equation is written to take amps for the current value, not milliamps (mA), so the milliamps need to be converted to amps. There are 1000 milliamps in 1 amp. Divide the number of milliamps by 1000 to find that number in amps. For example, my red LED takes 20 milliamps, so I figure out how many amps that is like this:
20/1000 = .02 amps
3) Plug the two known values into the equation.
R = 1/.02
4) Do math.
50 = 1/.02
The final value of resistance needed to protect the red LED from the 3 volt battery is 50 Ω.
50 Ω resistors are not available, but 56 Ω resistors are. When using a current limiting resistor to protect an LED, it's better to round up. 56 is the ideal choice, but because the resistor choice is limited in the kit purchased for this class, you have a choice between 47 or 100 Ω resistor. Since 47 is so much closed, this is a rare instance when going down makes sense. There is another reason why it makes sense that is special to wearable electronics, but that won't be revealed until the next lesson. :)
Step 7: Using Your Multimeter
Time to get hands on! A multimeter is a measuring tool and more. It's the most useful tool you will want to keep by your side while building circuits. In this lesson, we will go over how to measure two things you have learned about: voltage and resistance. By using a multimeter you can measure how much life a battery still has or how resistive a material is. Grab your multimeter and let's measure the battery and resistor used in your circuit.
Your multimeter has two probes coming from it, a red and black one. The black should be plugged into the hole labeled COM and the red probe should be plugged into the hole that is labeled mAVΩ (milliamps, volts and Ohms).
Measuring Resistance
Turn the dial from Off to 200Ω. This setting means that you can measure anything up to 200Ω. If you need to measure higher than that, click the dial-up to select the max value you need.

Grab a resistor and place it on a surface. Touch one metal lead with a probe and the second lead with the other probe. A value should pop up on the multimeter's screen. If I measure the 47Ω resistor, it tells me it's 48.4. It's ok if the resistor value is a little above or below. The gold band you can find on all your resistors tell you it has a 5% tolerance. This means it can have a value 5% lower or 5% higher than 47Ω. For many circuits, this is an ok margin of flexibility. Cool, right? Now you are read the resistance of anything that electricity can travel through. Grab another resistor and test that. You can even test a small part of your finger tip, remember, we are conductive too!

Measuring Voltage
With a multimeter, you will never have to wonder whether a battery is good or not again. You will be able to read how many volts are left. Turn the multimeter's dial to 20V, this allows you to measure up to 20 volts.

Pop the coin cell battery into the battery holder. Place the red probe of the multimeter on to the power tab and the black probe of the ground tab. Look for the "-" symbol to know which is ground, the "+" symbolizes which side is power. A number will climb on the multimeter's screen until it stops at the voltage provided by the battery. Sometimes batteries will have more volts than they are marketed to have. I've read as much as 3.2 volts coming from a fresh 3-volt coin cell before.

Step 8: Build the Circuit
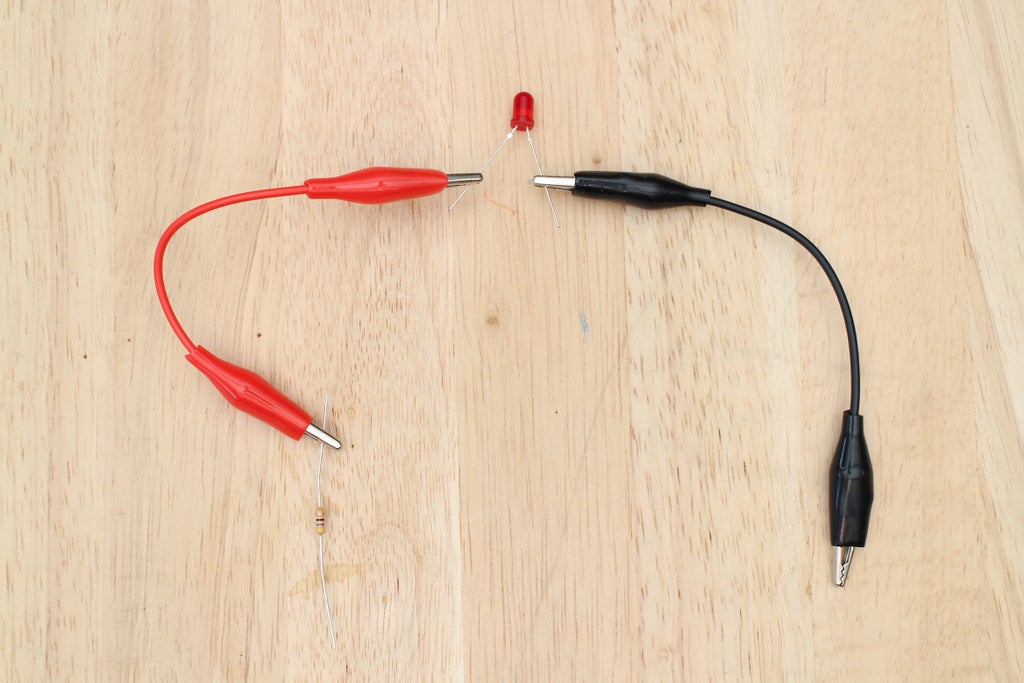
Phew! You made it! Time to string your components together into a circuit. Grab some alligator leads. Here is your component list:
1 x LED
1 x resistor (value figured out using Ohm's Law)
1 x coin cell battery
1 x battery holder
When building circuits that use low voltage batteries you use certain colors to indicate power and ground. Red is used for making connections to power and black is used to connect to ground. Components can be damaged or small shocks can occur if power and ground touch, so it's important to keep them clearly indicated. This also makes for easier circuit building when you need to find out what is grounded and what is powered quickly.
To identify which side of the battery is power and which is ground, look for the - and + symbols. They are small and embossed on the holder. Make these connections using the proper color of alligator leads.
+ power lead of LED (long leg) to resistor
+ resistor to power (+) side of battery
+ ground lead of LED (short leg) to ground (-) of battery


Pop in the battery and the LED will turn on. Great job! You have built your first circuit.

Step 9: Test Your Knowledge
{
    "id": "quiz-1",
    "question": "What is electrical resistance?",
    "answers": [
        {
            "title": "The ability to resist current flow",
            "correct": true
        },
        {
            "title": "An electrically conductive path",
            "correct": false
        }
    ],
    "correctNotice": "That's correct",
    "incorrectNotice": "That's incorrect"
}
{
    "id": "quiz-2",
    "question": "What does it mean when a component has polarity?",
    "answers": [
        {
            "title": "It can go in a circuit without worry of orientation",
            "correct": false
        },
        {
            "title": "The component only allows current to flow through it one way ",
            "correct": true
        }
    ],
    "correctNotice": "That's correct",
    "incorrectNotice": "That's incorrect"
}
{
    "id": "quiz-3",
    "question": "What does forward current mean?",
    "answers": [
        {
            "title": "It’s the maximum amount of current an LED will use to light up.",
            "correct": true
        },
        {
            "title": "It's the minimum current an LED needs to light up. ",
            "correct": false
        }
    ],
    "correctNotice": "That's correct",
    "incorrectNotice": "That's incorrect"
}
Step 10:
What color LED did you pick? Share your circuit below!


