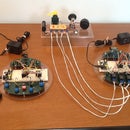
Introduction: Jacob's Ladder With Auto Coil
Here is a simple simple did i say simple project for you to make for halloween or just cool to have laying around in your lab or shop.
Great for experiments and simple simple simple and cheap to make.
Now I made the test unit as I did my plasma cutter on a piece of wood and later put it in a cd case using a slim jim tube to encase the arc bars for safty.
I'm not contrating on a case but rather the assembly of the circuit to get it running then you can choose what ever form works best for you putting it into a case.
Have fun and enjoy.
Also check out my homemade plasma cutter instructable and my site for other cool free plans.
http://theplasmacutterman.com/.
https://www.instructables.com/id/How-to-Make-Your-own-Plasma-Cutter/.
P.S. check out my Tesla Levitating Steam Punk Lamp on You Tube.
https://www.youtube.com/watch?v=jip8HYd39g0
Step 1: Parts List
Ok i'm taking this from my homemade pdf file cause im not so savey with this instructable stuff so here it is.
These are your parts list and a few hints in building it.
Step 2: Warning Warning
OK safty first.
This project uses high voltage with high current which can kill you if your not careful.
So please be careful and pay attention to what you are doing and when done put in a case as soon as you can to protect others from getting hurt.
I put mine in a case with a momentary hand switch and a kew switch so it would'nt work with out both together.
Here is a picture of how I did mine and more pictures in last step.
So have fun but be careful.
Step 3: Instructions
Ok follow these instructions below.
Also it gives a few more tips on operating it to lengthing the life of your unit by not holding switch on too long at a time.
Step 4: Pictorial Instruction
Ok the last page was to start you getting your head wrapped around this and now you can begin to put it together once you have all your parts and some scrap wire and tape.
Look at each picture and just copy what you see and once you get it working you will know how and what to do to reposition in a case.
Next step is to look at my pictures of how I done mine and last a video of it working.
Be careful and enjoy.
Step 5: Mine in a Case and Video Link
Here are my pictures of my unit in a case with key switch and normally open push button fire switch.
Also I have a link here to see my utbe video of it working.
Have a great time and thanks for dropping by.
http://www.youtube.com/watch?v=Uqpo-3pbjto&feature=mfu_in_order&list=UL

Participated in the
MakerBot Challenge


