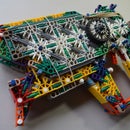
Introduction: K'NEX RLSW V.1 (Red's Light Support Weapon) (Build)
This is my second entry to the "Toy Rods and Connecters Contest." It is my RLSW (Red's Light Support Weapon). I designed this gun to be perfectly suited for K'NEX wars. It works both as a mag gun and as a muzzle loaded gun as it is great for hallways (in indoor K'NEX wars), as well as long rage (outdoor) K'NEX wars. It is, overall, a good mix of speed and power, and I would feel very confident in taking this gun to a K'NEX war.
Some features of the gun are:
- Great range 60 - 70 ft.
- Great looks (IMO)
- Attachment rails
- Very easy to hold and use
- Very comfortable
- Nice pin-pull
- 12-ish round magazine
- Simple sights
Now, lets move on to the first step shall we?
Some features of the gun are:
- Great range 60 - 70 ft.
- Great looks (IMO)
- Attachment rails
- Very easy to hold and use
- Very comfortable
- Nice pin-pull
- 12-ish round magazine
- Simple sights
Now, lets move on to the first step shall we?
Step 1: Main Body #1
In this step you will be doing the majority of the work, as you will be building both the right side of the gun and most of the internals. If you need help, ask for some.
Step 2: Handle / Pistol Grip
In this step you will be building the handle and the comfort bar. I was too lazy to take the whole thing apart, so I just gave some general pics. It is relatively strait forward and simple, but if you need help, I am always willing. I truly suggest that you should make your own handle, as this one was created to my wants. Use the ingenuity that God gave you and make your own version.
Step 3: More Internals
In this step you will be finishing off the insides of the gun.
Step 4: Main Body #2
In this step you will be slapping on the left side of the gun and all the extras (including the tactical rails). Keep the image notes in mind as you build.
Step 5: Magazine
In this step you will be building the magazine. As always, I was too lazy to take it all apart, but it is VERY easy to see how it is built. Just build it. If you want more bullets to fit in this magazine, all you have to do is make the mag longer. And yes, you do need those broken rods.
Step 6: Banding and Finishing
You will be doing exactly as the title says you will be doing.
Step 7: Extras!
Here are just some extra pics for you.


