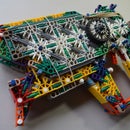
Introduction: K'NEX TMP (Build)
When you have a gun that bridges the gap between a handgun and a SMG, it must have two things, a small overall body, and a high rate of fire. The Steyr Mannlicher TMP (known as the MP9 in MW3) has both. Coming in at a little over 11 in. and with a rate of fire of about 850–900 rpm., the TMP is no joke.
The TMP is my favorite machine pistol from MW3, and this is my main reason for wanting to build one. Dr. richtofen's original was my inspiration. This replica TMP has a 13 - 16 rd. magazine, an overall length of about 12 in, and an amazing pin-pull-length. Both grips are surprisingly sturdy, and the sights have a long enough sight radius to make some pretty accurate shots.
Features:
- Great range: 40 - 50 ft.
- Accurate body size
- Comfortable grip set
- Long sight radius
- Sturdy body
- Large capacity magazine: 13 - 16 rds.
- Safety trigger setting
- Ammo is a one slot, blue clip connector
- Strong trigger setup
This is my third entry in the Toy Rods and Connectors Contest. Don't forget to vote for all my entries!
Don't forget to check me out on YouTube, Google +, at my website: The Red Book of Westmarch Insider, and become a member of K'NEX Connect today!
Lets get to building!
Step 1: Left Panel
This step is relatively simple, all that we will be doing is building the left panel. Don't forget to note where the rods are inserted. And as always, if you need help, just drop me a comment below!
Step 2: The Grip
This step is more complicated than the last step, mainly because you need to insert each part of the grip correctly for the sturdiest connections. It took a little time, but the setup I show you here is the best overall.
Step 3: Internals - Part #1
Here we will be building the top of the internals. Just pay close attention to the pics, and you should do fine.
Step 4: Internals - Part #2
Here you you will be working on the bottom of the internals. Namely, the trigger setup. View each image to get a better look, and keep an eye out for image notes.
Step 5: Foregrip
This forgrip is alright, but this is where I would start adding your own flare to your TMP. Change it up, make your's bigger, smaller, wider, whatever you want to do.
Step 6: Magazine
The magazine is relatively simple. Just pay close attention to the pics, and if you want, you could make it shorter or longer.
Step 7: External Additions and Rubber Bands
In this last step, you'll be adding the side/extra panels and all the rubber bands. The pics are pretty descriptive, so you should be fine. As I said before, if you have any questions, just leave a comment below!
Check me out on Google +! That is where I give all my updates, post many of my videos, give links to my newest instructables, and more!


