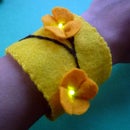
Introduction: LED Wristband (Easy)
Learn how to make an LED wristband! This is the easiest version that I have created. I have taught children as young as 4 years old (with parental supervision) this activity!
Materials:
Craft foam (sold in sheets), assorted colors
Conductive fabric
LEDs
Copper tape
Sticky Back Velcro
Small binder clip
Craft glue that can stick to foam
Coin cell battery (CR2032)
Step 1: Let's Make Your LED Light Up!
Choose an LED in a color of your choise. Look at the wire legs coming out of the body. One leg should be longer than the other. This is the "+" leg.
Now let's light it up! Touch the "+" leg of the LED to the "+" side of the battery and the other leg to the other side. Pinch both sides. The LED should light up!
Step 2: Let's Make a Battery Holder! Part 1
Take a sheet of colored craft foam and cut a strip about 2 inches wide. The length should be long enough to wrap around the wearer's wrist plus about 2 inches.
Take your conductive fabric and cut two strips. One that is .5" x 4" and one that is .5" x 5"
Pick up the longer length of conductive fabric and glue it to the foam strip so that it is centered and the edge of the conductive strip wraps around the edge of the foam so that there is .5" of conductive fabric on the underside.
Step 3: Let's Make a Battery Holder! Part 2
Locate a spot near the middle of the wristband (about .5" to the left of the conductive fabric. Cut a slit. Take the second strip of conductive fabric and feed it through the slit that you just cut. Glue the conductive strip to the foam so that about an inch appears on the top of the wristband. The rest of the strip will be on the underside of the wristband.
Step 4: Let's Make a Battery Holder! Part 3
The right hand side of the wristband is going to be folded in and turned into a battery holder.
We’re going to make a pouch for the battery. Take two glue dots and place them on the opposite
side of the conductive fabric strip as shown above. Fold in the right side of the wristband at the point where there is an empty space between the strips of conductive fabric and press so that the glue adheres. You will have a pouch!
Step 5: Let's Secure the Battery Pouch!
Take your battery and place it + side up in the pouch. Make sure that it hits the edge of thepouch. A little bit of the battery might stick out, but that’s okay.
Now take a binder clip and attach it to the pouch, pinching the battery and the two layers of
foam together.
Take a piece of tape and place it slightly under the edge of the battery. This will keep the
battery from shorting (when the power and ground sides of the battery are connected)
Step 6: Let's Test the Battery Holder!
Flip your wristband over. Your LED is going to be positioned between the two strips of conductive fabric.
Take your LED and make it do the splits! Flatten it with your fingers!
Lay it on your wristband so that the shorter leg is touching the shorter piece of conductive fabric
and the longer leg is touching the longer strip of conductive fabric. Press down. It should light up!
Take your copper tape and tape down the legs of the LED. Make sure that the legs are securely adhered to the conductive fabric. It’s okay if the copper tape on the ground side extends past the conductive fabric.
Step 7: Let's Make It Wearable!
Now remove the metal parts of the binder clip by pinching the legs inward, then pulling them out
Take a piece of sticky velcro and stick it to the wristband as illustrated. (It does not matter what side of the
velcro you stick to what side of the wristband)
Decorate your wristband! You're all set!


