Introduction: Laser Engraver Made With Repurposed CD/DVD Computer Drives
Over half a year ago now, while trying to think up ideas for a project, I found a tutorial for a pen plotter that used the stepper motor mechanisms contained within DVD and or CD computer drives to create a CNC platform. These drives became a very common scrap part after disk drives went the way of the dinosaur in PCs, so I was sure I could find some to use for this project. Unfortunately for me, the instructions proved to be inadequate in many ways, with vital information missing, confusing grammar, and significant portions of the project being explained vaguely or not at all, simply appearing in the next step without reason. These issues frustrated me, and while I could have spent the time to fill in the blanks myself, I found that I could, and wanted to, make my own project.
Along the way, the pen plotter turned into a laser engraver and with that came many other alterations that I designed, prototyped, and implemented myself. It is because of this that I can call this project my own, and I hope that you will follow along as I show you how to build one for yourself.
Just One Thing Before We Begin: This project contains a high power laser. Needless to say, it can blind you. Please purchase protective eyewear, at the very least, to protect yourself. Make sure no one else is watching the laser as it fires without protective eyewear and always let other people know that the laser will be firing. Finally, do not leave the device unattended while it is operating. Thank you.
Supplies
Before beginning the list of supplies, there are a few prerequisites that one will need to meet in order to fully recreate my project. Firstly, a 3D printer and, ironically, a laser cutter will be needed in order to manufacture many of the required parts for this project. Secondly, and perhaps the most inconvenient, prerequisite is the software and expertise that one will need. Besides the laser cutting software used to run the finished machine, this second set of requirements is solely because of the stepper motor mechanisms themselves. As shown in the next step, these mechanisms come in many different shapes and sizes which causes many of the parts I designed for my project to become useless for any other. I will be able to guide the design process, but the actual designing will have to be done by the person completing this project. Now, with that out of the way we can get into the physical supplies.
DVD Drives: See notes section before purchase. Buy used if purchasing.
CNC Shield Expansion for Arduino Uno: This kit contains most of the electronics needed for this project. Assembly will be detailed in a later step.
20W Laser Module 5V PWM: This is the laser we will be using for the project.
12V 1A Power Adapter: This is my recommended power adapter.
2.1mm DC Power Female Jack: The exposed wires will be screwed into the CNC shield in order for the power adaptor to plug into the engraver.
Female to Female Jumper Wires: The wires will be used in groups of four in order to connect the stepper motors to the CNC shield. One end of the four wire bundle will be cut and stripped for soldering.
E6000 Craft Adhesive: This is the glue that was used in this project. It is optional if a different glue is preferred.
Sugru Moldable Glue: This is highly optional as any glue, tape, or other adhesive that can secure the jumper wires to the the frame will function fine. I recommend it because it was easy to use and worked well.
Fusion 360: This is the 3D modeling program I used for all the parts, made by me, in this project. All 3D files I link throughout this project will be in the form of an STL and a Fusion 360 Archive file for ease of use.
LightBurn Software: This is the software that will run the engraver because it is compatible with Grbl. I recommend outside sources to teach one how to use it.
GRBL: This is the software that will be loaded onto the Arduino Uno in a later step. It works with LightBurn to run the stepper motors and laser. The wiki contains a wealth of information that cannot fit in this guide.
M4 Brass Hex Pillar Spacers: These parts fit into the legs of the CNC platform and are the length the legs are designed for. Make sure to get matching screws to go into them.
Last Few Notes:
The DVD drives for this project can be bought on Amazon and other sites, but many of these drives are considered e-waste. Because of this, they can be bought for cheap in many places where e-waste can be found or sold. I say this because I recommend getting four or more of these drives to disassemble. The reason for this is explained in the next step.
Step 1: DVD Drive Disassembly
To get started, we will tackle the first step in the most headache inducing part of this project. We need stepper motor mechanisms (referred to as SMMs from now on), but they are buried within these old DVD drives. Hopefully the images, and my words here, will guide you to removing them.
For the tools required, there is little else other than a small screw driver, but a couple of small, sturdy objects that can be used for prying and pushing would help greatly.
The first thing to do is remove the back panel. There should be four screws in each corner on one side of the drive. Once that panel is gone, there are many things you may see. This, right here, is the annoyance of these drives. I have yet to find two that are exactly alike in construction, and so all parts pertaining to specific measurements on these SMMs cannot be reused on repeat projects. I have two example images for different initial interiors above.
Anyways, the next step is to keep removing parts until you see a lever that controls the disk tray. Look for screws or plastic tabs that prevent parts from being removed and don't be afraid to rip out any connectors. Two examples on what the levers could look like are shown in the gifs above. Once the tray is slid out, you can locate two tiny black tabs on either side. These tabs prevent the rest of the metal shell from coming loose. Once they're pressed in, the plastic surrounding the tray should pop out and the remaining metal should be able to slide off the bottom. With the bottom, as well as the sides, removed the SMM should be clearly visible from the bottom. All that is left to do is unscrew the four corners.
You should end up with a SMM that looks like one of the three grouped together in the image above. It should have the small, cylinder shaped stepper motor with four solder points as well as the screw rod that moves the center mass back and forth. The SMMs that have alternative motors or mechanisms to move the center mass cannot be used. Two invalid SMMs are depicted together above. This is the reason for buying more than two. If you have more than two SMMs that you think could be used for your engraver then you could choose the SMM that has the longest travel distance, but you could also choose the ones that seems less obstructive, or better looking. If this explanation was inadequate this videogoes much more in depth, but remember to stop disassembling when he takes out the SMM.
After the SMMs are removed all ribbons still attached to it can be ripped or cut off.
Step 2: Add the Legs
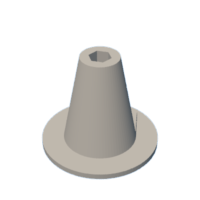
Now that you have two SMMs to make up your CNC platform, you can choose which one will be the bottom. Once you've decided, you can begin installing the legs. The legs are designed in a way that allows them to be twisted in order to adjust the leveling of the platform. These legs are a part that I can, and did, provide, but the custom washer replacement I made will most likely be useless. This is minor though, and finding actual washers that work for the holes in your SMM shouldn't be too much of a challenge. After 3D printing the legs, the rest shouldn't be too strenuous and once you are done, you'll have one SMM that stands on its own four legs. Bellow, is a standard STL file for 3D printing and a Fusion 360 Archive file incase you want to make some alterations to the leg in Fusion 360. All files from here on out will be given this way.
Step 3: Glue Them Together
The headache part two is upon us. Gluing the two SMMs' center masses together was an undertaking that took me the longest out of all the steps outlined here and cost me the most sanity. Numerous mistakes were made, the aftermath of one is depicted above, but much of the tribulations can be avoided following my experiences. The first obstacle is one I feel you should undertake even if your SMM situation is better than mine was. The center masses of my SMMs were awkward and weak in some areas, so in order to get around this, a custom part is required. To design a part that neatly fits both the top center mass on one side and the bottom center mass on the other, I highly recommend using calipers, making one or two layer high prototypes to test the shape, to not be overly accurate, and to constantly make sure your connector doesn't get in the way of the SMM's movement. You can see the connector I came up with above. This part is specific to my SMMs and yours could look completely different, but remember that the goal is to create two indents that fit snugly around your center masses so that when glue is used there is no chance of misalignment. The connector will be the most challenging design task you will face in this project, so if you made it, congratulations.
The second obstacle is the one I can help with. The mistakes I mentioned before were all caused by the issue of keeping the two SMMs level with each other. This is an issue I tried too many times to fix before I got it, but in the end I landed on the solution of leveling towers. These towers are created to match the height of a level upper SMM, when the connector is installed, and to keep it there while the glue hardens overnight. This is another part you will have to create as your height is almost certainly different than mine was. My recommendation for these towers is to print multiple prototypes slightly longer or shorter from your initial measurement. Once a tower is chosen and duplicates are made, glue can be placed inside the bottom indent before the connector is placed on top of the bottom center mass. Then glue can be used in the top indent before the top SMM is put in place. Take care when squeezing the two SMMs and the connector into each other. Support it from the bottom and the top, like a SMM sandwich, and refrain from pushing too hard on only one side to prevent anything from breaking. Once everything has been placed and pressed together, the leveling towers can be put in place. Hopefully the towers will just meet the top SMM, but if not, the legs may be adjusted until the towers fit.
If you are using the E6000 craft glue, please take proper precautions in the handling of it. Remember to wear gloves, safety glasses, as well as a mask and place paper towels on any surface you don't want glue to get on to.
Step 4: Top Plate Time
Next is the top plate, or plates more accurately. Designing this one can be challenging, but once the hole measurements have been confirmed everything else is a breeze. For the initial plate design, I recommend imagining which side the laser tower is going to be on and making the respective side of the top plate stick out the least on that side. Other than this limitation, the build plate can be any shape you desire, just make sure there is wood underneath where the cutting area will be. Once you have the top plate designed, you will probably need spacers to go in between your plate and the frame in order to avoid hitting the center mass of the top SMM. Its best you design these yourself as the height and the diameter of the screws may be different for you as they were for me. They don't need to be complicated, and there doesn't need to be more than one type like mine either, but make sure the screws you're using can go through them and have enough length for a nut left over. After getting the initial top plate cut out and installed, a second plate can be made to fit over the screw heads. Something to keep in mind is that to prevent the second top plate from moving around, the holes should fit snugly around the screw heads. This new plate has the benefit of being easily removable which means taping down engraving material is easier, and replacement incase of an accident is easier as well.
This is a reminder that your cut area will be small. The range of motion on my SMMs was around 33 millimeters which means I ended up with a 33 by 33 mm cut area. It is labeled directly onto the second plate in one of the images above.
Step 5: Electronics Time
Now that the CNC platform has been largely completed, it is time to turn towards the electronics. In the images above there are four components. An Arduino Uno (left), the CNC shield (right), and two stepper motor drivers (top). The shield goes on top of the Uno, but the drivers have four spots to potentially be placed. Each of those four spots are labeled "X", "Y", "Z", and "A". The stepper drivers should go into the "X" and "Y" spots. As for their orientation in those spots, there is a pin labeled on the under side of the stepper driver as "En". There should be a hole on the CNC shield that matches this.
After those components are assembled the hard plastic ends of a group of four jumper cables should be cut off and the wires stripped. The stripped wires should be soldered to the points on the stepper motor and the non cut end of the group should be plugged into the shield next to the drivers as shown above. The order of the wires pugged into the shield relative to where the wires were soldered on the stepper motor did not seem to matter, but I advise against changing them later once the software is involved. I recommend attaching the wires to the frame in order to prevent the soldering points from being too stressed. I used Sugru, but any from of solid attachment will work. Finally, the female jack can be installed by inserting the two wires into their respective receptacles in the blue piece on the CNC Shield. Make sure the red wire is in the positive area and the black wire is in the negative.
Please use the recommended power adaptor as one with a higher voltage or amplitude could cause electrical fires and/or explosions.
Step 6: GRBL Software
GRBL is the software that we will be loading onto the Arduino Uno. It will turn the raw code that LightBurn produces based on vector graphics and translates it into motion and laser control using our engraver. Although that is its general purpose in our build, much of the information about GRBL is better said by them than by me. Their wikicontainsno useless information, so I highly encourage you to explore the various pages. In particular, visit the "Compiling Grbl" page and then read the beginning of the "Using Grbl" page. You should also familiarize yourself with the "Grbl v1.1 Commands" and the "Grbl v1.1 Configuration" pages. Don't forget to look at the "Grbl v1.1 Laser Mode" page as well.
Some important configuration settings start at $100 and ends at $122. These values will help determine various things about how the axes will move. The descriptions underneath the settings will help with determining these values.
One of the more important commands is the G0 movement command. An example would be: G0 X10 Y10
This code, when the motors are properly configured, would move the x-axis 10 units away from x=0 and the y-axis the same.
Step 7: Lasers, Baby
This step will contain the electrical connections of the laser, the construction of the base plate, and the installation of the laser. First off, the laser module should have three pins (three wires) coming out of the top of it. The diagram above shows the three pins and what they are in the bottom right. Just incase your wires' colors do not match my own, the red wire is the 12V pin, the black wire is ground, and the yellow wire is the PWM within my pictures. The red wire and the black wire go to the same spots as the female jack while the yellow wire plugs into the white Z+ pin. In reality, the yellow wire should connect to the spindle enable pin because its purpose is to control the power of the laser (our "spindle" in this case), but due to software changes, the shield's labeling is now incorrect. The wiring on your shield should look like the pictures above. This is the final wiring setup. It is now time for the base plate.
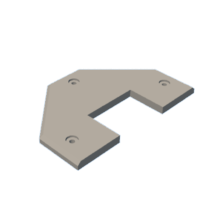
The base plate is the last file you will have to make yourself because of the SMMs. The actual dxf file of the sketch above is linked below, so if you would like to simply alter the distances between each leg, you can do so. I don't recommend cutting out the spot for the Arduino. The base plate, similar to the top plate, has two layers of wood. The top layer has the pattern of the legs and the tower base cut all the way through, and the bottom layer only has the outer rim cut out. When these two layers are glued together, an indent is formed for the tower and the legs to go into.
Finally, the laser tower needs creating and installing. The first thing to do is 3D print the parts. The tower is the largest part in this project, it will take a while for it to print, and it may even take multiple tries. But, once it is done, the laser should screw right in via the four holes in the flat plate at the top. The laser tower should then be placed in its spot on the base plate before fitting the tower holder around its base and screwing it in. If the base of the tower doesn't fit the hole in the base plate quite right, then don't be afraid to sandpaper the base of the tower to get it to fit right.
Step 8: Tips for First Use
Apart from the two accessories detailed below, the engraver is finished and should be fully operational. Before you power it up though, there are a few things you should remember. The first is that you need to plug the Arduino/CNC Shield into the computer before you plug it into the wall. This is very important as the laser will turn on by itself if the unit is not controlled by the computer first. Secondly is the zero position. By now, you should have the axes calibrated using the Grbl configuration settings mentioned before, and should have the G0 command working. Since there is no homing system installed, the only way we can zero the device is by manually pushing it to one corner and then giving it the command G0 X0 Y0 right after startup. This process will make sure the cut area is always in the same place and that the motors are never over extended. The commands can be given via Arduino IDE or through LightBurn's console tab. Thirdly, because it is the plate that is moving, all material that you plan on lasering will need to be taped down to the top plate before running any programs. I've included photos depicting the consequences of not doing this although when not securing the material, this humble laser engraver turns into what I like to call the "Artistic Interpretation Machine!" Finally, for the first few runs of the finished project, I recommend calibrating the focus on the laser. For me, this involved strapping a piece of cardboard to the device and burning lines into it, turning the focus dial a little bit more each time. I suggest using a material that you believe will be similar in height to the materials you will be using in the future.
If you are having trouble with LightBurn, there are many videos out there to help you with all of the features it contains, but this videoshould at least help you with connecting your engraver to LightBurn once you've plugged it into your computer.
Step 9: Accessories and Conclusion
If you've made it this far, I sincerely congratulate you. The unpredictable nature of the stepper motor mechanisms made this project difficult for anyone looking to recreate it, but you did, or, at least you tried. :) No matter what you did during this journey I hope you learned something valuable because, for me, that is what this project is really about. Pictured above are all the parts, tools, prototypes, and yes, even failures, that led me to the finish line. It doesn't matter what you ended up with as long as you experienced the process.
Anyways, those are my two cents but I still have a few notes for the end.
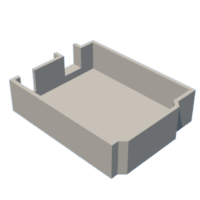
Two unnecessary, but cool looking, pieces I added to the finished Laser Engraver were the electronics case and the wire spool. The electronics case encases the Arduino/CNC Shield unit in plastic and the wire spool offers a way to shorten the laser wire by wrapping it around a center column. These two are largely pointless, but they helped fill the remaining space on the base plate and look nice doing it. The files for them are linked down below.
As a final note, be really careful with this device. It is a fully exposed high power laser that can blind you easily. Every test I've done with this thing has been either inside a larger laser cutter, or with protective eyewear in a completely empty room. Please be safe. You can see the general setup in a picture above.
Alright. That's it. That's all I've got. It's taken a long time to get here, but here we are. Thank you for making it all the way, and I hope you enjoyed it.
Step 10: Never Stop Making

Participated in the
Electronics Contest


