Introduction: Laser-engraved Icosahedron


Memories are captured through photos and often enshrined in the form of picture frames or posters. I was trying to come up with a visual display to celebrate the Toronto Raptors 2018-2019 NBA championship team, and I did not think I could capture everything in one photo. This instructable details my process in creating a laser-engraved icosahedron dedicated to commemorate the Toronto Raptors championship.
An icosahedron is made of 20 equilateral triangles of the same dimensions. In this design, an icosahedron with a side length of 95mm is described. This example takes images from the web to create 20 designs, one for each face of the icosahedron.
Supplies
- 20 wooden 4" square blanks (Link)
- Wood adhesive
- Wood filler
- 10 rare earth rod magnets (1/8" diameter and 1/8" length)
- Sandpaper
- Laser cutter
- 3D printer
Step 1: Design and Prepare Images for Engraving

The first step involves designing a triangular face and using an image editor to prepare for laser engraving.
There are many different ways to prepare photos for engraving and a lot of great tutorials detailing different methods (link). Based on the different photo editors or laser cutters, the steps will be different.
In general, my process is describe below and shown in the image. I chose to use Photopea, a free web-based image editor, which has the color halftone tool that is very useful for converting images for laser engraving.
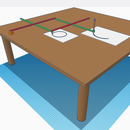
- Create a blank triangular template: The template was drawn on a rather large canvas size is to ensure images maintained high resolution. 2 lines were drawn to outline a triangular border, with the bottom canvas border being the third edge. A sample template file is attached.
- Design and clean file: Images and text were dropped inside the triangular border. Images were manipulated (removing image background, cleaning edges, scaling, converting to black and white, intensity adjustment, etc.).
- Convert file and export for engraving: The image was flattened. Then, the color halftone tool was used at the smallest possible radius with all angles set to 0 degrees. This step converted the image to a set of black dots making it laser-engraving friendly. After this step, the image was saved and exported as an image file, ready to be uploaded to the laser cutter.
This process was repeated for all 20 triangular faces.
Attachments

Step 2: Laser-engraving and Cutting Triangles

The next step was to cut out all designs. The image file would first need to be uploaded to the laser cutter. Before uploading, make certain to scale the image so the print size has a width of 95mm. For this step, I used GIMP, another free image editor.
This step may require some iterations to get the right laser cutting settings (power and speed), which will vary between laser cutters. In general, the point is to get a good contrast between the wood and the engraved sections. Other than power and speed of the laser, some other settings to try for darkening engravings would be to do multiple passes or to change the laser focus height.
After engraving, the triangle will be needed to cut out. An equilateral triangle with sides of 95mm is used for cutting through the material. A DXF triangle template for cutting is attached, as well as a sample engraving image file.
Attachments
Step 3: 3D-Printed Alignment Tool and Hole Etching


After engraving and cutting the 20 triangles, the faces need to be assembled into an icosahedron. My method for alignment was to use a 3D printed tool with 5 embedded magnets for temporarily holding the faces at the correct angle.
There are two parts to alignment.
- 3D printed tool: This tool is a truncated pentagonal pyramid, with holes at the center of the 5 flat faces. 1/8" diameter rod magnets are glued in each hole.
- Backface hole engraving on triangular face: After laser engraving and cutting the triangular face, the triangle is flipped and three holes are etched to mate with the embedded magnets on the 3D printed tool. Laser cutter settings are varied to etch holes approximately 1-1.5 mm deep.
FIles for both the 3D printed tool (STL) and the hole engraving locations (DXF) are included.

Step 4: Assembly of Icosahedron


Using the alignment and tool, triangular faces are positioned in the correct position and angle, constrained by the tool. An extra rod magnet is placed on the outside face of the triangle to temporarily hold the face in place.
First, 5 faces are fixed using the alignment tool, joined at a common vertex. To permanently fix these faces, the edges were glued together. After allowing time for the glue to set, the magnets and alignment tool were removed and re-positioned to another location. This process is repeated to position and glue additional faces until all faces are eventually attached to the structure. The last face can be glued without the use of the alignment tool.
Step 5: (Optional) Finishing Touches

- Before attaching the last triangular face, I glued a larger rare-earth magnet on the interior side of the triangular face. This would give the ability to mount the icosahedron display on a wall (or any other surface).
- For a cleaner look, I applied wood filler to fill in the gaps in between the edges. Excess wood filler was sanded for smooth edges.
- Another optional step is to apply wood finishing touches such as adding stain and varnish.
And that's it! Mine looks a little rough around the edges so maybe spend more time and care into the assembly and finishing stages than I did. Cheers!

Participated in the
Fandom Contest


