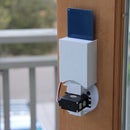
Introduction: Lego Wii Remote Holder
This is a simple modern lego wii remote holder. It leans in a position perfect enough so that it stays in place. Note: Wii Remote needed for holder to work and stay in place.
Step 1: Parts Check
All we need is 1-2x1 Lego brick, 1-3x2 bricks,18-2x4 bricks, and 2-2x2 bricks. Colors are optional. The following are for adding on more holders behind: 1-2x4 and 2-2x3 bricks.
Step 2: The First Layer
This is one of the easiest layers. All we are going to do is assemble a 10x10 square. Take 2 - 2x4s and put them horizontal. Then take 1 - 2x4 and put it vertical right next to the others so it completes a right angle. Repeat to make a 10x10 square.
Step 3: The Second Layer
Step 4: The Third Layer
This step is only going to be on one side of the 10x10 square. We will use 1-2x1 brick, 3-2x2 bricks, and 1-2x3 brick. Place them all on one of the 2x10 lines on the 10x10. This still will come out to be a right angle.
Step 5: The Fourth Layer
This is optional. It is for adding on more of the same holders for more wiil remotes. If you are participating in this step, you will need 1-2x4 and 2-2x3 bricks. First we will find the 2x10 that we put down in the previous step. Then, on top of that, we will put down the bricks metioned in this step. This is the tricky part. Instead of putting them right on top we willl put them 1 stud of of the 2x10 not making a right angle. If you are adding more holders on, put on an extra layer across the side of the old 2x10

Participated in the
Toy Challenge


