Introduction: How to Level, Fill, & Stack a Cake
This instructable will guide you through the steps to level, fill, and stack a tall, bakery quality cake.
Leveling a cake is very important. Luckily it is super simple! It builds the foundation for a uniform cake. You will sometimes hear bakers refer to leveling a cake as 'torting'. It's the same thing, just a fancier word!
The filling of a cake makes it undeniably delicious and there are countless options! We will discuss the best choices based on weather and the environment.
Stacking a cake is as simple as it sounds. We will stack our cake four layers high which should result in a 4 inch tall (maybe slightly taller) cake that looks very professional.
This technique is a breakout lesson from my Cake Decorating 101 collection. If you are interested in learning more about cake decorating please take a look!
Step 1: Leveling a Cake
1. Place your completely cooled cake back in the cake pan and cut the top of the cake off by holding a serrated bread knife level with the top edge of the pan.

2. Move the knife back and forth in a gentle sawing motion until you have cut through the entire cake. Repeat with the other cake and set the tops aside. You can use the leftovers later by making cake top cookies, cake balls, or you can just eat them!! :P
If you do a simple Google or Pinterest search you will find endless recipes for cake top cookies and cake balls.

3. After the top is cut off you should have a cake that is approximately 2 inches tall and is perfectly level.

4. There are two ways to cut this cake into layers. The fastest and most accurate way is by using a cake leveler. I purchased mine at Hobby Lobby for $3.99. It is a simple adjustable wire cake leveler that will easily slice a cake into layers. Adjust the leveler to 1 inch and in a gently back and forth motion cut the cake in half. The other option is to use the serrated knife and estimate where the middle of the cake is and slice the cake into even layers as best you can.


Step 2: Filling Options & Buttercream Recipe
My intention with this instructable is to stick with the basics and make this as easy and enjoyable as possible. For this reason we are going to be making a delicious (and basic) vanilla buttercream to fill our layers but first let's discuss filling options!
There are literally hundreds of recipes and combinations for cake fillings. Some of the more popular fillings include: buttercream, pastry cream, bavarian cream, ganache, curd, jam, fresh fruit, and pudding. With each of these popular fillings comes the countless recipes that go along with each.
Weather plays an important roll in determining which filling to choose. Keep in mind that if the weather is hot your fillings can become soft, thin, or runny very quickly. In turn, gravity will start to pull your cake down if the filling gets warm and the cake will start to sag. This is especially true if you are using a pastry cream, bavarian cream, curd, pudding, or a butter based filling. This can become a disaster very quickly when those fillings start to ooze out at the bottom of the cake or through the sides between the layers. Trust me, as tempting as these fillings may sound, there is a time and place for these delicious treats and it's not hot weather! Another important thing to consider is spoilage. If you are making a cake with a lemon curd filling, or any recipe containing eggs, the cake will need to be consumed within four hours regardless of hot or cold weather. Depending on the level of decoration that will go into/onto a cake, this is often impossible.
Vanilla buttercream is my go-to for most cakes. It goes well with any flavor of cake and will please most guests. During the summer months I highly recommend using the following recipe which includes vegetable shortening. I completely understand that this is not the healthiest option, however, it will stand up to heat and butter will not. I left butter and shortening out in the summer sun for about 15 minutes to demonstrate what will happen with an all butter frosting in the heat!

Keep in mind that you aren't going to be eating buttercream everyday. In the cooler months feel free to substitute the shortening in the following recipe with 3/4 cup butter.
VANILLA BUTTERCREAM FROSTING RECIPE
1/2 cup butter — room temperature
1 cup vegetable shortening
1 1/2 teaspoons vanilla extract (**a word on extract below)
2 lbs powdered sugar
1/2 cup water
**Feel free to experiment with other extracts like: orange, peppermint, almond, etc. Please keep in mind the cake flavor and if you are going to add berries or fruit (more on this in the next step) in the layers. A chocolate cake with orange buttercream and fresh raspberries sounds delicious, but a chocolate cake with lemon buttercream and fresh bananas might not be as pleasing!
DIRECTIONS
1. Place the butter, shortening, and vanilla extract in the bowl of a stand mixer fitted with whisk attachment and whisk on high until smooth. (A hand mixer can be used if you do not have a stand mixer.)


2. Turn speed to low and add 1 pound of the powdered sugar. Mix until incorporated adjusting speed as necessary. Mixture will be lumpy and thick.

3. Add 1/4 cup of the water and mix until everything is well incorporated. Mixture will be thin.


4. Add with remaining powdered sugar and water and whip on high for approximately one minute until no lumps remain. You should have a velvety smooth and spreadable buttercream.

Step 3: Filling & Stacking the Cake
Now that we have our buttercream made we can start assembling the layers. You will need:
- Turntable (If you don't have a turn table you will need a cake base or a cake plate that is completely flat. You could also use an upside down nine or ten inch round cake pan.)
- Masking tape
- Rubber spatula
- 6-inch cake board
- Off-set spatula
- Leveled and cut cake layers
- Buttercream
- 30 Fresh raspberries or other favorite berry or fruit, cut in half or in slices (optional)
DIRECTIONS
1. Place a few pieces of tape on the bottom of your cake board and stick it to the turntable centering it the best you can. Place one of the cake layers (cut side up) directly on the cake board. Many bakers will say it needs to be sealed onto the board with buttercream or ganache, however, I find this to be an unnecessary step when using freshly baked cake. If you have allowed your cakes to dry out or if you freeze them this would become an issue, but ours will have enough moisture to 'stick' on it's own.


There are two basic methods for applying layers of buttercream. Choose one you feel works best for you.

METHOD #1
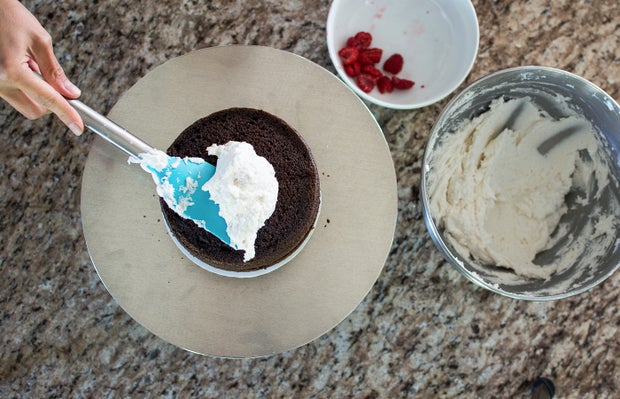
a. Spoon about 3/4 cup of buttercream onto the first cake layer and smooth and level the buttercream with an offset spatula.


b. By spinning the turntable and holding the spatula steady you should achieve a relatively smooth and level layer.
METHOD #2
For this method you will also need:
- Wilton A2 piping tip
- 12 inch piping bag
- Scissors
- Large coupler
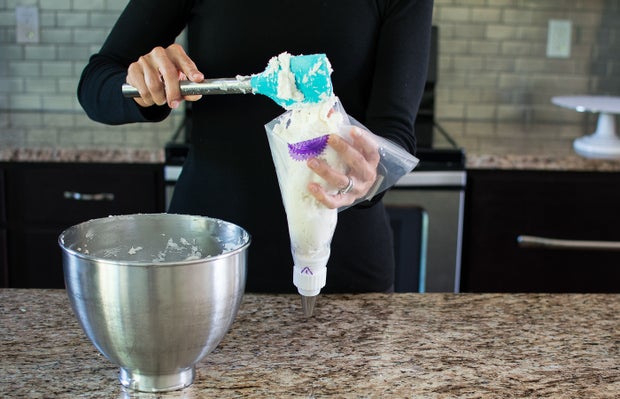
a. Cut the tip off of the piping bag and assemble the coupler with the tip. (A resealable freezer bag can be used in substitution for a piping bag. You can either cut one corner off of a freezer bag making a hole big enough to squeeze the buttercream out, or assemble the freezer bag with the tip and coupler. The disadvantage to using a freezer bag is they almost always blow out at the seams and buttercream starts spewing out everywhere. It can be done though!!)


b. Spoon a generous amount of buttercream (1 1/2 to 2 cups) into the prepared piping bag.


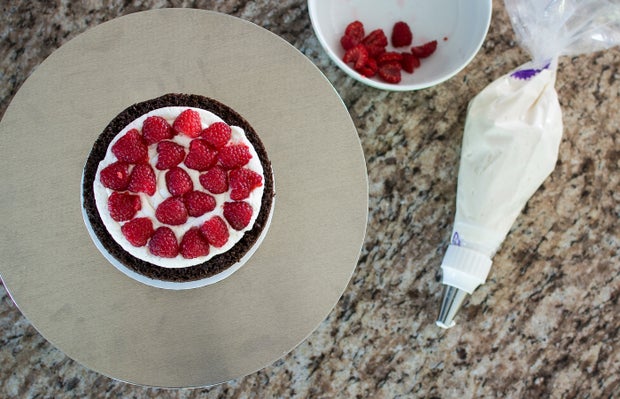
c. Hold the round tip in the center of the cake and squeeze the bag firmly in a circular motion until the cake is evenly covered with buttercream. Leave a little bit of the edge of the cake showing. The buttercream will spread to the edges once all layers are stacked.

2. Cut raspberries in half and place a layer of berries directly on top of the buttercream. You can omit berries entirely if you do not want them in your cake layers! You can also use any other berry or soft fruit. If you choose strawberries (for example) you may need to cut them into slices instead of just in half.


3. Stack with the second layer of cake and repeat the process two more times.

4. Gently press the top layer down to mold the buttercream around the berries. Once you are finished snap a photo and upload it in the class project section below. Don't forget to tell us if you changed up the cake or buttercream flavors and/or the fruit!

If you aren't moving onto the next lesson right away, wrap your cake tightly in plastic wrap. Leave it at room temperature, for up to 24 hours, until you are ready to crumb coat.


