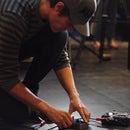
Introduction: LinkIt ONE Drum Synth Part One


I've always been interested in playing the drums but never had the funds/time/space/forgiving neighbors to allow me to own a drum set. There are a few electronic drum sets out on the market that offer synthesized drums at a reasonable price, but I figure building one of my own can be just as fun!
I wanted to create a drum synth that was portable and modular yet simple to set up and use, allowing me to perform an impromptu Phil Collins' In the Air of the Night drum intro on a park bench or subway platform. This project was developed on the LinkIt ONE board: an open source prototyping platform jam-packed with features like onboard audio, SD card, Bluetooth, Wi-Fi, GPS, built-in API...the list goes on! If you've ever prototyped with Arduino, the LinkIt ONE is like its smarter, beefier cousin. So, grab ONE and let's Link It up! ::rimshot::
This is part one of my LinkIt ONE drum synth tutorial, which focuses on creating the kick drum, bluetooth receiver and audio portion of the drum synth. Keep following me for my upcoming part two on wireless drum sticks!
Step 1: Gather Materials

For this project you'll need at least these basic materials:
- A LinkIt ONE board - the brains behind the operation! Although other Arduino-compatible boards would work, this one has all the built in features we need to connect and play music easily! The code I've provided is also made specifically for the LinkIt ONE's audio, bluetooth and memory storage system.
- At least one piezo disc for each drum sensor you want to use
- One 1Mohm resistor for each piezo disc
- Wires, wires, and more wires
- Soldering iron and solder (not needed if your piezo comes pre-wired)
Step 2: Make a Da Piezo!

Most piezos (a.k.a piezoelectric sensor or piezo disc) don't come pre-wired, so you might need to solder two wires onto the piezo before you can use it. Soldering wires to the piezo can be a little difficult at first since they are easily damaged and come with a thin layer over the center of the disc (the part you need to solder one wire onto). But with practice you'll be able to drum out 3-4 in no time!
- Prepare the disc for soldering by lightly scratching a spot on the white center of the piezo with a razor or small file. Don't press to hard, just scuff it up so the metal shines through a little. You can also scuff a small corner of the disc's outer ring if you want.
- Heat up the soldering iron, prep and tin two wires with a little bit of solder. This will help the wires 'grab' onto the piezo disc more easily when soldering.
- Solder the first wire to the rim of the piezo disc, this is usually the ground wire. Let the piezo cool before the next step.
- Once the rim wire is soldered firmly onto the piezo's edge, carefully solder the second wire onto the scratched center area of the disc. Don't hold the soldering iron on the piezo disc too long as it may damage the disc. You may need to use a small tweezers or pen tip to hold the wire in place as it cools.
Repeat these steps for each of the drum sensors you want to use. For this instructable I've only attached one for the kick sensor, but you could add as many sensors as you have analog in ports.
Step 3: Wire the Piezo to the Board

The wiring for this project is pretty simple, just connect the piezo's outer ring wire to the Gnd of the LinkIt ONE, and connect the piezo's center wire to the analog in port A0. Place a 1M resistor in parallel by connected it to the two piezo wires. This acts as a 'pulldown resistor' to help keep the analog input from bouncing around while the piezo isn't being hit.
If you want to use two more drum sensors (like a hi-hat or double kick), connect them in the same manner to the analog in ports (A1 & A2) as well as Gnd. Don't forget to use a 1M resistor for each piezo.
Step 4: Load Code and Drum Audio Files to Your LinkIt ONE Board

One of the best features of the LinkIt ONE board is the 4MB of flash memory storage, easily enough room for our drum sounds. Loading the files is just a flip of a switch!
- Switch the LinkIt ONE's USB switch to 'MS' for Mass Storage
- Plug the LinkIt ONE into your computer. It should automatically recognize the storage device.
- Download the attached zip of drum .wav files and unzip them to your LinkIt ONE's memory.
Don't forget to flip the switch back to 'UART' before loading the code!
You should now be ready to load the Arduino sketch LDrummer.ino onto your LinkIt ONE. Download the sketch into your Arduino library, open it and upload it to your LinkIt ONE (you've already installed the LinkIt ONE libraries, right??).
Attachments

Step 5: Testing the Audio Output and Drum Piezo

Plug a pair of headphones into the LinkIt ONE's audio jack and open up the serial monitor to the same port and baud rate that you set in the sketch code (default is 57600). Type any of the following lowercase characters into the serial monitor to test each drum sound (they are case sensitive):
Hard hi-hat: q Soft hi-hat: w
Hard crash 1: e Soft crash 1: r
Hard crash 2: t Soft crash 2: y
Hard ride: u Soft ride: i
Hard snare: a Soft snare: s
Hard tom 1: d Soft tom 1: f
Hard tom 2: g Soft tom 2: h
Hard floor tom: j Soft floor tom: k
Increase volume: + Decrease volume: -
Also test the kick drum piezo by tapping it with your finger. You should be able to hear it with each tap, but if it's not working (or double hitting) you may need to adjust the settings in the sketch:
- Increase KICK_LEVEL from 30 to 50 or more if it's too sensitive
- Decrease KICK_LEVEL from 30 to 20 or 10 if it's not sensitive enough
- Increase KICK_TIME from 100 to 250 or even 500 if you're getting double hits with each tap
Check your wiring if the drum piezo is randomly hitting even without touching it. You should be able to tap as fast as you want and clearly hear each drum hit. Play with the settings until you feel comfortable with the responsiveness.
Step 6: Future Goals and Better Drum Rolls
Once you've got your keyboard-controlled drum synth up and running, you might be wondering "what's next?" While this is a great first step toward a complete 10-piece drum set, there are a few things that need to be improved:
For now, this drum synth is monophonic. What that means is you can only play one sound at a time, and each successive hit/kick will cutoff the previously sounded drum. I'm planning on designing a polyphonic (two or more sounds played simultaneously) drum synth that can blend .wav audio files (using LinkIt ONE play .wav buffer API) in the near future.
Better volume control: Currently the LinkIt ONE audio offers 6 levels of volume control. It would be nice to have an analog volume control knob for a smoother range of audio values.
More voices: I plan on adding more voices to the drum synth, most likely by utilizing LinkIt ONE's onboard SD card slot. Switching between voices or setting up individualized drum sounds could be done with an LCD display and two or more buttons
Wireless drum sticks: I have been working on a pair of wireless drum sticks that have built-in sensors for angle and movement using MPU6050+HMC5883L motion sensors and bluetooth. I will post a separate instructable in the near future for anyone interested in building their own!
MIDI support: Because the LinkIt ONE offers two Serial ports (Serial USB and Hardware Serial1) I plan to add a MIDI out port. An explanation for MIDI wiring and set up can be found in the sketch code, though I haven't tested it as of yet.
So that's where I'm at so far, feel free to leave your ideas, suggestions and questions in the comments section below. Check out future posts with videos and updates in the coming weeks. Happy holidays!

Participated in the
Tech Contest


