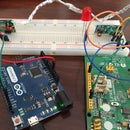
Introduction: LinkIt ONE Music Player
The LinkIt ONE is a great development board I had my chance to put my hands on. It runs above ARMv7 and provides arduino compatible interface, GSM, wifi, GPS, microSD Card slot, audio out port and more.
This instructable provides an easy solution for a media player running above the LinkIt ONE and triggered by buttons, where each button triggers different sample.
Step 1: Supplies
- LinkIt ONE development board
- 4 buttons (each button for each sample, you can use more if you'd like)
- 4 330Ohm resistors
- microSD Card
- breadboard
- some jumper wires
Step 2: Wiring
Wiring step is pretty straight forward.
Each push button has 4 legs, where we use only three of them (since two of them are shortened):
- Leg 1 is shortened to 5V (Red wire in the sketch).
- Leg 2 is shortened to GND through a 330 Ohm resistor.
- Leg 3 is shortened to a digital data pin on our board.
The data wires provide a LOW signal until the button is pushed, and then, we receive a HIGH signal, which triggers the relevant sound sample or song.
Step 3: Preparing the SD Card
Formatting
SD Card should be formatted as FAT. In case you're running into troubles, you should be able to find plenty of information online, just google it :)
Files
Move the sound files you wish you play, remember their names, you need it for next steps.
Step 4: Preparing the LinkIt ONE
Insert microSD Card
Behind the LinkIt ONE board you should find the slot to enter the SD card. This slot is pretty cool, on the front you can slide your SIM card, and from the side you can slide your microSD card in. It should fit perfectly inside, and you should feel the "click" when it's inserted.
Switch to SDCard Mode
We need to switch the LinkIt ONE into SDCard Mode, it can be done by moving a switch that can be found on the board. The switch needs to point to the 'SD' label, as shown at the pictures above.
Step 5: Coding
The code is pretty straight forward. We need to configure few things to make it work:
- Make sure the pins are wired correctly to the buttons (this is the XXX_BTN_PIN define).
- Make sure you configure the sound filenames (this is the XXX_BTN_NAME define).
- If you want it to work out of the box you need to comment the 'while (!Serial)' line.
#include <LSD.h>
#include <LAudio.h>
#define RED_BTN_PIN 4
#define BLU_BTN_PIN 5
#define YLW_BTN_PIN 6
#define GRN_BTN_PIN 7
#define RED_BTN_NAME (char *)"1.mp3"
#define BLU_BTN_NAME (char *)"2.mp3"
#define YLW_BTN_NAME (char *)"3.mp3"
#define GRN_BTN_NAME (char *)"4.mp3"
void play(char * filename) {
LAudio.setVolume(5);
LAudio.playFile(storageSD, filename);
Serial.print("Playing ");
Serial.println(filename);
delay(5000);
}
void setup() {
Serial.begin(9600);
while (!Serial);
Serial.println("Initializing SD Card...");
LSD.begin();
Serial.println("Card Initialized.");
pinMode(RED_BTN_PIN, INPUT);
pinMode(BLU_BTN_PIN, INPUT);
pinMode(YLW_BTN_PIN, INPUT);
pinMode(GRN_BTN_PIN, INPUT);
}
void loop() {
if (digitalRead(RED_BTN_PIN) == HIGH) play(RED_BTN_NAME);
else if (digitalRead(BLU_BTN_PIN) == HIGH) play(BLU_BTN_NAME);
else if (digitalRead(YLW_BTN_PIN) == HIGH) play(YLW_BTN_NAME);
else if (digitalRead(GRN_BTN_PIN) == HIGH) play(GRN_BTN_NAME);
}
Attachments
Step 6: Playing!
Plug in your speaker to the AUX port on the board and enjoy it :) I promise you will be surprise with the quality!
Thanks,
Aviv Mussali.


