Introduction: Lite3DP S1: MSLA 3D Printer, Arduino Based and Open Source

Please visit Lite3DP to find all the latest information.
Everything contained in this project is under the license Creative Commons 4.0: Attribution Non-commercial Share Alike (by-nc-sa).
This project contemplates 2 ways to build your Lite3DP S1:
A) Complete Kit: the simplest way, you will only need to assemble the components of the kit. You can get the Complete Kit on Crowd Supply.
B) From scratch: you will need to laser cut metal plates, order the PCB, get the electronic and mechanical components, solder, 3D print the parts, cut the vinyls and more. In this case it is highly recommended to get the injected tray (VAT) on Crowd Supply in order to avoid any possibility of resin leakage or breakage.
Related Links:
Lite3DP Instructions and downloads
Last update: September 2021.
Supplies
Here are the bill of materials if you want to make your Lite3DP from scratch:
Attachments

Step 1: Crowd Supply Complete Kit
You will only need to assemble the kit, according to the video. Don't miss the quick start guide!
In the complete kit the Arduino board is delivered with the firmware preloaded and the stepper motor driver with the correct current.
Note: You will also need MSLA 405nm resin and a micro SD card to start 3D printing.
Step 2: From Scratch


Get the components: "Components.pdf".
Tools needed: Allen key set, hand tap thread set M3 and M4, small hacksaw for metal, cyanoacrylate adhesive, electronic soldering iron, soldering tin, tweezers.
Note: You will also need MSLA 405nm resin and a micro SD card to start 3D printing.
1) Order your PCB. (Gerber file available on Github)
2) 3D print these 3 parts in black PETg with 3 perimeters and 40% infill (no support needed): "Carriage.STL", "Base.STL" and "Support.STL"
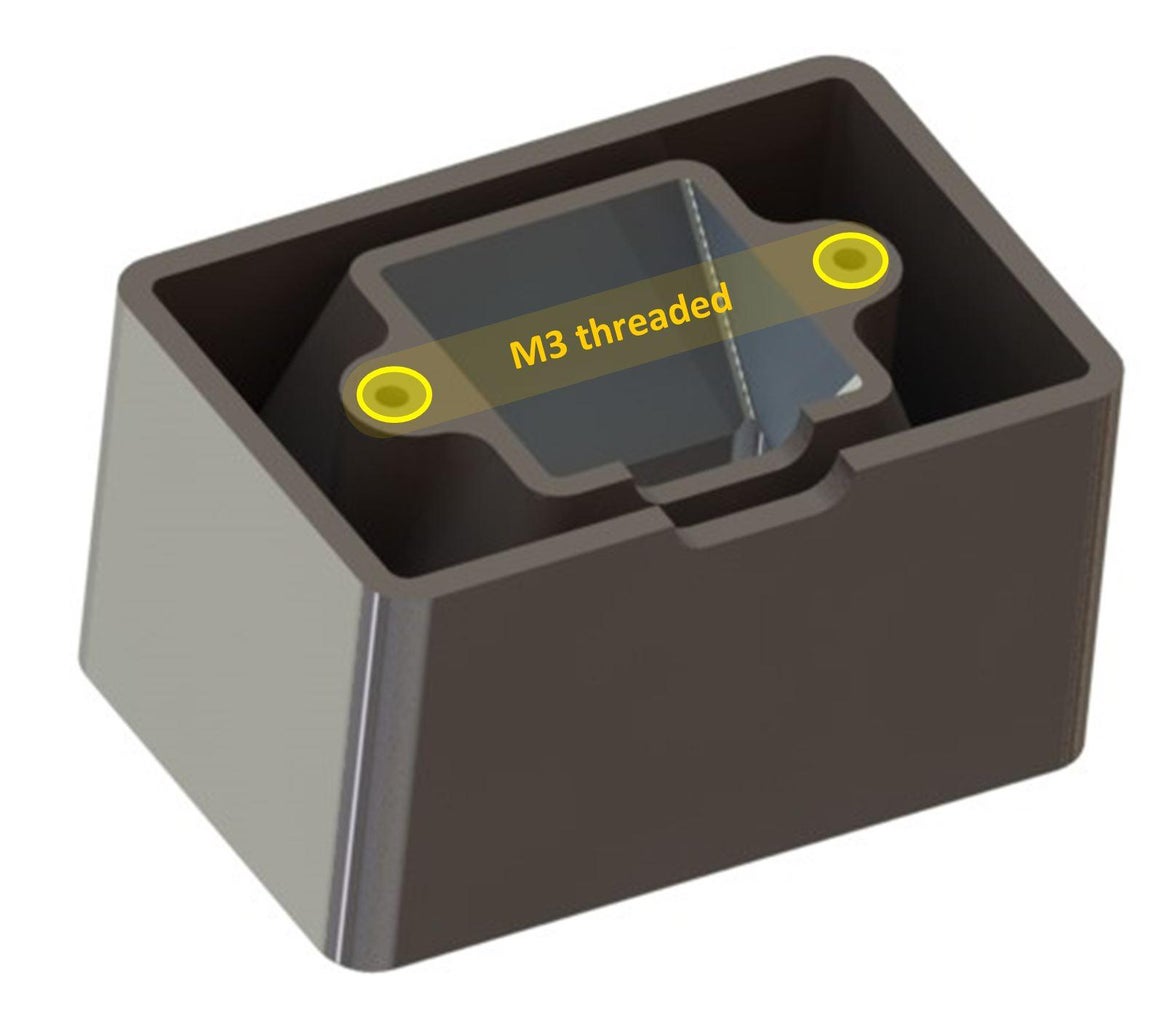
3D print in PLA with 3 perimeters and 60% infill (no support needed) any of the three tray models. It can not be printed on PETg or ABS as the resin chemically reacts with them. As previously stated, it is highly recommended to get the injected tray (VAT) on Crowd Supply in order to avoid any possibility of resin leakage or breakage.
Tray (VAT) Model A: to make a through M3 thread.
Tray (VAT) Model B: to make a blind M3 thread.
Tray (VAT) Model C: to use M3 nuts. (add 4 M3 nuts to the list of required components).
3) Order your laser cut metal plates:
- Base in 2 mm thick aluminum.
- Platform in 3 mm thick aluminum.
- VAT frame in 1/8" (3.175mm) thick steel (ferromagnetic - to be attracted to magnets).
4) Order your electronic components and solder them on the PCB. Here is the list: Mouser. (terminals for the stepper motor: Mouser). -See: "PCB BOM.pdf"-. Read "Assembly details and instructions.pdf"
5) Order your vinyl cuts in matte black. These vinyls have the function of holding the screen to the PCB and preventing the passage of UV light. (The largest vinyl goes on the bottom of the PCB. Look at the LCD against light to apply the vinyl on its edges).
6) Glue the 9x3mm magnets to the PCB.
7) Make the threads according to the attached images (M3 and M4).
Cut the M4 threaded rod to a length of 24 mm. This is threaded and glued with cyanoacrylate to the aluminum platform. Finish assembling the platform with the ball on the other end of the threaded rod.
Place the magnet inside the carriage.
Cut the POM nut.
8) Upload Arduino firmware. Download it from Github.
9) Adjust stepper driver current to 280 - 300 mA (0,28 - 0,3 A). (Tutorial onYoutube).
10) Assemble the components according to the section: "Crowd Supply Complete Kit".
Check the official page for instructions, tips and downloads: Lite3DP


