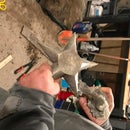
Introduction: Lost Foam Cast Skulls
Why lost foam skulls, Why not I say...
Aluminium skulls are to casting, what 'hello world' is to computer programming and what flashing led's are to electronics.
My Sons were very keen to get there own cast skulls (as too was my Daughter as it turned out).
Lost foam, casting has been in my experience one of the single most effective methods of getting good quality results.
Of course you cant get everything pre made in polystyrene or Styrofoam to use as a mould but there is quite a few different things available off eBay and specialist stores.
Also if you have access to a CNC router or hot wire cutter this opens up a whole world of possibilities.
Step 1: Adding the Sprue
A sprue is the path that the molten metal follows to enter a part.
In the lost foam method a sprue is constructed by hot gluing some scrap packaging polystyrene onto the top of the skulls.
I chose to orient the sprue onto the top of the head for the more regular shape for finishing afterwards and also because if done upside down you could run the risk of trapped pockets of air or gas due to the irregular shape.
In lost foam casting once the molten metal contacts the polystyrene it quickly burns and changes to gas and the molten metal fills the void left behind which is of course an excellent negative.
In these the moulds the sprue assemblies were I guess 7cm or so long.
Step 2: Adding the Sand
The sand that I am using here is commercially prepared greensand. It is quite fine and takes detail quite well.
I have successfully used loose play sand in the past with acceptable results but find this to give a better finish.
In the beginning I add a layer of 3cm or so of loose pre sifted sand in the bottom as a bed and then follow it up surrounding the part in sand then compressing with my fingers. This is repeated taking care not to damage the polystyrene part. In the end the sand is compacted such that even tilting the can partially on it side is not sufficient to tip the contents out.
Step 3: Melting the Metal
I am using aluminium from ingots from pre melted cast car parts and some freshly melted scrap from a corroded old pump housing.
In the first photo I am skimming the dross (oxidised metal and rubbish). Pre melted scrap ingots give a cleaner melt with less dross.
I do not use any salt or washing soda as some on YouTube etc do as I haven't found it particularly useful myself.
In the second photo I am pouring the molten aluminium into the moulds, you can clearly see the foam burning away. Only this one burnt with a flame, the others just burnt with black smoke only.
On a larger part there is a lot more flames and smoke. Once you start pouring, keep pouring otherwise you risk the sand potentially collapsing in and impacting on the finished quality of your part.
Step 4: The Results, As Cast
Here we can see the final results as cast.
The detail is good and there are few problems with the casts.
The only thing I have done to these casts is to pull it from the sand and scrape off some sand with my pliers.
Step 5: Once Finished
The cast parts had the sprues cut off with a portable bandsaw (a hacksaw would have easily sufficed) and then they were sanded smooth with a flap disc on a grinder.
To make the surfaces regular I then wire brushed all 3 casts on a bench grinder and then buffed and polished 2 of the 3.
The whole process is documented on a clip on my YouTube channel if you are interested.
Open to any constructive feedback and ideas. Hopefully you enjoyed this or found it of use.

Participated in the
Halloween Contest 2018


