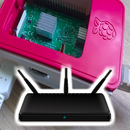
Introduction: Make Time Lapse Videos Using Raspberry Pi (11 Lines of Code)
I recently planted some seeds in my table pot for the first time. I was really excited to watch them grow, but as we all know it's a slow process. Unable to see the growth got me really disappointed but suddenly electronics hobbyist inside me woke up and decided to rig-up Raspberry Pi and its camera to capture this slow process and turn it into a beautiful time-lapse video.
Here I present instructions to make such beautiful time-lapse videos. Lets get started.
Step 1: Quick Video
Here is a small video, that summaries every thing in 6 mins (including beautiful 2 mins time-lapse footage).
Step 2: Things Needed
Description: We will use Raspberry Pi camera to capture images, Raspberry Pi will be programmed to capture images on regular intervals. SD card(preferred 16GB) will host raspbian and store captured images. SD card reader will be used to interface SD card with laptop/PC over USB for flashing raspbian. Ethernet cable will put headless Raspberry Pi on network and we will be able to access it through our laptop/PC also connected on same network (You can put your laptop/PC and Raspberry Pi on same network by connecting them using a single Ethernet cable). 5V/2A USB supply will power our Raspberry Pi. Additionally you can get your hands on Raspberry Pi camera stand.
List of things needed:
Step 3: Software Requirements
Description: Raspbian jessie OS for Raspberry Pi, we will use its features like nmap,ssh,scp and python3. Openshot video editor for converting image sequences into time-lapse videos(This is a video editor that I used on my linux laptop, you are free to choose video editor of your preference).
Software requirements:
Step 4: Installing Raspbian on SD Card
Description: First thing to do is to get our Raspberry Pi up and running. To do that we need to first download Raspbian OS from raspberrypi.org. Once downloaded, we need to write the image of this OS on our SD card. Follow these steps to install Raspbian on SD card.
Steps:
- Go to raspberrypi.org and download latest version of Raspbian,
- Insert your SD card in SD card reader,
- Insert SD card reader in your laptop/PC,
- Follow THIS LINK to upload OS on your SD card. Link contains instructions for laptops/PC running windows, MAC and Linux, follow as per your requirement.
Now Insert this SD card in your Raspberry Pi and read up the next step [don't get too eager to turn on your Rpi ;) ].
Step 5: First Boot
Description: Before powering on Raspberry pi, use Ethernet cable to put headless(one without any display) Pi and your laptop/PC on same network. Now power on your Pi using 5V/2A power supply. Thats your first boot, but nothing to see right, just few LED blinks on Raspberry Pi and continuous blinking of network LEDs. Wait, Next step is where you enter your Raspberry pi :).
Step 6: Find IP Address of Pi and Remote Access Raspberry Pi
Description: Now we need to find IP address of Raspberry Pi connected on same network as your laptop/PC. In case you are using Linux OS on your laptop/PC, type ifconfig to find IP address of your laptop/PC. We can find IP address of Raspberry pi using one of the following two methods.
Methods to find IP address:
- Use nmap command on your linux machine to scan your subnet and note down IP that appears for raspberry pi foundation.
- Use USB to UART converter and follow THIS LINK. This will allow you access to Raspberry Pi, there again you can use ifconfig to find IP address of Raspberry Pi.
Once you find IP address of Raspberry Pi, you can access Raspberry Pi using SSH on linux and PuTTY on windows machines.
Step 7: First Access Part 1: Expand Filesystem
Description: On first boot enter Raspberry Pi using SSH. We need to perform 2 important configurations i.e. Expand Filesystem and enable camera interface. By expanding file system you can ensure that all of SD card storage is available to OS. Steps to perform this configurations are as follows.
Steps to Expand File system:
- Once you SSH in to your Pi using its IP address, type 'sudo raspi-config',
- Raspberry Pi Software Configuration Tool will popup, select 'Expand Filesystem' and press enter,
- You will get a popup saying 'Root partition has been resized. The filesystem will be enlarged upon next reboot', again press enter,
- Exit the configuration menu,
- Again a popup saying 'Would you like to reboot now?' will show up, select 'yes' and press enter,
- On reboot, SSH in to Pi and type 'df', This will show details of your expanded filesystem.
So now you have your expanded filesystem, lets enable the camera interface.
Step 8: First Access Part 2: Enable Camera Interface
Steps to enable camera interface:
- SSH in to Pi using its IP address and type 'sudo raspi-config',
- Raspberry Pi Software Configuration Tool will popup, select 'Enable Camera' and press enter,
- You will get a popup saying 'Would you like the camera interface to be enabled', select 'yes' and press enter.
- A confirmation popup will show up saying 'The camera interface is enebled', press enter.
- Exit the configuration menu.
Now that all configurations are done, turn off your Raspberry Pi and go to next step.
Step 9: Connect Raspberry Pi Camera
Description: Now once Raspberry Pi is turned off, connect your camera in CSI connector of Pi. Orient camera connector strip as shown in image. Finally again turn on Raspberry Pi.
Step 10: Code
Description: Our code is written in Python3 and its just 11 lines of code. First 3 lines imports classes from packages, next we have an infinite loop that creates camera object and takes a snap periodically. We can execute this python code using python3 command. Instead of executing this code manually, we can put this execution command in /etc/rc.local file. This will ensure that each time Raspberry Pi boots this script will get executed, meaning camera will start capturing images. Don't forget to put ampersand (&) at the end, in rc.local file's execution command as our code contains infinite loop.
You can even download this code from GITHUB.
Step 11: Transferring Images From Raspberry Pi to Your Laptop
Description: Once you capture few images on your Pi, you will get eager to take a look at your pics. Use 'scp' command to transfer images from your Pi to laptop. Format of scp command can be seen in above image.
Step 12: Converting Images in to a Time-lapse Video
Description: Once all images are imported to your laptop. We can use our video editors to convert this image sequence in to a beautiful time-lapse video. If you are on linux, you can use following steps to do the same.
Steps:
- Open 'OpenShot' video editor (install it from software center),
- Set time you want to allocate to each frame from Edit->Preferences menu,
- Import images in video editor by right click in Project files area and left click on import files,
- Once Imported, select all images and again right click and select 'Add to timeline',
- Take a look at preview and finally export your video from File->Export Video.
On exporting you will receive your beautiful time-lapse video, Take a look at it and ...... (I don't know, get the feeling).
If you want to look at my time-lapse videos take a look at video in step 2. That's all for this instructables, Thank you for your time.
If you liked this instructable there is a good chance that you will love my youtube channel.


