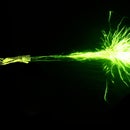
Introduction: Make a Light Explosion With Gimp or Photoshop
This instructable shows you how to make a cool light explosion; projected from your hand. Remember this is just a guide on how to do this kind of thing.
Step 1: Get Your Picture
First you need your photo to use, you need a firework, the best firework to use for a hand controlled explosion is a lone one with a flower shaped end. Most newer cameras have a firework mode, so use that the photo gives the firework a tail.
Step 2: Open You Image Editor
As the title says open your image editor, in my case gimp, but in others photoshop or similar, once that is done add your firework.
Step 3: Trimming It
I say trimming but I mean just taking of the bits which just get in the way, and stop the photo from looking as good.
So if you have any unwanted bits bring up the layer window (ctrl-L) and right click the photo layer and select Add layer mask, the from the pop-up window click the top option (White (full opacity) then go onto paintbrush and select the colour black, and paint over the unwanted parts. If you have not added a background then the colour should come out chequered, and if you do have a background it will come out the colour of your background. Now on the layer window right click the layer and choose Apply layer mask. Then go onto paintbrush and select the colour black, and paint over the parts you deleted.
So if you have any unwanted bits bring up the layer window (ctrl-L) and right click the photo layer and select Add layer mask, the from the pop-up window click the top option (White (full opacity) then go onto paintbrush and select the colour black, and paint over the unwanted parts. If you have not added a background then the colour should come out chequered, and if you do have a background it will come out the colour of your background. Now on the layer window right click the layer and choose Apply layer mask. Then go onto paintbrush and select the colour black, and paint over the parts you deleted.
Step 4: Making the Firework Green
Now you need to change the colour balance, by going Colours - Colour Balance. Then set the amounts to:
Shadows
Red - 0
Green - 100
Blue - 0
Midtones
Red - 0
Green - 100
Blue - 0
Highlights
Red - -30
Green - 100
Blue - -100
And remember this is just a guideline to get green electrocution.
Shadows
Red - 0
Green - 100
Blue - 0
Midtones
Red - 0
Green - 100
Blue - 0
Highlights
Red - -30
Green - 100
Blue - -100
And remember this is just a guideline to get green electrocution.
Step 5: Adding a Person
Now you need someone to shoot this electricity, so get someone, or something get them, or it to pose the take a picture. The only prop my brother used was a glove. Then go to gimp and click on File - Open as layers and select your photo. If you need to rotate it do so.
Step 6: Getting Rid of the Background
Now you will notice that your photo has a unwanted background, so you do the same as before, you add a layer mask and delete the background. Instead of applying the layer as soon as every thing but the subject (person, item), you need to blur it, so go onto the Blur/Sharpen tool select Blur, and then set the rate to 60. Then once you've blurred the entire outline you apply the layer mask.
Step 7: Moving the Blast
Now time to move, and rotate the firework to suit the person, so I adjusted the rotation to about 90 degrees clockwise, and move it down and to the right. Then you face the problem that your previous black background has been lost,but that can easily be fixed with layers, so add a new layer (white) then select bucket fill and black and fill in the entire background. Note that you will have to make this the bottom layer otherwise you won't see the other items. Then just to finish off make sure that the firework layer is just above the background layer, then right click it and choose Merge down.
Step 8: Lighting
Now it is time to add some lighting, but gimp doesn't have a camera to tell what's behind what so we have to do it ourselves. So select black and Bucket fill, then fill in the shaded parts even more. Then select Filters - Light and Shadow - Lighting effects. Then choose a colour that is similar to the firework and then set the position of the light where the light would really come from. Note that you would probably have to change the intensity of the light, to make it more realistic.
Step 9: Cutting and Trimming
Now all you need to is to trim the picture and by that it is easy as clicking on Image - Canvas Size, then just click on the chain to make it break, then lower the hight number. You will probably have to offset on Y by about 500.


