Introduction: Making a Flint and Steel From an Old Carbon Steel File
I had a bit of file left over from the bush knife instructable, and decided I'd make myself a new firesteel. Since I already knew that the file was fully tempered, high carbon steel, it would be perfect for the job. (you can see my bushknife instructable on selecting your file, and ensuring it's not just case hardened).
Like the knife fabrication, it's important to keep cooling the steel as you're shaping it to prevent it from losing it's temper. I recommend keeping a spray bottle nearby and stopping often to drench the metal.
Like the knife fabrication, it's important to keep cooling the steel as you're shaping it to prevent it from losing it's temper. I recommend keeping a spray bottle nearby and stopping often to drench the metal.
Step 1: Tools and Supplies
Equipment;
Angle Grinder w/ cut-off disk, grinding disk, and sanding disk - For doing most of the rough work
Belt Grinderw/ 60,100,150, 220, 300 grit belts - Fine shaping and polishing
Propane Torch - used to anneal the handle
Bench vise/anvil - bending the metal
vice grips - holding the file
spray bottle of water - cooling the metal to prevent loss of temper
Step 2: Shaping Your Steel
I already had an idea of how I wanted it be shaped, so I didn't bother drawing it out. This steel would be built freehand, based on one that I'd seen in a Museum in Toronto from around the 1750's, during the time of the French Indian War. I used the angle grinder, with the cut off wheel to slice off one side of the file, then switched to the grinder disk to rough out it's basic shape.
Step 3: Cleaning Up the Sides
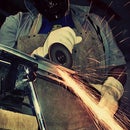
Again using the angle grinder, I removed the grooves from the file, thinning the bar slightly. As you can see from the pic, this can build up a lot of heat, so it's important to stop often to spray it down. An important benchmark is to watch for discoloration in the metal from over heating. If you see the metal turn blue, you've waited to long and risk losing your temper.
Next, I used the sanding wheel on the angle grinder to smooth down the sides a bit more. Working with the grinding wheel can leave pits and grooves that, although don't hurt operation, can seriously detract from the look of your firesteel.
Next, I used the sanding wheel on the angle grinder to smooth down the sides a bit more. Working with the grinding wheel can leave pits and grooves that, although don't hurt operation, can seriously detract from the look of your firesteel.
Step 4: Finishing the Surface
After I got it smooth enough with the angle grinder, it was time to start working it on the belt grinder. Starting with the 60 grit belt, I reduced the sides until there was no pitting left, and the steel had a nice flat surface. I also beveled the striking edge down from .200" to .150". The narrower striking platform seems to allow the steel to throw off more sparks when struck against the flint. I tried a variety of different widths from .200", down to .080" but found that around .150" was an optimal width.
After finishing the overall design, I progressively sanded with finer and finer belts until I got the finish I wanted, stopping at 300. I knew I would be hammering it to bend the tang, and wasn't to concerned with giving it a polish. Plus, annealing the tang would change the color of the metal, adding the protective patina, giving it a 'forged' look.
After finishing the overall design, I progressively sanded with finer and finer belts until I got the finish I wanted, stopping at 300. I knew I would be hammering it to bend the tang, and wasn't to concerned with giving it a polish. Plus, annealing the tang would change the color of the metal, adding the protective patina, giving it a 'forged' look.
Step 5: Heating and Bending
Not having an acetylene torch, I figured that the metal was thin enough that two smaller propane torches would do the trick. I started by heating the end to red, then slowly moving up the tang, until I reached the striking platform. Next, I picked the spots where I wanted the metal to bend and concentrated the heat in that spot.
Working this way, you can't really do the bend all at once. Basically, it's a system of heat, hammer,re-heat hammer etc. repeating the cycle about half a dozen times until the proper shape is attained. Take your time and don't rush. If the metal cools to much and you continue to hammer at it, you could fracture it, or worse, it could shatter and you could lose your whole piece.
Working this way, you can't really do the bend all at once. Basically, it's a system of heat, hammer,re-heat hammer etc. repeating the cycle about half a dozen times until the proper shape is attained. Take your time and don't rush. If the metal cools to much and you continue to hammer at it, you could fracture it, or worse, it could shatter and you could lose your whole piece.
Step 6: Finishing Your Steel
Once you have your steel shaped, it's time to finish it off. You can keep sanding up to 2000 grit (wet) if you want a polish, however, I prefer a rougher look. The hammering process gives it a bit of a forged look, so I simply gave it a buff on the wire wheel, then a light wet sanding with 600 grit paper to give it a shine.
Step 7: Testing Your Steel
Here's the flint and steel in action. Hope you enjoyed the instructable as much as I enjoyed making it.


