Introduction: Maze Solving Robot (Boe-bot)

This how-to will show you how to design and make your very own maze solving robot, using simple materials and a robot. This will include coding as well, so a computer is also needed.
Step 1: Find a Chassis

In order to build a maze solving robot, one must first find a robot. In this case, my class and I were instructed to use what was at hand, which, at the time, was the boe-bot (see above). Any other robot which allows for inputs and outputs as well as programming should work as well.
Step 2: Building Your Sensors


This is a large step, so I will break it down for you into three sections: 1. Bumper S (solid) 2. Joint 3. Bumper M (moving) (These all correspond to the order of images above)
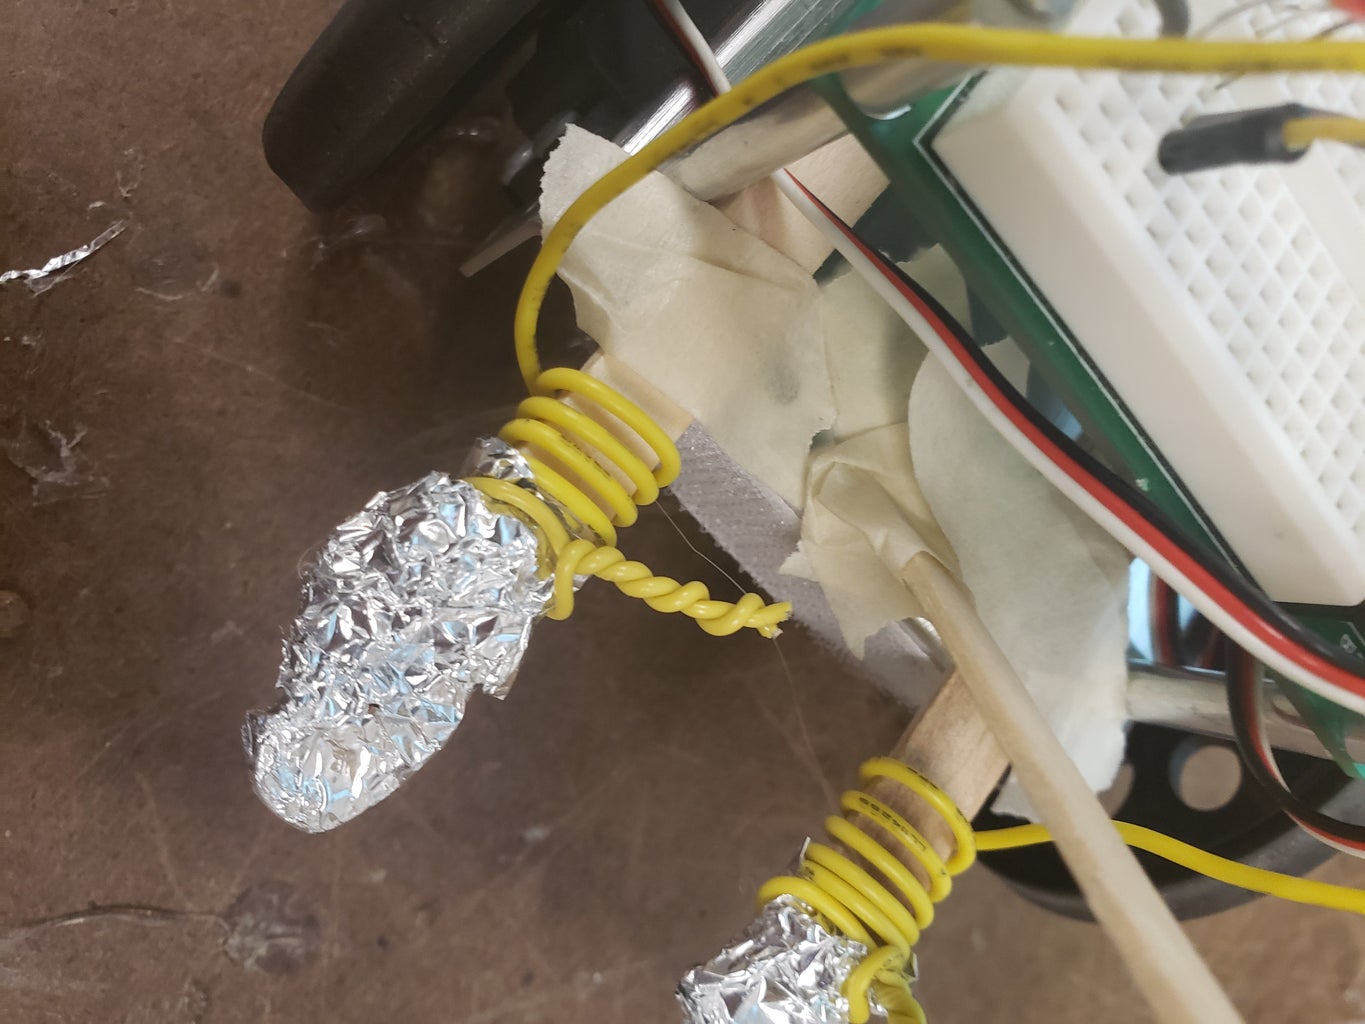
1. For making the solid bumper, all you need is a protrusion on either side of forward facing side. The ends should be covered in a conducing material. In this case, I used aluminum foil, however, other metals or materials could work instead. The protrusion should be secured tightly and durable to the chassis, preferably using something stronger than artisan tape (It was the only non-permanent method at my disposal at the time). Once your protrusion is fixed along with a conducting material on its end, a wire must be fed from both ends of the protrusion up to the breadboard or input jack.
2. The joint must be flexible, durable, and able to retain its shape. A light compression spring hinge would be perfect but if that isn't available, elastic material can be used instead. I used hot glue simply for the fact that it was the only thing available. It works for a situation where compressions are relatively far in between as it has a slowish rate of return. This must overhang the protrusions on either side but not go past them as then it will no longer operate properly. *ENSURE THAT IT IS NOT TOO HARD TO COMPRESS THE JOINT*
3. The moving bumper is similar to the solid bumper except instead of being attached to the chassis, it's attached to the overhanging joint. This too has a conducting material at its end as well as wires running up to the breadboard/input jacks. A little bit of friction material can be applied on the sides of the bumper to allow for sensing of walls approaching at a shallow angle.
The end result should be a system of two moving and two stationary bumpers, a joint that moves freely but returns firmly and quickly, and four wires leading up to the circuit board.
Step 3: Building the Circuit Board

This step is relatively easy and quick. LEDs are optional. Two of your bumpers (either solid or moving) should be hooked to the ground while the other should be hooked to an output/input. LEDs can be implemented between the two groups to indicate if they are working or not, however, this is not mandatory. Essentially what is being done here is when left alone, the robot is a broken circuit. However, when the M (moving) and S (solid) bumper make contact it completes the circuit, telling the robot to change directions or to back up, etc. Once this is done, we can now move onto the coding.
Step 4: Coding Your Robot


This step is simple to grasp, but difficult to do. First, you must define which variables are the motors. Then you must define all your different speeds (this will require at least four: right forward, right backward, left forward, left backward). With this, you can start coding. You want the robot to constantly to be moving forward until it hits something, so a loop with R + L forward will be needed. Then the logic code: it must tell the robot what to do, when to do it, and when to check if it needs to do it. The code above does this through IF statements. If the right bumper is touching, then turn left. If the left bumper is touching, then turn right. If both bumpers are touching, reverse, then turn right. However, the robot will not know what turn right or reverse mean, so the variables must be defined which is what most of the code is. I.e.
Right:
PULSOUT LMOTOR, LRev
PULSOUT RMOTOR, RFast\
next,
return
This just defined what "right" is for the robot to understand. To call upon this variable, GOSUB _________ needs to be used. To turn right, it is GOSUB Right. This call up must be done for every turn and movement while variables only need to be done once. This is nearly all invalid, however, when used on something other than "Stamps in Class"
Step 5: Test Your Robot
This is generally what you will spend most of your time doing. Testing is the best way to make sure that your robot works. If it doesn't then go change something and try again. Consistency is what you're looking for, so keep on trying till it works every single time. If your robot doesn't move, it can be the code, the ports, the motors, or the batteries. Try your batteries, then code, then ports. Motor changes should generally be last resort. If something breaks, then replace it with better materials to ensure component durability. Lastly, if you lose hope, disconnect, play some games, talk with friends, then try looking at the problem from a different light. Happy maze solving!


Participated in the
Sensors Contest


