Introduction: Metal Bucket Product Displays - I Made It at TechShop!
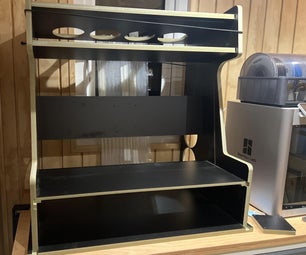
A local start up food company contacted me to see if I could help them with a promotional sales display for their new line of hot sauce. What developed was a graffiti covered metal bucket with wooden inserts to hold the bottles up to viewer height with their logo applied to the front.
Step 1: Planning
First - considerations went into how the final product would look, and how the support system would work. After a brief prototyping phase, we landed here:
Step 2: Measuring and Planning
The original plan was to deliver 40 total of two different display sizes - for this reason, and for ease of manufacturing when reordering, I decided I would take the time to cad out the design specs so the items could be replicated on the ShopBot router at TechShop. If you are unfamiliar with Techshop, you can read about them here: Techshop.Com Techshop offers access to state of the art design and manufacturing equipment, software and tools. They also offer classes and training to help you get up to speed and get your creative juices flowing. I do all of my layout work in Adobe Illustrator because its the program I have the most experience with, but many layout programs will offer you the ability to export what you are doing into a format that can be used on the ShopBot. This tutorial is not designed to teach software processes or hardware safety, so please do the correct thing and get yourself some training :) Measuring for the process consisted of determining how far down into the bucket the "table top" should sit that holds up the product, subtracting out the thickness of the table top material and considering the rest of the space to the bottom of the bucket to be the leg length.
Step 3: Time to Design!
Once the prototypes proved successful, it was time to move the design into the computer for mass production on the ShopBot. A couple of considerations before you begin your layout. First some practical things. The ShopBot system at TechShop Detroit/Allen Park will hold a full 4'x8' sheet of plywood and if you nest your parts (put them as closely together as mechanically and safely possible) you can replicate quite a few items out of one sheet of MDF. Perhaps more importantly though, my car wont transport a full sheet of MDF so my designs are all done on 2'x8' sheets as I have to have the boys at Home Depot rip them lengthwise so I can transport them from the store to TechShop. A secondary consideration, If you are using a machine other than your own, is the amount of time it takes for the router to complete a job. We schedule time on the machine at TechShop, so you want to make sure you can complete your job in the time allowed. Breaking jobs in half allows me to better control time limits. Shown above is a single sheet of MDF with almost all of the circles required to complete the project. Note the horizontal line dividing the sheet in half for planning purposes as this will eventually be two separate half sheet jobs. Later on a second sheet, traditional table saw techniques will be used to cut up the blocks that will become the legs. The art you make in your vector based drawing program is basically just paths for the router to follow, so no special skill is involved other than being able to picture what a router bit wider than a line is going to do to your artwork. All of the really important stuff, like how deep and how wide to cut, is handled by another piece of software you will dump these paths into.
Step 4: Saving Your Files
Once your artwork is complete, save your files in a format the ShopBot can read. For ease of use for those of us that don't think in "code" there is a secondary program we will rout these paths into, where we can add the descriptions of what we would like done - cutting, drilling, pocketing, etc. That software is called VCarve and its job is to say "so this line here - you want that cut all the way through, or do I just route that down into the board like a slot?" It handles the communication with the computer driving the router. VCarve will take any file you save in the following formats - .dfx, .dwg,.eps,.ai,.pdf,.pvc,.v3d, .v3m, and .crv and let you add the cut directions over the top of them. If you don't have an appropriate software program of your own to import from, VCarve has a full suite of tools, all very powerful that you can use to create your job from scratch.
Step 5: A BRIEF Non-conclusive Overview of VCARVE
As the title suggests, this is an overview, not a full blown training Instructable. Please get the appropriate training before using any power tool or accessory and always follow the proper safety procedures when operating dangerous, though highly cool and useful equipment. Lastly, this Instructable is based around the equipment, set-up and software at TechShop Detroit - your situation may differ. Begin by opening the VCarve software. Select file - new from the main menu. In the new document, set the job setup information in the left hand panel to match your prepared file. In my case, we will be setting it for a 96" long (8') by 24' wide (2') sheet of 0.5" MDF. Set the z zero to the top of the material and set the xy datum position to the lower left corner. My units are inches. By setting it this way, I can now import the half sheet plan I made for either part of the full sheet I set up earlier in Adobe Illustrator. Once your settings are correct, click ok.
Step 6: Import Your Paths
Now the screens left panel should be full of editing tools. From the main menu up top, select FILE-IMPORT-IMPORT VECTORS. A standard window will open asking you to locate your file, locate it and click open. (if you do not see your file, either you aren't looking in the right location, or you saved it in a format VCarve doesn't support.) When the file opens, it may or may not place your paths where you expect. If they are not where you expect, you can easily center them - under the transform Object heading, look for a button called align selected objects (looks like a square with four arrows pointing in on each side of the box, or hover over each button slowly and the name will appear. Clicking the button when your paths are selected, will automatically center the paths within the document. As our paths are completed, we can now leave the drawing layout portion of the software and move into telling VCarve what we want it to do with these paths from a cutting, drilling, gouging point of view.
Step 7: Defining Your Toolpaths
To close the drawing tools tab and move to the tool paths tab, click on the switch to tool path button (last on the right under 2D view control section) On the right hand side of your screen, you should now have a new series of tools in a panel on your right hand side of the screen. These tools tell the shop bot what to do while it follows the paths you've imported. Should it cut, drill, or gouge? You get to tell it here. There is a bit of finesse involved with setting up cut paths - especially multiple paths if they use different tools. You want to make sure you complete the operations in an order that is safe and beneficial. for example, drilling and routing out pockets (gouging an area to a depth less than the full thickness of the board) put a lot of stress on an area. In this example each circle has some sort of path inside it that is either drilled routed or gouged - I should perform all of those before I tell the cutter to cut out the bounding circle. A router spins quickly and with a great deal of force, so I want to do what I need to to the center of each object before I set that object free from the surrounding structure holding it in place :) I Want to drill my holes first, so I will select all the paths that represent holes to be drilled, then tell the tool path that these are to be drilled, how deep to drill them and if necessary what order. Start by selecting all the drill paths (hold down shift while clicking every drill vector.) Once all drill holes are selected, select the Drilling tool path tool from the tool paths pallet. Selecting the tool with open the settings dialogue box. In the box, you'll set the drill bit size, the depth you want it to drill, and the drill style (peck, or one pass) Once your settings are correct, you can click the calculate button and the software will figure out the tools path, and even animate in 3d the tools path and process to drill your holes. Last photo is the completed path, drilled and ready for the next step.
Step 8: Finishing Out the Machines Instructions
Use the same processes to complete the paths for the pockets and final cut outs - remember to use tabs on the final cut out path to keep your work safely anchored to the sheet. All of these processes will be covered when you take your training class, so pay close attention and ask questions on any process you are unclear about. When all paths are completed, you can use the animate path player to view what your job will look like when completed - this will let you know if you've omitted any steps or need to make any adjustments. It will also give you a fairly realistic estimate of how long the machine will take to complete your project.
Step 9: Setting Up the Machine and Your Material for Cutting.
At this point the hard stuff is done - mostly. We need to align our material to be cut, set the spindle up with the proper cutting tool for the job, and hit go. Again, proper techniques and safety precautions are covered in TechShop offered classes - please take one :)
Once you are set up correctly and have exported your paths to the ShopBot format, the computer will run the router through your path list one path at a time. In our case, it drills the holes first, then after a cutter change, gouges the pockets, and finally cuts the circles from the sheet. Once completed, some additional clean up may be required on your parts at the band saw.
Step 10: Putting It All Together
Once all the parts are freed from the sheets, the building can begin!
Step 11: A Little Paint, the Logo, and Viola'
Once glued up, painted and labeled, the project is complete. It was an excellent project to hone my layout and cutting skills on the Shopbot and inspired numerous ideas for future projects.


