Introduction: Mirrorless Camera for Makers
This instructables show how to build a mirrorless interchangeable-lens camera for makers.
Supplies
- LilyGo T-Display S3 Pro With GC0308 Camera option (we only need the camera PCB)
- OV2640/OV3660/OV5640 Camera with M12 mount and 24p DVP interface (a little bit long FPC is preferred)
- M12 varifocal zoom lens
- Four 12 mm M2 flat head screws
- Tiny camera tripod
Step 1: What Is Mirrorless Camera?
The full name of mirrorless camera is mirrorless interchangeable-lens camera.
Previously, interchangeable-lens camera is DSLR (Digital Single-Lens Reflex) camera. Start from digital camera, the optical viewfinder can be replaced by a digital viewfinder or live view screen. Then the whole optical design are simplified and the mirror of DSLR also be eliminated, so the new design interchangeable-lens camera is called mirrorless camera.
Ref.:
https://en.wikipedia.org/wiki/Digital_single-lens_reflex_camera
Step 2: Camera for Makers
A interchangeable-lens camera is a good way to study how does optical physics work. Especially using full manual focus lens.
However, the price tag of a mirrorless camera is not suitable as a study material. Fortunately, as a maker, we can make one for our studies ;)
Step 3: M12 Lens Mount
M12 lens mount is the smallest lens mount system that have varifocal zoom lens in the market. At the same time, maker dev device commonly used image sensors (OV2640/OV3660/OV5640) have M12 mount version in the market. Follow this coincidence, I chosen M12 lens mount for this mirrorless camera project.
Step 4: Dev Device
Since we selected M12 lens mount, we need select a similar size dev device as a camera body. The dev device should have built-in camera support and a color display for live view. LilyGo T-Display S3 Pro capable to do it.
Step 5: 3D Printing
T-Display S3 Pro already has a very good case body. But we still need some modification to have a M12 lens mount.
Please download and 3D print the 3D models at thingiverse:
Step 6: Assembly
Follow the video steps for the assembly and something to note:
- The leather sticker decoration is optional, you also can decorate with different materials
- The camera sensor can be installed in 2 different angles depends on what sensor version you bought
- The screws fixing camera sensor are optional, depends on is it provided when you buy the sensor
- Highly recommend use tripod for the stabilities of manual focus, any tiny camera tripod should be ok
Step 7: Sample Camera Program
Please follow LilyGo Github page to install required software:
https://github.com/Xinyuan-LilyGO/T-Display-S3-Pro
And then here are the draft sample camera program for testing:
https://github.com/moononournation/T-Display-S3-Pro/tree/main/digital-camera
Step 8: Sample Photo
The sample program will take photo if pressed the button (GPIO 12). The photo will store to SD in the folder "/DCIM/100ESPDC".
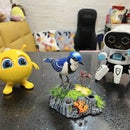
The above are some sample photos for your reference.
Step 9: A Long Way to Go
Since this camera is designed for makers, it will have infinity possibilities. Every maker can modify their own version and all versions probably will be open sourced, so it can evolute quickly.
One of the scope require substantial enhancement is the software:
- Use NTP & RTC to record photo taken time
- Store photo thumbnail
- Replay function
- Manual focus aids features, e.g. enlarge center part to help more precise focus
- With the specific sensor, also can enable auto focus
- OSD for displaying camera status, e.g. battery level, memory status, storage remain, date time, sensor configurations ...
And since maker can plug more modules to enhance this camera, so it also can:
- Use GPS module to store location data to photo file
- Use 9-axis module to store photo taken angles and motions
- Use weather sensors to store temperature, humidity, pressure and even air quality while photo taking...
Since it is WiFi connectable, it also can:
- Remote control taking photo
- Connect some servos to tilt the angle
- Even become a remote robot ...
If you are interested in AI, it also can:
- Speak command to take photo by Speech Recognition
- Auto take photo by human detected
- Auto focus human face
- Face recognition and tag in photo ...

Runner Up in the
Anything Goes Contest


