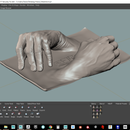
Introduction: Modeling Hands in Maya and Mudbox (Part 1)
Maya is a great Autodesk program that can be quite intimidating for a new user. If you start with one section of Maya like modeling it's a great way to get to know the program. Lets start by creating a custom shelf to quickly access a few tools to create custom geometry. under the file menu, click the tiny gear icon and create a new shelf. Name the shelf whatever you would like, in this case I'll name it something like Modeling tools. We will now select tools from the top menu and hold ctrl + shift to load them onto the shelf. These buttons will now be active and easy to find i your new custom shelf. There are many ways to access tools, I find the shelf is a great way to start working immediately so your not wasting time looking for tools.
Step 1: Custom Tools for Modeling
If you take the time to go over each tool under the Edit Mesh, Mesh Tools and Mesh display you can get a basic understanding of what the tool might do by its name. For example extrude is a pretty straight forward tool. Load as many tools onto the shelf, but make sure to include Combine, Separate, Merge and Extrude. If you don't load the tool onto the shelf you can just go back to the menu, I just like the ease of clicking the tool from the shelf.
Step 2: Create Geometry
Create a cube, if this is the first time using Maya, you may want to turn off interactive creation so that it will place a cube at the origin instead of having to draw it out. Give the cube some edges and scale the dimensions before hitting create just like the image below.
Step 3: Extrude
Select the four faces at the top of the model and click the extrude button in your menu. Notice that you kave a floating menu with some settings for the extrude function. Middle mouse click on the words "keep faces together" you should notice that it will change from yes to no. Leave it on no for now, this will allow the extrude to be detached from its neighbor so that you get individual fingers on the extrude.
Step 4: Adjusting the Finger Lengths
Scale (E for scale) the extrude by clicking one of the squares on the locator and then select the center square and drag to scale down. After you have scaled down slightly to give the finger a taper, click off of the selection and select the top face of each finger and move it down (W for move) to the desired finger length.
Step 5: Inserting Edgeloops
We now need some edge loops to create a face to extrude the thumb. Grab the insert edge loop tool from the shelf or menu under Mesh tools. Click on the pal area and drop an edge loop. Add one more in the middle of the palm. We will use the lower face to extrude the thumb.
Step 6: Extrude the Thumb
Select the face for the thumb and extrude, before releasing the extrude function, select one of the rings to access the rotation on the extrude and rotate. click off of the model and select extrude again to lengthen the thumb with more polygons. Now you can go back and add more edge loops to the fingers at the knuckles. add one in the center of each knuckle, then go back with the offset edge loop tool and select the edge loop that you placed for the knuckle. You will now see that you will get 2 edge loops on either side, adjust to desired position, then release.
Step 7: Extrude a Wrist
Now that you have all the fingers in place and the extra edge loops we need to add a wrist. Select the 2 faces at the bottom of the hand and scale them out slightly. Extrude, then add 2 divisions on the floating window for the extrude tool. We want to always have enough geometry so that faces are more square then rectangular, you will soon understand why this is important.
Step 8: Smooth Preview
Now that we have created our base geometry for a hand, you can get an idea of how this hand will look when subdivided in Maya. click on the number 3, this will activate smooth preview, smooth preview is also a great way to check your geometry for holes or triangles that may be hidden.
Congratulations you just created a base mesh that is nice quads and ready to be turned into an awesome detailed hand in Mudbox. Every model I make goes through this simple box modeling process. A quad mesh makes it easy to divide for detailing and posing. If you take the time to do this instead of rushing into modeling with a bad mesh you will have a much easier time later to add UV's or modify the geometry. It's also valuable as a sculpting technique to look at models in a very simplified way. The most impressive models have beautiful form and don't even need detail.
Step 9: Send to Mudbox (Part 2)
Send the geometry to Mudbox by going to the file menu, send to Mudbox as new scene. This will start up Mudbox and place your geometry in the scene. Notice your geometry looks exactly like the one in Maya, press shift + D two times to add two subdivision levels. Page down and Page up will allow you to go up and down these levels at any time.


