Introduction: Monster Monkey Fist Using Pool Ball
How You Make a Giant Monkey Fist using Pool Ball:
A paracord monkey fist is beneficial to carry on you for survival and self defense purposes. It's super easy to conceal and carries enough power to slow down any attacker.
In this tutorial you'll learn how to make a paracord monkey fist using a pool ball! This giant monkey fist weighs in at a hefty 6 ounces!
**Be sure to check out my other instructables and follow me. I will be adding a new one each week. Also check out my other projects on my site: Craft Projects , DIY and Paracord Projects. I have a post on How to Make A Paracord Belt there and some other cool projects. Working to publish my new Remote Control Gun project there soon. **
Here is the original post I did for this:
You can also get my free newsletter here with my new projects
How To Make A Monkey Fist With A Pool Ball
Supplies you need:
- pool ball
- 10 ft 550 Paracord in a color that you want to be the compliment color
- 18 ft 550 paracord in a color that you want to be the main color
- 8 ft 550 paracord in a color that you want for your lanyard and handle
- Monkey Fist Jig- You will need to make one the size of a pool ball, dowels work great. (I will do tutorial soon)
- scissors
- lighter or matches
Step 1: How to Get Started


Step 2: Melt Ends

Step 3: Start Weaving
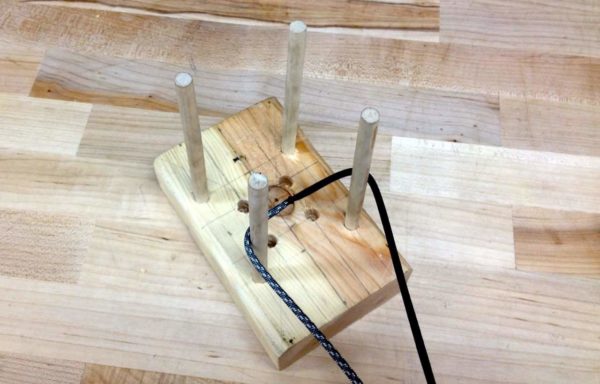
Step 4: Start Wrapping
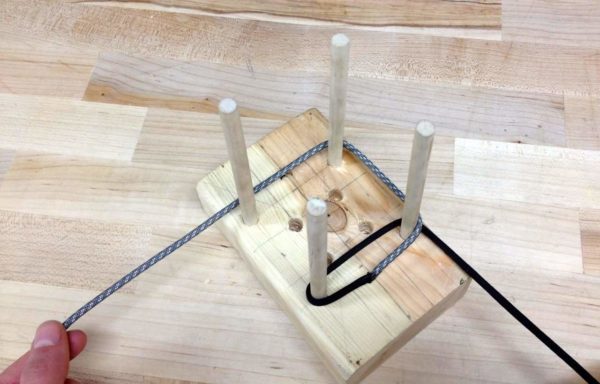
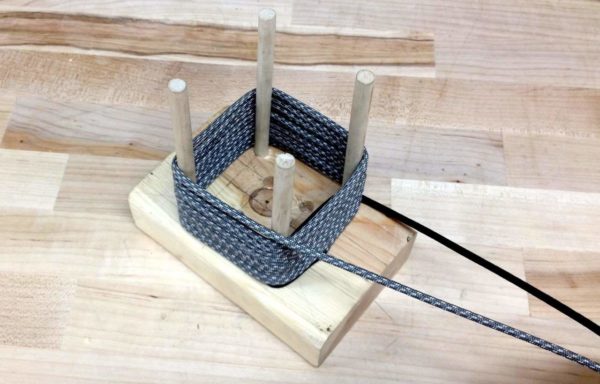
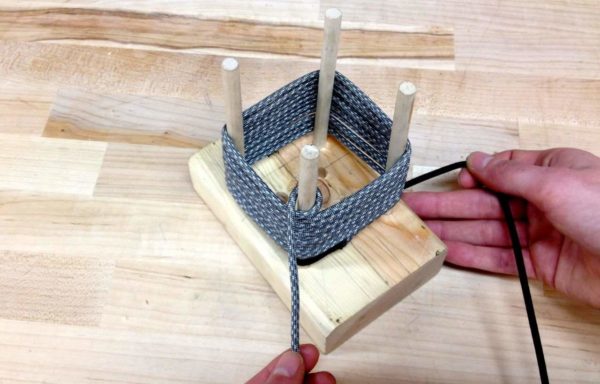
Step 5: Wrap Second Color
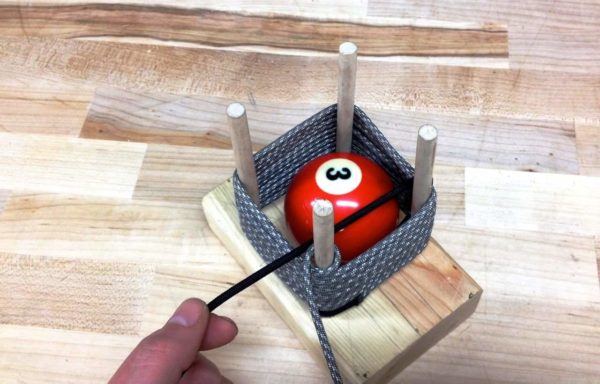
Step 6: Repeat Step 4
Helpful Hint: As you wrap your paracord to make your monkey fist knot, do your best to keep each loop next to each other and not overlapping any other loops. This will make it easier for you when you start to tighten your monkey fist.
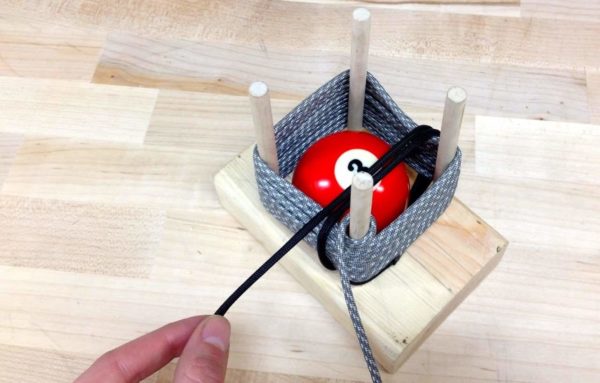
Loop the black paracord counter-clockwise around the outside of the grey paracord.
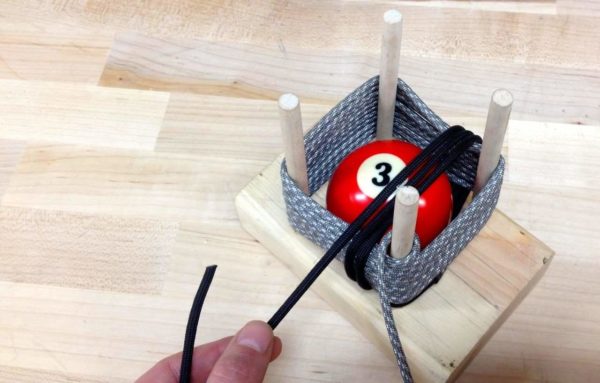
Keep wrapping like this, going around the pool ball in the center.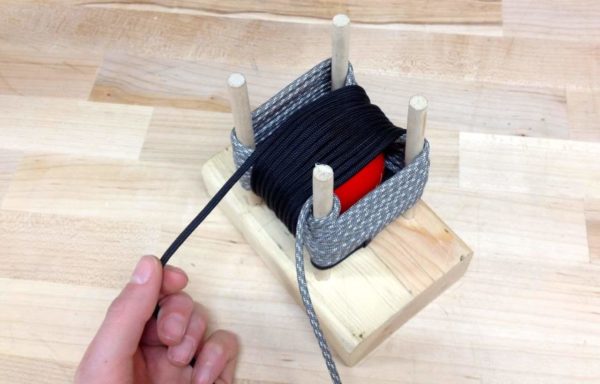
Wrap until you have gone around 11 times.
Step 7: Last Loops
Now we are going to complete the last set of loops, continuing with the black strand. This time, we will weave the strand so it is on the inside of the grey loops but around the black loops we just made.
Be sure to use this series of loops to contain the pool ball. Just like the previous steps, you will wrap it around 11 times.
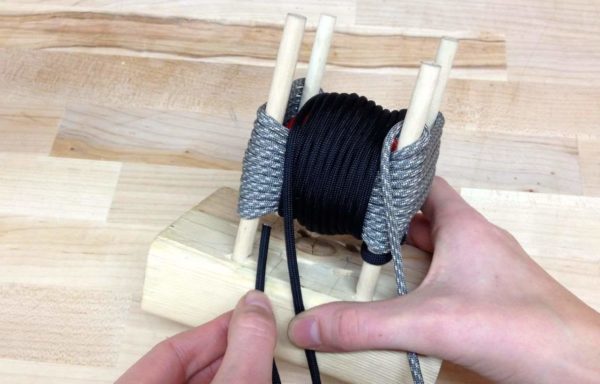
Grab the end of your black paracord.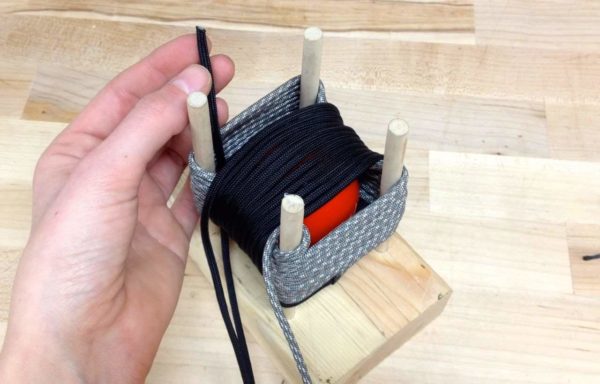
Thread it up and inside the grey loops.
Thread it over the black loops then back down on the inside of the grey. These loops will be hugging the pool ball.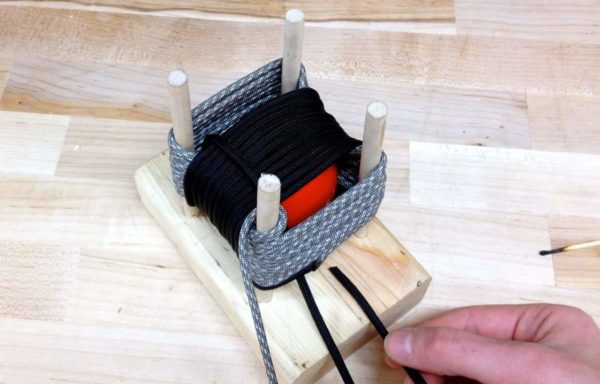
Thread it back under the pool ball.
Bring it behind the pool ball and inside the grey loops.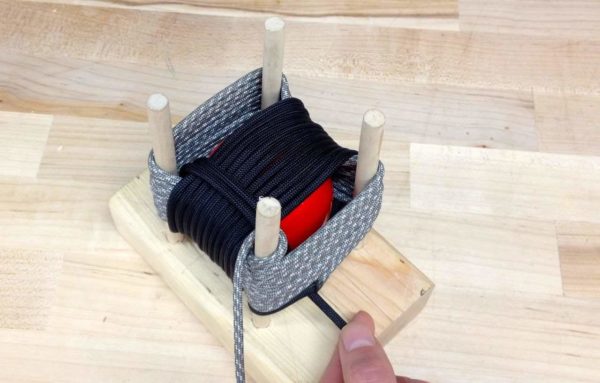
Repeat until you've made 11 loops.
Step 8: Remove From Jig
You have now formed your monkey fist knot! Now you are going to remove it carefully from the jig and start tightening. As you go through and start tightening, it is important that you do not make anything too tight for the first round.
This is a slow process that you will have to repeat a couple of times to gradually get your Monkey's Fist as tight as you want it. If you tighten too much too early, you will end up causing the cords to over lap. This is especially important for the loops on each 'edge' - if you pull these too tight, you will begin to pinch the loops underneath together, making it very difficult to keep your monkey fist neat and even.
Take your time at this phase, and try to maintain symmetry all around your knot.
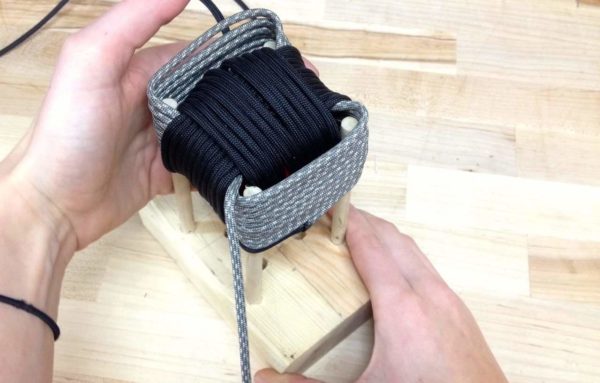
Remove your monkey's fist from the jig.
Step 9: Tighten
Starting with the grey paracord at the corner where you made your first loop, pull the complimentary side up gently to tighten the corner.

Follow the strand around the fist, continuing to tighten.

Start tightening the loops. Be patient, this is a slow process.
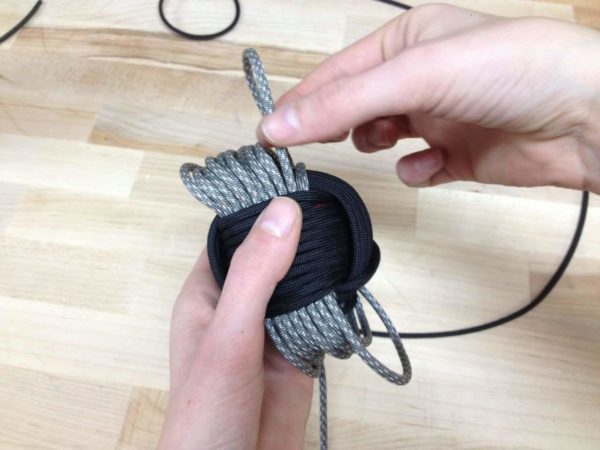
Follow the cord around the ball and continue to pull and tighten.

Continue all around the ball, it should start to look like this.

Continue along the ball starting with the black cord. You will have to go around a couple of times to get the monkey fist nice and tight.
Step 10: Lanyard and Handle
Now let's start to make your lanyard and handle. To do this, you will first make a diamond knot with the two pieces of cord hanging out of the monkey fist.
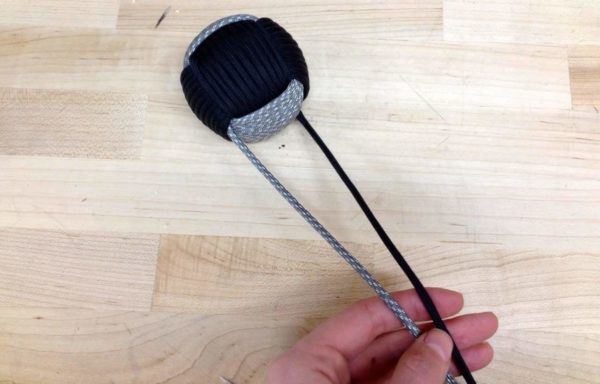
To start the diamond knot, align the two cords next to each other.
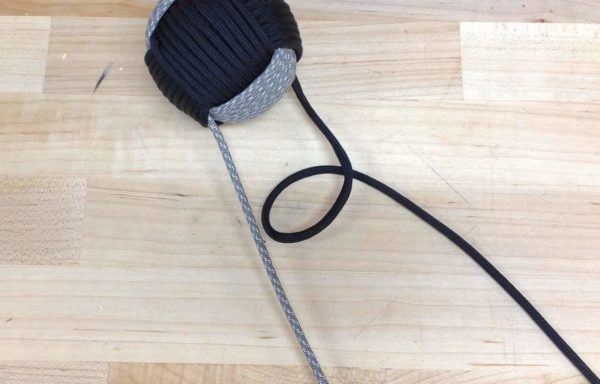
Take the black strand and make a loop over itself.
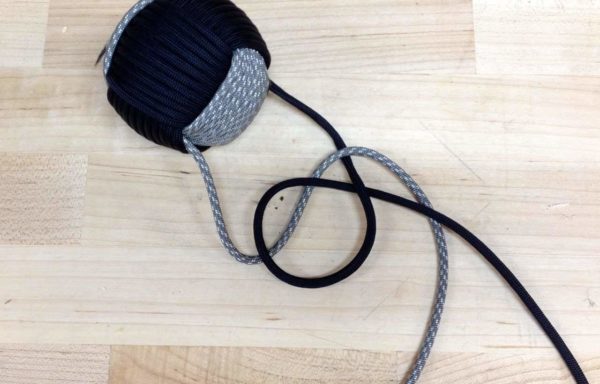
Bring the grey strand under the black loop, over the top of the black strand then back under the black strand.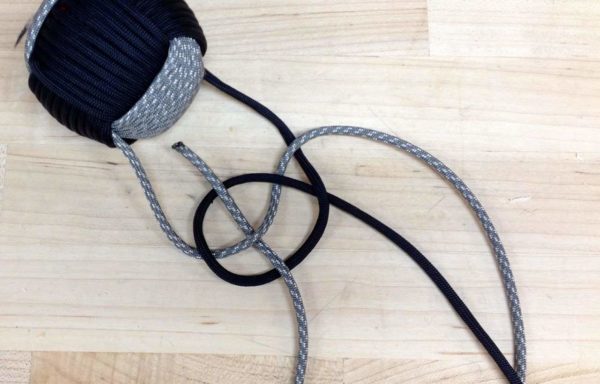
Now thread the grey strand over the bottom part of the black loop, underneath itself then back over the top part of the black loop.

Pull the grey strand slightly to tighten the loops. (Just slightly)

Pull the grey strand around and under pulling up through the center of the black loop. Make sure you end up on tom of the other grey strand that is there.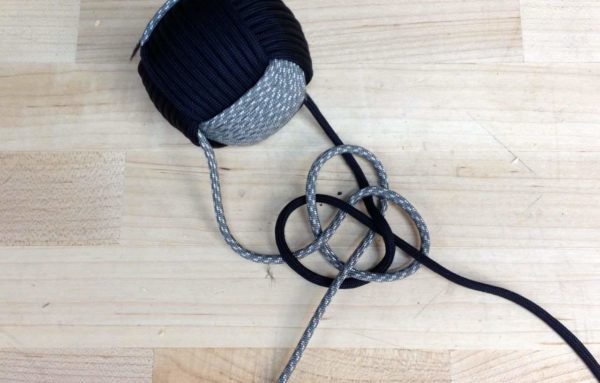
When you pull it a little tighter, this is what your knot should be looking like.
Now let's go back to your black strand. Grab the end of it.
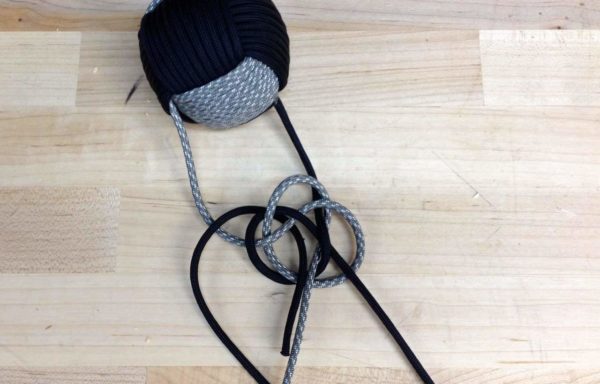
Loop the black strand on the left side of the knot, over the grey strand and under all the other pieces, pull it up through the center of the knot just like you did with the grey strand.
This is what it should look like. Now, carefully start tightening the knot. Pull the strands one by on to get the diamond knot closer to the base of the Monkey Fist.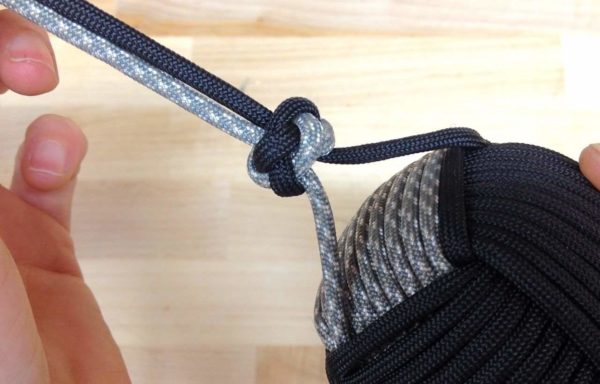
This is how your diamond knot should look.
Step 11: Make Lanyard
Now that you've made your diamond knot, let's move on to creating your lanyard.
To do this, we will tie a seesaw knot. Grab your third piece of paracord (8ft piece) and fold it in half to get started:

Fold your third piece(the 8ft piece) of paracord in half to make a loop.
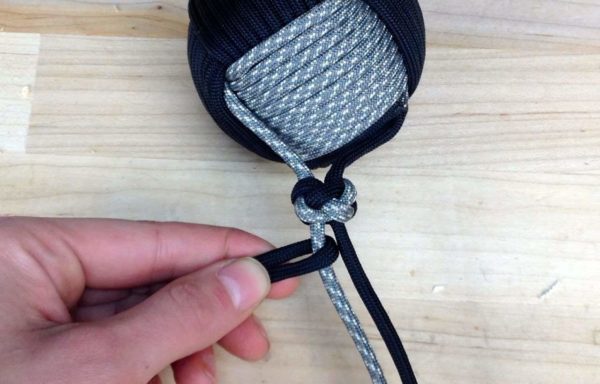
Thread the loop around the grey cord.

Now grab the black cord on the right.
Thread it behind the grey loop and up through the new piece.

Pull all four strands to tighten. You will always start with the strand that is the highest up. So, the next strand that you will work with, is the black one on the top left.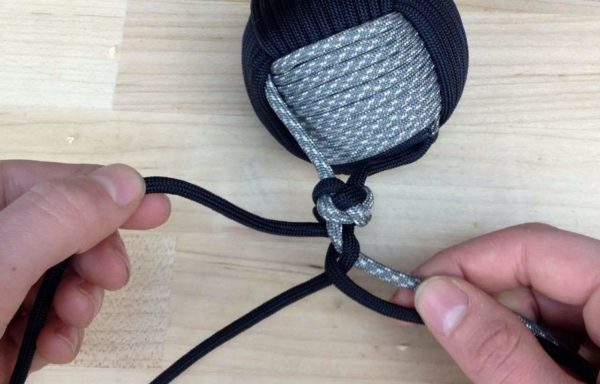
Now, grab the top left black strand from your new piece.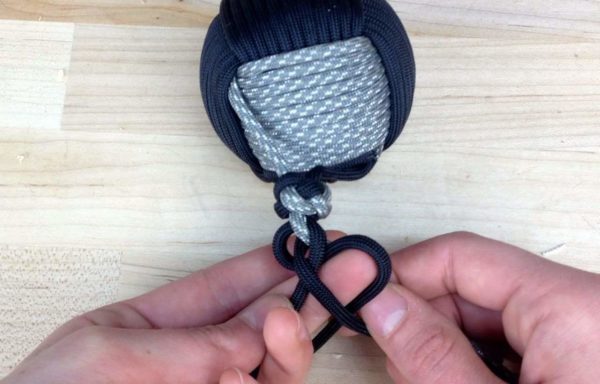
Do the same as you did before and wrap it behind and up through the center of the right two pieces (the grey and black strands).
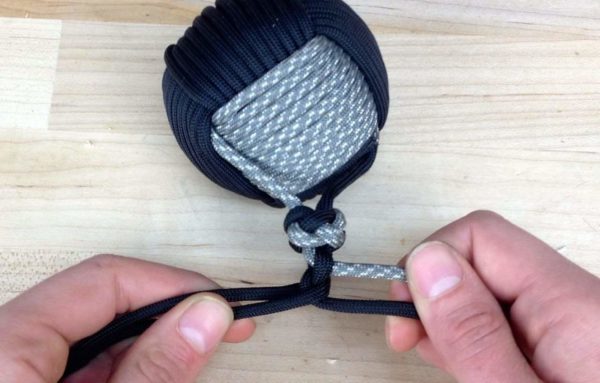
Bring it back to the left side. Pull all four strands to tighten. Now the grey strand is the highest strand, so this will be the next one you work with.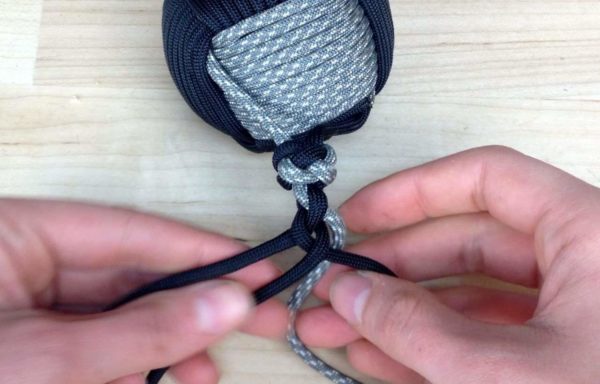
Wrap the grey strand back behind.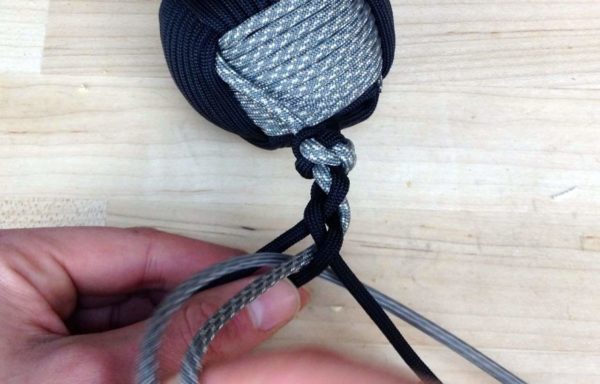
Then pull the grey strand through the middle of the left two strands.
Pull the grey strand back to the right side, and pull all four strands to tighten.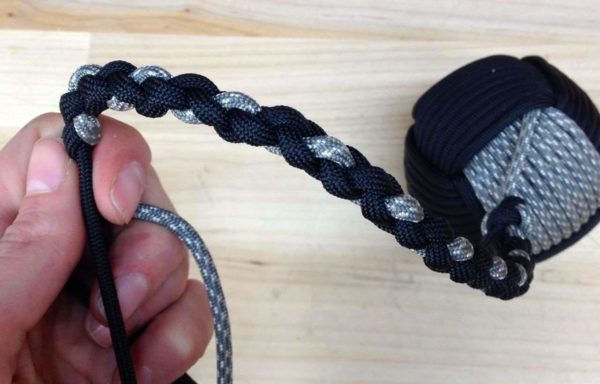
Continue to repeat those steps until you have reached your desired length.
Step 12: Finishing

Keep your black and grey strands that came out of your monkey fist as the center piece of your cobra weave. Pull your remaining black pieces of cord to opposite sides.
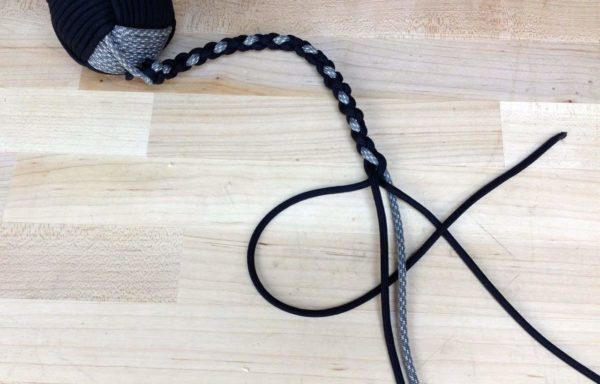
Starting with the left piece, pull it under the center pieces and over the right strand.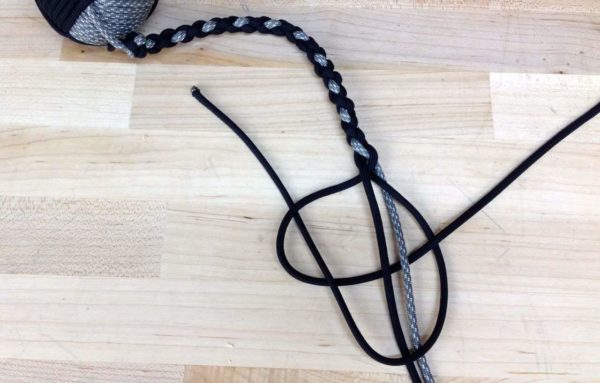
Take the right strand over the center pieces, then over and through the loop on the left side.
Tighten the first knot. Now repeat with the right strand. Bring it under the center piece and over the left piece.

Take the left strand over the centerpieces and down through the loop on the right side.
Pull to tighten. This is what your cobra weave should be looking like.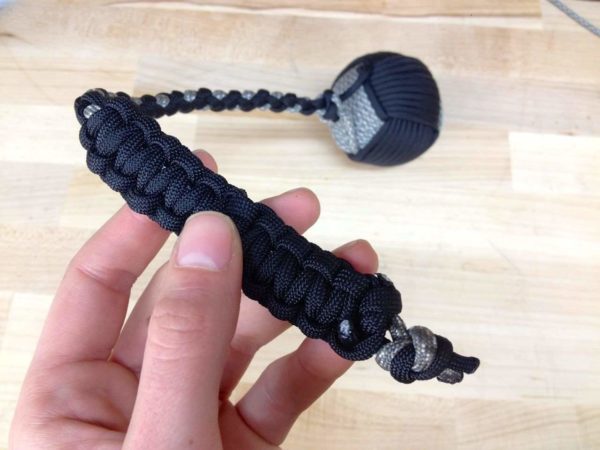
Continue on down until you've reached your desired handle size. Finish the ends by cutting and burning. Make a knot with the black and grey center strands and cut and burn as well.

First Prize in the
Paracord Contest


