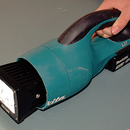
Introduction: Mouse With USB Port (optional Internal Drive)
This project for me is more useful than it first appears, I use this mouse all the time and all though it was quite fiddly to make It was worth the effort.
Now why would I want a mouse with a USB port hanging out the side? The main reason is that I do a lot of computer aided drawing on a lap top which is impossible to do with a track pad and I share and collaborate with students who have all manner of different shapes and sizes of USB drives.
So whats the problem? Well my mac book has the USB ports so close together that it is often not possible to have two things plugged in at once, It drives me mental, and I didn't really want to have to use a USB hub, as it just another item I have to carry around and get lost.
Also with its internal drive It also saves me carrying around a USB, and it useful for when I use a desktop machine as I don't have to scratch around under the desk to find a working USB port.
The instructable has lots of notes attached to the photos
Step 1: Stuff You Will Need
- A full size USB mouse
- Small USB hub, than can be pulled apart easily
- Small USB tumb drive (optional)
- Sugru
- USB pinout
- screw drivers
- box cuter knife
- solder, soldering iron, solder sucker.
- hot glue gun
- side cutters
- Magnifying glass or glasses
- Hole saw or drill.
- Multimeter
Step 2: Strip Down.
The mouse has a couple of screws hidden under the 2 plastic slider pads at the back of the mouse, and clips at the front, which came apart without too much of a fight.
The hub was just clipped together, and I used a box cutter to prise the plastic covers off. The final photo shows the mouse and hub striped down, it was still not going to fit inside the mouse cover.
It is important to chose a hub that is small, and can be take apart.
Step 3: Fitting the Circuit Board
It became clear that the striped down hub was still not going to fit, so I cut a hole in the internal part of the mouse and removed 3 of the usb sockets from the circuit boards.
My plan was to also remove the mini usb socket which is the input but I found it just too small to solder leads onto. In the end I had to also remove the brace across the centre as I just could not fit everything in.
I gave quite a bit of thought to where the usb should plug in, so it doesn't interfere with the normal operation of the mouse.
Its normal practice to have the USB drive plug in with the label side up, so I didn't want the USB socket mounted upside-down
Step 4: Wiring and Fitting
When I looked at the usb mouse wire for some reason the colours where different to the pinout chart. I put one of the usb sockets on the end of the cable and used a multimeter to figger out where they go. The pinout diagram is viewed when you look into the end of the usb cable, not the socket, so a little care must be taken so that you don't get the wires mirror imaged or reversed.
I simply cut the mouses cable and soldered the mouse end to the hub where the socket was removed and the other end to the mini usb cable, with the cover removed.
Finally I cut a hole in the side of the case for the usb socket to come out. I pointed it up slightly to stop the usb dragging on the table when the mouse is moved.
Step 5: Fitting Usb Drive and Assembly
After stuffing the usb hub into the mouse the best way I could, the board was on an angle which look as ugly as sin, but the top still fitted back on and it worked correctly. I used a dab of hot glue to hold every thing in place, and turn my attention to stuffing a usb inside.
I found the smallest usb I could find and removed the covers with a box cutter, I then solder four wires on to the circuit board, using the pinout as a guide. Then it was just a case of soldering in the 4 wires to the hub where I removed one of the usb sockets. After a quick check I found everything worked, A bit more hot glue, and I put the lid back on screwed it together and put the slider pads back in.
Step 6: Tidy Up
At this stage I had a mouse that works and does every thing it should, but I was not very happy with ugly usb socket hanging out the side, held in place with hot glue. I t looked like it was just begging to snap of the first time the mouse was dropped. Then I remembered I won some sugru some time back, which is a type of air drying rubber. Ive never used it before and when I opened the pack it was a bit of a shock "ITS BLUE!" Oh well now I know why its got a blue stripe on the pack.
Sugru is a bit like plasticine and is quite fun to play with, I just rolled up a sausage shape and smoothed it out around the port. It worked really well and has given the port a great deal of strength, though black sugru would of looked better.
So in the end I painted it black

First Prize in the
Hack It! Contest


