Introduction: NES Controller Cellphone
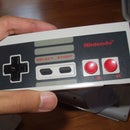
The NES Controller Cellphone.
UPDATE 6/9/11:
Hey everyone. Wow, I'm still surprised at home much attention this project gets.
Unfortunately, I don't get to check instructables like, at all. SO if you need to contact me, please
hit up my tumblr: tamsanh.tumblr.com
I've managed to squeeze a Motorola C168 into the tiny compartment that is the NES Controller.
Yes. I know. Amazing.
I got the idea while at the local Play N Trade. I saw the controller on the rack, and immediately said: "That would make a great cell phone!"
And so I did it!
I started the taking apart of the phone yesterday at around 3PM. I then woke up at 2AM, and worked from 3AM to 11AM. If you pay attention to the lighting of the pictures, you can actually see the transition of night to day. The finished phone was taken this morning, and the taken apart phone was taken yesterday afternoon. All the dremeling was done in the basement in the early morning, until the late morning.
I'd like to thank all my friends who supported the idea, and the Play N Trade who had the controller to mod!
P.S. In all fairness, and to give props where they are do, it was actually Sam Garfield who first made the NES Controller Cellphone. However, it was still my own personal idea to begin with. I did not use Sam Garfield's DIY to make this phone. This phone is a product of my own imagination.
Step 1: Materials Used
The Materials I used were:
- 1 Motorola C168 GoPhone
- 1 NES Controller
- 1 Dremel with assorted bits.
- 1 Screwdriver with assorted small screws. Must include a TorxTorx T4 size.
- 1 Roll of Tape
- 1 Pair of Goggles
- 1 Pair of Pliers
The Motorola C168 GoPhone is the perfect phone for this project. Because of its price, size, and one little secret the Cingular doesn't want you knowing.
You see, the GoPhone is cheap because of the plan that comes with it. They expect you to use that plan, and they get a profit. However, if you Already have a Cingular plan, you can actually use Your SIM card in the phone instead of the one that they provide. I actually asked the local Radio Shack if my SIM would work in the phone, and the woman said
"Yes, it Does work; but because you told us you were going to do that, we cannot sell you this phone, because that is fraud. You're going to have to go to another Radio Shack now."
I don't like that woman.
Step 2: Take Apart the NES Controller, and Prep for Dremeling
The NES Controller sports 6 screws on the back. I just took them out, and the circuit. Really simple.
I then got my trusty pair of pliers, and removed the most protruding bits of controller. They were there to hold the circuitry in place, but now they won't be needed. I removed as much as I could so that I wouldn't have to dremel later.
I then cleaned the vice grip before using it to hold the controller. I didn't want to have a rusted up NES Controller Cell Phone.
Step 3: Dremel Time
This is pretty much the entire project. It took about 90% of the total time.
Use multiple bits for different situations. Don't use the same bit for the whole thing; you'll have a horrible time if you do that.
The pictures pretty much explain it all.
If you Ever plan to do this, you Must use the goggles. The dremel created showers of molten plastic shards, which flew everywhere at hundreds of miles per hour.
If you don't want to be as blind as Anne Frank, wear goggles!
Step 4: How to Take Apart a Motorola C168
How to disassemble a Motorola C168 GoPhone.
No where did I find a tutorial to help me with this part, so I figured it out myself.
This phone was quite a toughie to take apart. I was so used to the relative slide-and-lock ease of Nokia phones, that this phone took my by surprise. Probably the part that is the hardest about taking apart this phone is finding a T4 Torx bit. They're not standard with the basic small screwdriver sets. I had to pull it out of a super-bit box we have.
I had been hoping not to void the warranty for this project, but alas, it was necessary. I don't like voiding warranties on devices I've only owned for 2 days.
The C168 was an interesting challenge. The faceplate was quite hard to remove, but I found the solution. Every few centimeters, there's a screwdriver 'station' where you can insert a screwdriver, and pry off the faceplate. I had to find all of them, and after I got past the bottom ones, I just yanked off the plate. I then did a quick charge check.
I ran into problems when putting it inside the then super dremeled NES Controller:
The phone didn't fit with the keypad on it, and I still had to test it with the buttons in.
Step 5: Button Dremeling
So I found, when the buttons were put into place, the phone jut out quite unattractively.
The only solution was to dremel the buttons into submission.
The Start and Select were a different problem though. They were plastic, and couldn't be dremeled. I didn't want to cut them up though, because then they wouldn't stay in the controller, but they were creating a very noticeable bulge.
Instead of cutting up all of it, I opted to cut only the renegade parts: the parts that were creating the bulge.
Step 6: Keypad + Screen Dremeling
I traced out where the keypad and screen were, and used different dremeling techniques to achieve the same design as the original phone. I didn't feel it was worthy to be called a Mod if I was just going to cut a huge hole in the back of it.
Don't let the lack of pictures mislead you: Remember when I said it was 90% dremeling? Well, 20% was the case, the other 70% was the freaking keypad. It Seriously took forever, because it just wouldn't fit Ever. There was always something wrong. It was so aggravating. In fact, that last keypad picture isn't even finished. I still dremeled for a few more hours before I got it to fit. I still had to work that keypad even after I was long done with the screen. So Annoying.
Step 7: Ear Piece Placement
So the next problem to tackle was the ear piece. The C168 didn't have the ear piece attached directly to the phone, it was attached to the faceplate, and springs were used to make the connection.
So I measured and marked where the connections were going to be put so that it could still fit on the phone's circuit board, and I drilled holes for the sound. Thankfully, it still had some glue on the ear piece after I removed it, so I just stuck it on.
It seems like a simple, straight forward process, but it took about 30 minutes before it was done. The measuring, bit searching, and sticking was a time consuming process.
Step 8: Charger Hole
This charger hole was the keypad all over again. I thought it was going to be simple: Drill a hole, and plug in.
But, no matter how much I dremeled, the charger just would Not fit. So I got desperate, and instead of drilling a bigger hole, I cut the charger to fit. It was a good idea.
There are no pictures of the hole being drilled because my camera was running low on memory.
Step 9: Finishing Touches
8 Hours later, the rig was set. Now there were just a few things that needed to be taken care of.
I needed the thing to stop shifting around, so I put a bit of tape in. Then I screwed the top screws in, taped the bottom, and Voila! A brand new, geeky Cell Phone for me! If this doesn't make me Alpha Geek, I don't know what will.
What I'm most worried about is the screen. Because it's the raw LCD screen, it's much more sensitive than a cell phone faceplate. As a temporary protection from scratches and dust, I used some tape again.
Also, the little Keypad squiggle is prone to getting caught on my pant pocket, and threatens to rip itself off, which would make me cry, because I worked on that little squiggle the most; so I put some tape on it as well. Tape is so amazing.
I love it quite a lot. It sounds great, looks great, and it's got a tone maker, and I made myself a little Mario ring tone, lol. I'm so happy with it.
Thanks for reading!


