Introduction: [NO CODE] Ultimate Cloud Media Server
Cloud storage is so useful that the vast majority of your own data are stored on various clouds. But clouds imply a risk of losing files, being stolen or used for commercial purposes by cloud companies. All the more, most free cloud services have a low storage threshold can be very quickly reached.
It’s therefore a great idea to make your own cloud server safely kept at home that you can access remotely on specific devices and where you can store all your favorite or essential data with no other limit that the external device you use.
We will show you on this Instructables how to transform your Raspberry Pi into a media hub to store, read and play your favorite content. If you have a used external hard drive with a significant amount of GB of space, this project should be specifically useful for you!
Features:
- Store all your files in a homemade secured cloud server
- Read or add files remotely
- Read media files locally on all your family’s devices (TV, tablets, smartphones, PC)
- Save automatically files sent by specific emails
- Connect your home audio system, update the playlist remotely and make it play automatically based on your preferences

Step 1: NECESSARY COMPONENTS
- Raspberry Pi 2 or 3 // ~$10~$35
- 16 GB SD card // ~$8
- External hard drive
- Audio system with AUX cable
- Any device you might want to use to read your files (TV, tablets, smartphones, PC)
If you already have an audio system and an unused external hard drive (or a USB stick with significant storage space), you only need to buy a Raspberry Pi with a 16GB SD card (total <$40).
Step 2: SET UP PROTA OS ON YOUR RASPBERRY PI IN 15 MINUTES
Prota OS can be downloaded for free on https://prota.info/prota/pi/. It’s only 3.8GB and easy to burn on a SD card (make sure to use a 16GB card).
Follow the instructions of Raspberry Pi foundation to write the OS image on your SD card. Extract the .img file from the zip folderPlug in your SD cardDownload and open Etcher, select the image and the drive and start the process. That’s it!

Once Prota OS is burned on the SD card, you can follow this simple installation guide to set up your Prota hub (less than 1 minute!). You only need to define its name and password, your time zone and your email address and the rest is completely automatic!
That’s it! In less than 15 minutes and with no hassle, you transformed your Raspberry Pi into a Smart Home automation hub!
Step 3: USING NFS APP TO SET UP YOUR CLOUD SERVER
You can really easily turn an external hard drive or USB stick into a cloud server (or NAS) using the NFS app.
- Plug-in your storage device in a USB port of your Raspberry Pi
- Go to App Libraries in Prota Space
- Download the NFS app
- Open NFS app and change the password as explained on the interface. The current one is written in red.
- Make sure to note down your ID and password + the IP of your Prota (you can find it in Settings app)


Once your app is configured, you will need to connect your computer or smartphone/tablet to the NFS network from which you can access & modify the content of the USB stick.
On macOS computers:
- Open Finder and click on Go > Connect to server (in the top bar)
- Type in smb:// + the IP of your Prota (you can find your Prota’s IP in the top left corner of Settings app in Prota Space)
- Select “media”
- Your name will be “nfs” and previously setup password
- Click on “connect”. You can now access the files on your USB stick/hard drive from Finder.


On Windows computers:
- Go to the Network menu of File Explorer
- The neighboring networks will start appearing. You should find in the list the name of your Prota Pi.
- Enter NFS as ID and the password you created on the NFS app
- Click on Media and you will be able to access the files on the USB stick


On Android smartphone/tablets:
- Download the app ES File Explorer File Manager
- Go to Network > LAN
- Click on the three dots and New
- Add a name, input the IP address of your Prota (you can find it in the top left corner of Settings app in Prota Space), the ID (“nfs”) and password of your NFS
- Click on OK and you will then have direct access to all your files

On iPhone/iPad
- Download the app File Explorer
- Tap the "+" button, then select "Computer, NAS" item.
- Input the IP address (you can find it in the top left corner of Settings app in Prota Space) and leave the DNS Domain field blank.
- Input “nfs” as username and the password you set previously.
- Click on Save

Your NFS server is now connected to your device and you can open remotely all your files, copy them or add new ones. It makes it very easy to access this server as the server folder is directly visible on the left side of your computer’s file explorer.
Step 4: USING DLNA TO OPEN AND VIEW FILES
Creating your NFS storage server will allow you to let all your family access the home cloud to open and view any file that you have put on it. It’s a great way to share photos, videos and movies with all the household members.
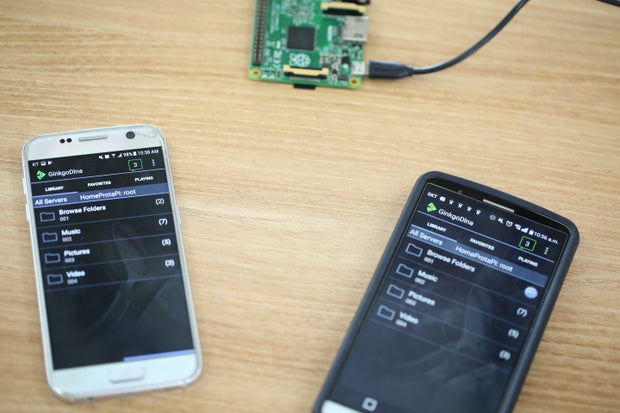
There are two possible ways for you to view and play those files on everyone’s devices. The first one is through apps like ES File explorer mentioned at the end of the previous step. An alternative is to use DLNA apps that you can easily download on all the devices at home (tablets, smartphones).
DLNA service aims at offering a common connected viewing experience on several devices. To use it on your home devices, follow those steps:
- Download DLNA app on App Libraries
- Download any DLNA app player on your device app store (for instance Ginkgo DLNA Player for Android or C5 for iOS)
- Look for your Prota on the nearby device list (your device need to be connected to the same WiFi network than your Prota Pi)

Step 5: CONNECT YOUR AUDIO SYSTEM VIA VOLUMIO
With Prota Pi, you can very easily transform any speaker into smart speakers that can be turned on remotely or play automatically you favorite songs based on pre-programmed playlists. It allows you to simply play all the audio files stored on your external hard drive, so no need to use a mp3 player or you phone and to connect it to your speakers.
To use Volumio, follow those steps:
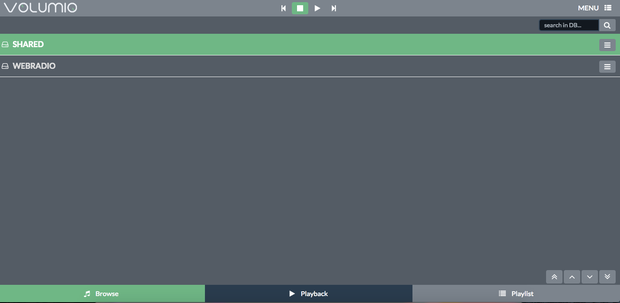
- Go to App Libraries and download Volumio app
- Open Volumio
- Click on the bottom left button “Browse”
- There you will be able to select the songs you want to play. Go to Shared, select your storage device, click on right side icon and add them to your playlist.


Now that your speakers are connected, you will be able to automate them depending on your presence at home or the time of the day. We will see that further in step 7.
Step 6: CONNECT YOUR EMAIL ADDRESS
Accessibility is a key element of any cloud. Giving full access to your cloud to someone is not always the most practical or reassuring way to let someone upload files on your cloud. To further secure it and still let friends upload files that they need to share with you, you can ask them to send you an email with this specific file to your personal email address or one dedicated for this task. By setting a very simple automation workflow, those emails can be stored to your NFS cloud depending on the conditions you set.
We will see in the next step how to easily set up the automation. The idea is that the automation is only triggered when someone sends you an email with a special subject line, for instance which includes “FILE TO SAVE”.
For now let’s connect your Prota to the email address you wish to use for this purpose.
- Download the Email app in App Libraries
- Open the app, click on + and enter your credentials
- For some email domains (like Gmail), you might need to go to your account security settings and allow access to less secure apps before being able to register your account
Step 7: AUTOMATION WORKFLOWS
Prota OS key element is Stories app, the automation tool based on natural language that let you connect all apps and feature together to create the smart rules that will run your smart home for you.
Here are the automate workflows you can use for your remote access media server:
- Saving files attached to specific emails
- Turn on music at specific times or when I’m at home
To let you automate easily, simply click on the link next to the following storylines (= automation rules) to import it in one click to your Stories app. You simply need to customize some personal elements:
Storyline 1 - LINK : “When I receive an email with “file to save” contained in the header, save it in my Files folder”
Storyline 2 - LINK : “When my bluetooth is detected, start playing music with Volumio app”(For this app make sure to set up the Blue Tag app following this guide)
Storyline 3 - LINK1 / LINK2 : “When it is between 7PM and 9PM on weekdays, play music with Volumio”
The possibilities of automation are endless with Stories, so make sure to check out our previous Instructables to get ideas of other features and automation workflows you can integrate into your smart home.
Step 8: TEST AND GO FURTHER!
That’s it, you can now enjoy your files from wherever you are, on whichever device you want, share them with family and let friends add their own documents to your remote access media server.
Prota Pi allows you to connect many things and set up very useful automation workflows, all for very limited budgets. You can for instance connect an old webcam to your Prota Pi, automate snapshots to be taken every 30 minutes and saved in your NFS cloud, so that you can at any time monitor what happened at home. You can also turn your Raspberry Pi into a DIY jukebox or set up a security system with it. Make sure to check our previous projects to get a broader idea of the many things possible with Prota OS.
We hope you enjoyed reading and replicating this project and automating your home. If you liked this project, make sure to have a look at our previous projects, to follow us on both Instructables and Twitter.
BETA PROGRAM
You like Prota OS and want to test our newest apps before their release?
Subscribe your email address here to enroll or get further information on our Beta program.
You like our projects? Make your own!
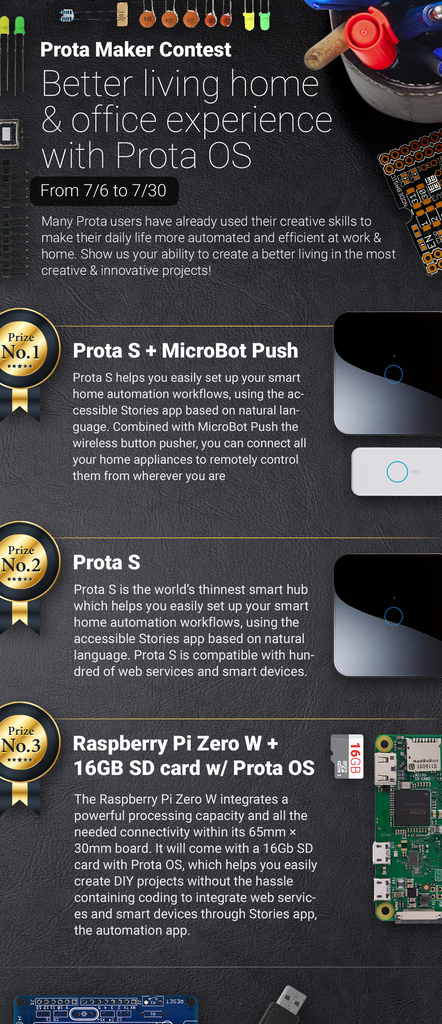
We are currently (and until July 30) running a maker contest. Show us the creative projects you can do with Prota OS and win awesome prizes!
More info here - https://support.prota.info/hc/en-us/community/top...


