Introduction: Nintendo Switch Carrying Case DIY

By following these instructions, you will be the proud owner of a homemade yet effective protective case for keeping your favorite mobile console safe.
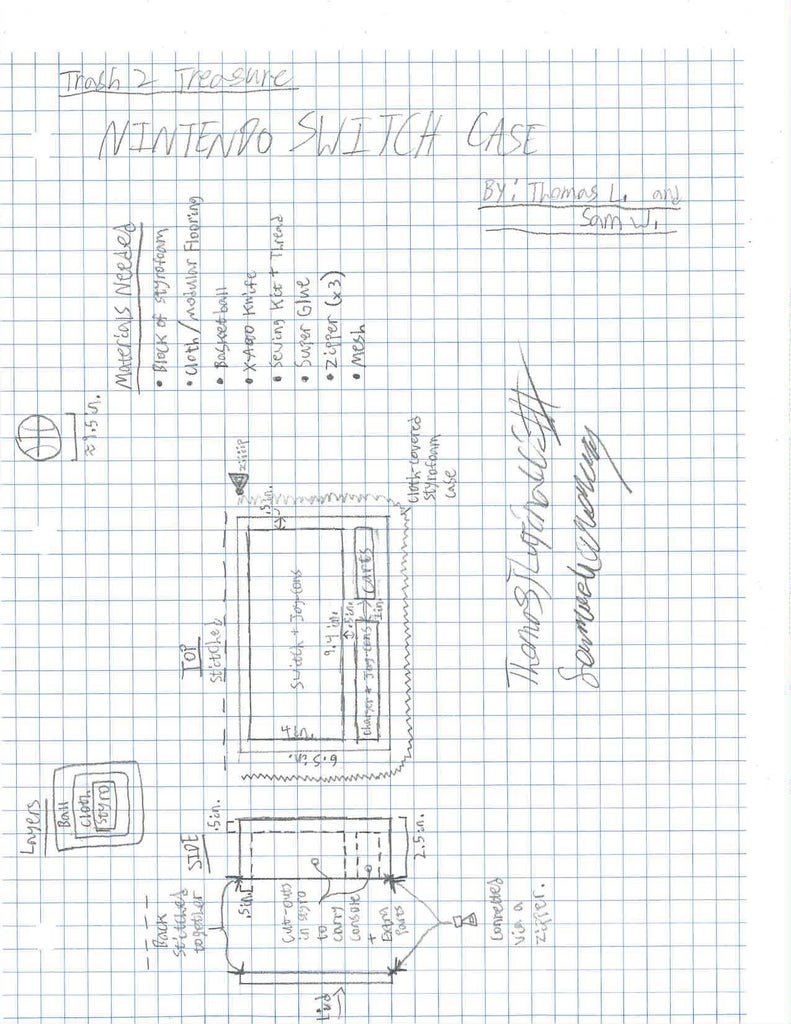
Step 1: Materials

Before you start building, you’ll need the following materials:
--------------------------------------------------------------------------------
- At least 10.5x6.5x2.5 Block of Styrofoam
- Modular Flooring/Cloth
- Masking Tape
- 1ftx3ftx at least ¼in thick wooden board
- Super Glue (Kragle)
- 2 Cabinet Hinges (Preferably with built in springs)
- (optional) Some sort of latch as a locking mechanism
These can be purchased either online or from a crafts store. To reuse scrap, modular flooring can come from Spring cleaning your garage, cloth can come from old, soft clothes, and the rest are all relatively cheap (under $20 total) from craft stores or home renovation stores.
Step 2: Sizing Your Materials

The first step in creating the case will be to construct the base.
- Take the block of styrofoam and use a saw to cut its thickness down to no less than 5 in. Use a level or straightedge to ensure that your cut is straight.
- Next, two rectangular holes will need to be cut into one side of the styrofoam block, one that is 10x4.5x2 in. to hold your Switch with and one that is 10x2x2 in. to hold extra joycons, chargers, games etc.
- Measure all areas of styrofoam and cut out modular flooring/cloth of the same areas.
- Use a saw to cut out wooden panels for the back, front, top, and bottom of your base block.
- Cut out an extra piece of modular flooring/cloth the size of one of your large panels.
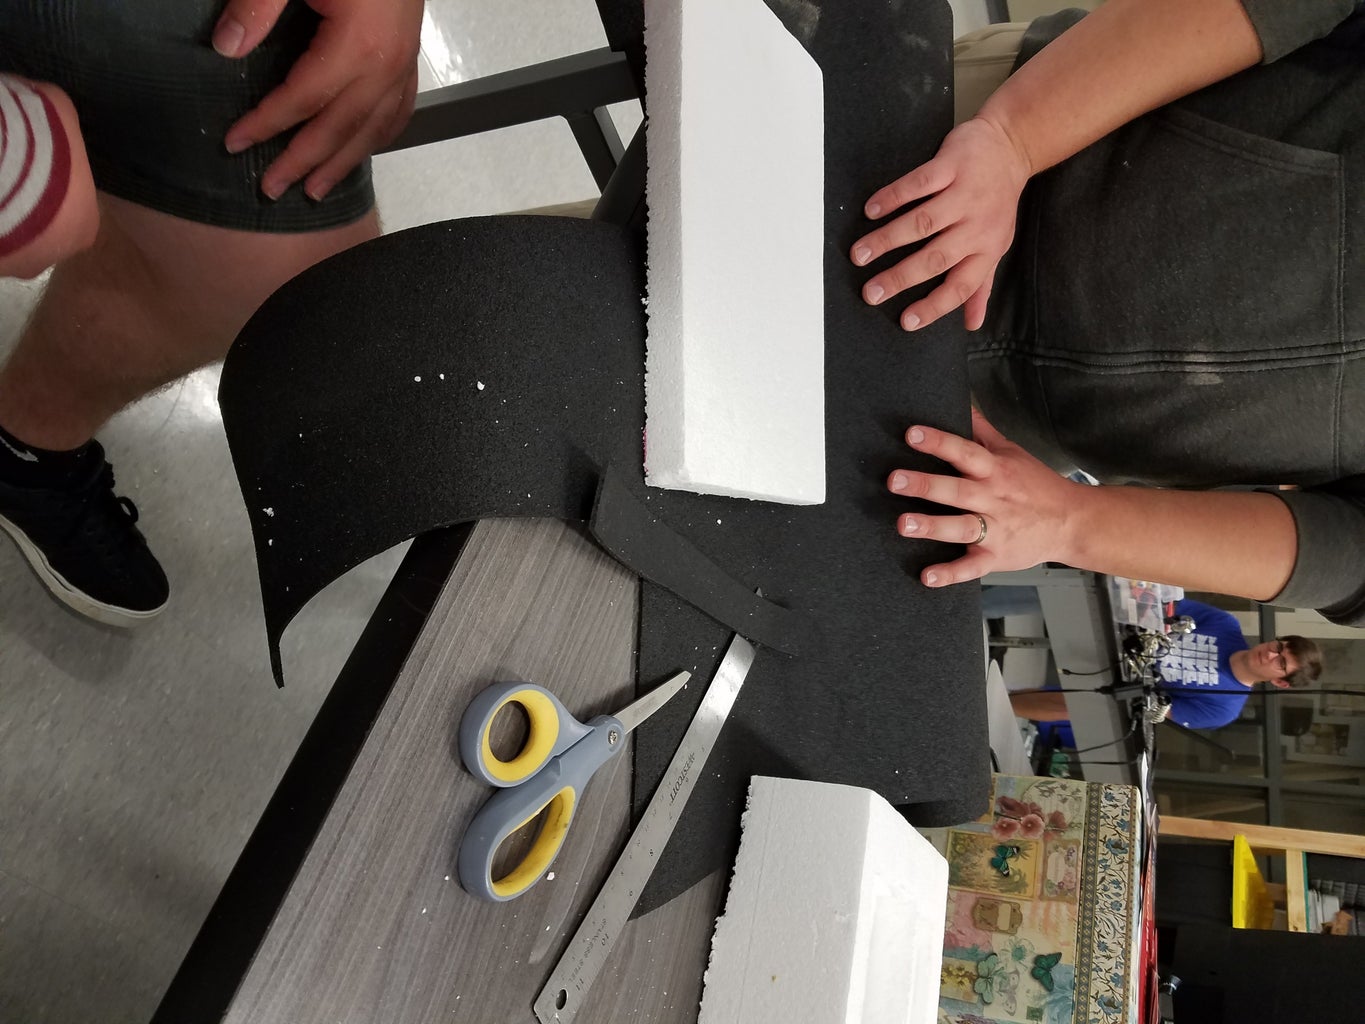
Step 3: Coverup


It's time to dress up that base!
- Wrap up every inch of the styrofoam in masking tape.
- Using super glue (Krazy Glue works really well!), stick together your layer of modular flooring/cloth to the entire body.
- Use more super glue to attach your wooden panels to the top, bottom and back of your block.
- Screw together the back board to the top and bottom panels.
- Take your last board and use the hinges to attach it to the top panel so that it may open and close.
- Glue your last piece of modular flooring/cloth to the inside of your newly formed lid. This will provide extra cushion on rougher rides for your console.
- (Optional) If your hinges are too loose and arouse concern, you can add a latch on the outside to keep the lid closed.
Step 4: Final Touch

Laser engraving is cool!!!
If you have access to one, you can use a laser engraver or CNC router to easily cut out a cool design to show off your new case!
Step 5: FLEX
Go show off your handywork to all of your friends!

Participated in the
Woodworking Contest


