Introduction: Not Ready to Let This Keyboard Go.
I have a favorite keyboard that I have been using for a few years now. It has served me well and I was disappointed when I realized that the 'E' key was not hitting every time. (Apparently I use a lot of 'E's.)
I removed a few of the key covers and discovered that the key mechanism is a Cherry Brown style key. I found a few choices for replacements and purchased 5 replacement Cherry Brown keys. While they were shipping, I proceeded with the first step.
Step 1: Disassemble the Case and Remove Keys
Take your time removing the key covers. I didn't and I payed the price on re-assembly. I suggest using zip lock bags or some other method of segregating key rows from other key rows. Not all keys are the same!
I bent some picture hanging wire to just fit around a key cover and used to to extract each key. You could probably pry them up, but I didn't want to risk breaking another key switch. Looking around online, I see that you can purchase these key extractors, but this quick extractor seemed to do the job just fine.
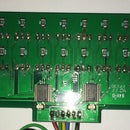
I removed the entire case and disconnected the USB cable from the PCB connector.
Step 2: Cherry Brown Key Switches
When my key switches came in I verified that the leads were the same as those on the PCB. I also noticed that there is are little compression clips on the top and bottom of the key that fix it in the board.
This is important to know about in order to extract the key from the plate once the key has been de-soldered. I found that a chip extractor was just about right to compress the clips in order to free the key.
BUTbefore using this tool, the key switch must be de-soldered... see next steps.
Step 3: Identify Key Switch and De-solder
I identified the key to replace and, while holding the key, turned the PCB over to identify the solder points related to the key. I checked this step a few times and marked the key to replace with a marker.
I used a soldering iron to heat up the pins then used a solder sucker to remove the solder from the pins as much as possible. Going over this a few times to remove as much solder as possible. If you can get the pins to move freely without heat, then they should be ready to extract.
Using the IC puller on the other side, and applying a little bit of heat, gently rock the key back and forth until it pops out of the socket.
Step 4: Install Replacement Key
Once the key is free, de-solder the connections again so that the replacement will slide into place without bending a lead.
Gently slide the replacement key into the unoccupied slot. It should snap into place if everything is lined up. The new leads poking through to the back.
Again use a soldering iron and solder to re-solder the new key switch in place.
Step 5: Test and Re-assemble
I attached the USB line and tried the offending key out for a while to verify that it was working as expected.
Then re-assembled the case, connected the USB line and re-populated the keys.


