Introduction: Off Grid Power Supply
This project is quiet, indoor friendly alternative to a gas powered generator. If you're charging devices, using lamps, or even running an electric motor for a limited time, this off grid power supply is a great companion for camping or emergency situations.
Step 1: Tools + Materials
This is a great CNC machine for furniture-sized projects. It's got a 33"(X) x 33"(Y) x 3"(Z) cutting area and it's fully compatible with Fusion's CAM tools. The post processing in Fusion seems to work very well with all the tests I've tried.
Or Be Your Own CNC...
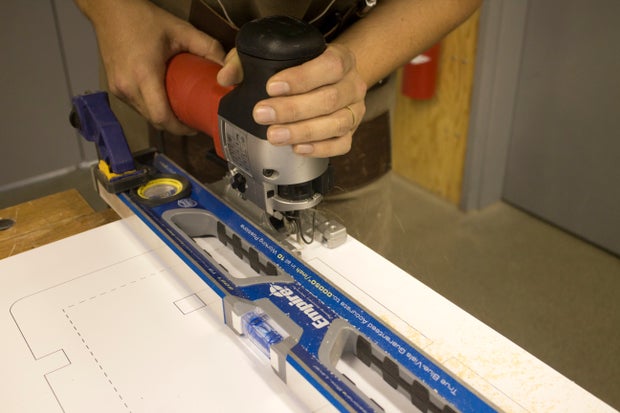
If you don't have a CNC router, all you need is a hand drill, a jigsaw with a metal cutting blade, a large format print from a print shop, and some patience. Here's a link to my Digital Fabrication by Hand instructable, showing you how to be your own CNC machine: https://www.instructables.com/id/Digital-Fabrication-By-Hand/
I'll provide PDF drawings in the next step that you can use as templates to cut out your own parts by hand with a jigsaw.
3D Printing
I use a Prusa I3Mk3S for just about everything. It's the best bang for your buck, in my opinion- very well made, 3D printable replacement parts, accurate and reliable.
3D Print Filament
- I used Matte Fiber HTPLA from Proto-pasta for this project, but pretty much any filament will work. I like this stuff because the finish looks really good.
Electronics
- Power Inverter: ($61) 800 Watt Continuous / 1600 Watt Peak Power
- 12V Deep Cycle Battery: ($64) Be sure to use a deep cycle battery, a car battery will run out very quickly!
- 12V AC Battery Charger: ($54) This charges the battery from a wall outlet when it's available.
- AC Power Socket: ($7) This connects to the AC battery charger. Be sure to use one that has a fuse!
- Cigarette Lighter Terminal: ($6) This terminal connects to the battery and can be used for DC charging, such as with solar panels.
- 12V Battery Meter: ($15) This gives you voltage and percentage of battery power.
Total: $210 (not counting wood and 3D print filament)
Hardware
All of the following hardware can be substituted for smilier hardware available in your location and on your budget, but the CNC files are designed with these parts.
- 1 1/2" wood screws
- 1" Ø tubes for cross bars. I used some carbon fiber tubes that I found laying around in the shop, but any PVC tube or wooden dowel will do. These should be cut to 8 5/8" long.
Materials
- 32" X 32" 1/2" thick MDF sheet. Any 1/2" material will work with the files I'm providing.
- Glossy Epoxy resin for waterproofing
Software
Fusion 360 is free and it's awesome. I use it for everything I design and fabricate. If you have access to a CNC machine, it's about as good as it gets when it comes to easy and fast CNC programming.
Student / Educator License (renew free every 3 years)
Hobbyist / Startup (renew free yearly)
Step 2: Design + Fabrication
Just like everything else I make, I designed this project in Fusion 360. I love it because it's so easy to make CAM setups of the things you design, as you'll see in the Fusion archive that's attached here. If you take a look at the parameters list, you'll notice that I'm using a material thickness parameter. This is important because the interlocking parts (held together with screws through pilot holes) can be automatically updated if you're using a different material.
The STL files are for the end caps that hols the cross bars. The capMid piece is meant to be a connection piece for the side panels, but I ended up not using them because I glued the sides onto the box.
The DXF files are vector files that can be used for CNC or laser cutting.
The PDF files are printable files that can be used at templates for hand cutting. They should be printed at 100% on whatever sheet size they'll fit on.
Layout.PDF is for 1/2" material.
Face Plate.PDF is for 1/8" material.
Step 3: Parts Assembly
The battery and charger fit into slots on the insert piece and are held down with zip ties and screws with washers as seen in the photos. The inverter is fastened with screws through pilot holes in the side of the box.
The diagrams above show where the parts in the face plate belong. I used power pole connectors to connect all the electronic parts, but you could easily do it all with screw-on wire caps from any hardware store.
Step 4: Chassis Assembly
The assembly is basically just a box with X-shaped side pieces. These pieces protrude past the main box and make feet that have carbon fiber cross bars. These bars make good handles for moving the power supply, but the idea is that they also can be used to attach it to a roof rack or something like that.
I used 2" wood screws to attach the end caps to the X-shaped panels as shown in the diagram. The caps were a bit snug, I would probably make the tolerance bigger for those pieces if I were to do it again.
Step 5: Go Off the Grid!
I ran a shop vac off of this power supply for about an hour before the inverted started beeping (warning me that the output was going below 10V). We used it at a cabin in the woods for a weekend charging phones, bluetooth speakers, and fluorescent lamps, and in 48 hours we still had power.
I'd like to try charging it with solar panels to get a sense of how well it would work with that kind of system. Let me know what you think in the comments!
77 Comments
Tip 5 years ago
Just one problem with this, if you are going to have everything all together in this one box you need to do something to separate and seal the battery off from the rest of the components, it also needs to be vented. Even if it is a sealed maintenance free deep cycle battery it will give off corrosive gasses that will destroy your inverter and other electronics, you also have the makings of a bomb, if battery gasses build up in an enclosed space they can explode. Batteries put off a lot more gas while charging. This is why they tell you not to put the inverter in with the batteries in a trailer, camper or RV.
Reply 1 year ago
Thanks for the advice!
Tip 5 years ago
I forgot to finish another thought before I posted my last message. Even if there is no back on this the battery should still be sealed off from the other electronics. As the inverter heats up and the cooling fan comes on it will circulate the gasses through the unit and other electronics. Even people that were just charging the battery in their car in an open garage have had the battery gasses explode, burning the car and the garage down. If you really need to use a lead acid battery it would be better if the battery was separate from the rest of this unit. Just be careful.
Reply 1 year ago
I'm redoing this project right now based largely on this advise. Thanks for taking the time!
5 years ago on Step 2
I tried several times to open the "trimNew.stl" file in Utimaker Cura to create gcode for the print but only a few small boxes are shown. Is the file bad or is it me? Thanks!
Question 5 years ago on Step 4
What is the diameter of the carbon fiber rod you are using for the 4 arms? Thanks!
5 years ago on Introduction
I will make 1 same for myself. Good for use for example when city off electric. Silent and power) nice !
5 years ago
I think this would be an amazing system to add solar panels to. With a slight redesign you could probably turn the top surface into a solar panel and incorporate 2 flip-up side panels for a 3 panel top surface while leaving the front open for charging and the handles available for carrying. I'm not 100% certain how the attachment would work with all these other things attached but I think if you ran your solar panels through a charge controller right to the battery terminals, that it would work just fine. In fact that'd be a pretty awesome product that might be worthy of a Kickstarter.
Reply 5 years ago
this is a standard configuration for an "off grid" system without really being off grid considering that he has an AC-DC converter in it. the only difference is that he made a nice enclosure for it. so why would it be a product "that might be worthy of a Kickstarter"? is it the enclosure that caught your attention?
Reply 5 years ago
No, I'm talking about a modular portable power system that is DIY from a kit. I like the option of adding a 12v car charging port, or a usb port, or 4. Maybe I want solar panels, or maybe I only want to plug it in to charge. Maybe mine has wheels or a camping lantern built right into the side. If you know that something like that already exists, point me in the right direction.
5 years ago
What does this do that a portable backup starter system for automobile use doesn't do? I didn't check the actual figures, but what it sounds like is the designer put together standard products into a cute (and well designed) box in order to make use of his toys (kudos for that) but otherwise nothing spectacular nor even special. For about $100 you can go to Walmart or the like and buy a portable car starter. The only thing it is missing is an inverter. Buy a 400 w inverter for $50 and you can mount it inside the original box by pulling the cords out and wiring the inverter into the opening. Along with it you would receive a flashlight and an pretty good air pump to boot. And you would be likely to keep on top of its maintenance because you have it with you in the vehicle all of the time - I would arrange to have it charged from the 12 v of the car.
Optionally, you could build the pretty (cool) box and install all of the guts out of the automotive backup starter system along with the inverter with a little ingenuity. What do you think about that possibility?
Reply 5 years ago
I think the main difference would be the size of the battery. You make a good point though, you could purchase one of these backup starter systems, rip out the guts and add a nice big battery and put it into a nice looking box as a nice alternative for having to buy the parts separately. If someone was extra clever they could probably find a way to expand the capacity and keep the form factor of the original. I like it.
5 years ago
I don't see a free hobbyist / startup option for Fusion 360, am I missing something? I see $40 month/ $300 a year, free 3 year for student, or free 30 day trial.
5 years ago on Step 5
FYI: The coupon code has expired already. :'(
5 years ago on Introduction
I have a surplus of BP 24V 100watt panels you woud need charge controler and in crease
Reply 5 years ago
LeonardK4 where are you located?
Reply 5 years ago
benicia california
reason sugested pure sine inverter is motors will burn up with a pulsating modifier one,, as far as welding it will leave a bad weld if not puresine , modified is square wave leaving short moments of no power so weld will be very inconsistant ..welding needs constant heat which only full-wave can pruvide
Reply 5 years ago
Also suggest you use puresine wave inverter if running motors
5 years ago
I made a few calculations . . . .
If you appreciate maximum lifetime (= number of discharge/charge
cycles) from your battery then it should not be discharged more than 60%.
This means that this 35Ah battery will not give you more than 20Ah
capacity.
Which means 12V times 20Ah is 240Wh.
You may be happy with that but . . . discharging and inverting
to AC will both generate some heat, again a 10% loss at least.
Finally you will end up with not much more then 200Wh.
The charger can deliver 12V times 1,25A minus 15% heat loss is
13 W.
Charging 200Wh will take approx. 16 hours !
What I do not understand is the 800W inverter . . .
Continues discharge of a battery in Amps should (rule of thumb) not exceed 25%
of the capacity figure.
In this case 25% of 35 is a maximum discharge of 8-9 Amps, times 12V
is 100W !
A 150 to 200W inverter is much better in proportion with the 35AH
battery.
Maybe the most important question is . . . . what is the shape
of the AC coming out of that inverter. As it is NOT mentioned in its
specifications then you will have a nine out of ten chance that it is NOT a
SINE-wave.
Anything else but a Sine wave will produce a lot of heat and finally ruin any
adapter.
For safety reasons in this mobile construction I would buy a AGM type battery.
AGM stands for Absorbed in Glass Mats, so the acid electrolyte is captured in a
glass mat.
I have seen a pallet full of these batteries that fell from a lorry. They were
obviously broken but there wasn’t spilled one drop of acid.
I must say I like the design of the cabinet !
regards, Tom.
Reply 5 years ago
it is a modified sine wave inverter. i went to the website and checked.
Is this a pure sine wave inverter or a modified sine wave inverter?
Modified sine wave
By Rick G on December 7, 2015