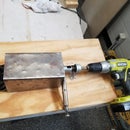
Introduction: Operational: 3D Filament Recycler
The following procedures are to be followed using the 3D filament extruder to ensure proper operation and user safety.
Step 1: Ensure That All Parts Are Assembled Properly and That the Individual Components Are Plugged in to the Internal Surge Protector.
In the initial set-up you must be sure to verify that the heating tape is plugged into the surge protector and that it is wrapped around the pipe. Then make sure that the insulation is placed on top of the heating tape, and then place the protective shield on top of the exposed unit.
Step 2: Plug in the Recycler and Verify That It Is Supplying Power to the Unit.
Plug in the surge protector to a wall outlet to start the recycler. If the previous step was followed the individual components should be plugged into the surge protector and the system should begin to run. The heating element will begin to heat up, ensure that the insulation and heat shield are in place to avoid possible burn injuries.
Step 3: Set the Temperature.
After the machine is plugged in and turned on, the temperature can be set using the included temperature regulator. The temperature should be set at 600°F. Let the machine warm up for approximately 10-15 minutes to let the pipe and externals reach equilibrium to the specified set temperature.
Step 4: Load the Hopper.
Load the hopper with semi-uniform broken down pieces of processed ABS plastic. Ensure that the pieces of plastic have been broken down enough to where they will not cause an obstruction in the pieces feeding into the auger. Also make sure that you have enough material to process at one time, the minimum amount is 10 ounces or more. The auger needs a constant feed rate in order to operate properly. The hopper is constructed of metal will become hot as the recycler reaches operating temperature, so exercise caution when operating near the hopper when the system is on.
Step 5: Start the Auger
If your set-up uses the pressure screw to control the speed of the drill, then tighten it until the drill is turning at a speed which you wish to feed the ABS pieces into the auger. Be careful not to speed the drill up faster than the extrusion process will allow. At this point you should see the pieces being pulled into the pipe by the auger and your extrusion is underway.
Step 6: Continue Feeding the Hopper
It will take about 10 oz of ABS plastic to push out the plastic out of the extrusion hole.The pressure and the heat will break down the filament to a soft solid state, but there must be enough material for the auger to process forward in order to extrude the filament through the small extruding whole.
Step 7: Cooling the Exterior
Ensure the fan is running at the medium speed in order to cool the extruded filament quick enough for it to be spooled but not enough force is produced to elevate the extruded filament. The filament must be manually guided to the spool until it can rotate without stretching the filament.
Step 8: Spooling the Finished Product.
Run the spool between 5-10 RPM depending on the extrusion rate. This will allow the filament to be spooled properly without any stretching, deformation, or breakage in the filament structure. If stretching occurs the deformed portion must be cut and separated from the rest of the spool in order to keep a consistent and reliable recycled filament diameter and strength.


