

Introduction: PS3 Controlled Arduino Based Hovercraft (Bluetooth) by Micrazysoft


Introduction
The commercial hovercraft is expensive, so we built a homemade hovercraft. Our hovercraft can go straight and turn via the PS3 controller. This Instructable teaches you to build a DIY hovercraft with a PS3 controller. The process requires the basic skills of Computer Aided Design CAD and Arduino. The time requirement is 12 hours.
Materials
- One Arduino Mega
- One Arduino Uno
- One PS3 controller
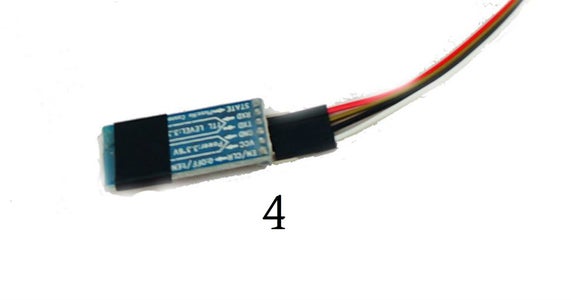
- Two FBT06 modules
- Two RK-360-SD-4530 motors
- Two L298N drive circuits
- One F2627-4500-64 lifting motor
- Two SG90 servos
- Two 75mm fans with 2mm-diameter holes
- One XP040031X battery
- One 1500mAh 11.1v 30c battery
- One USB host shield
- Some foam
- Some Acrylic board
- One glue gun
- Two L-Plates
- Electric speed controller
- Several DuPont wires
- Copper cylinders
Step 1: Build the Body of the Hovercraft


- Make a CAD design of the hovercraft. The design includes two pieces of boards as the picture shows.
- Cut the Acrylic board.
- Cut the foam in the following size.
- Glue the foam between two boards.
Step 2: Fasten the Lifting Motor


- Place the hovercraft body so that the hole faces up.
- Fit the lifting motor into the circular hole.
- Attach the electric speed controller to the lifting motor. You don’t need to worry about the order of wires.
Step 3: Attach the Servos


- Attach the arms to the servos.
- Attach the servos to the hovercraft with two screws.
- Attach the small Acrylic board on to the arms. The design of small Acrylic boards is shown.
- Attach two copper cylinders on the small board.
- Repeat the procedures for another servo. The overall effect is shown.
Step 4: Install the Motors


- Weld two wires with two pins on one motor.
- Attach the motor-spindle to the hole on the L-plate with M-3 screw.
- Attach one fan to the spindle.
- Attach the L-plate on to your small Acrylic board.
- Repeat the procedures for another motor. The overall effect is shown.
Step 5: Wire Different Parts


1. Attach the USB Host Shield to the Arduino Uno board.
2. Wire the lifting motor to the electronic speed controller
a) Follow List 1 and List 5 to connect the host shield to the electronic controller by the wires of No.1, 2, and 3.
b) Connect the electronic speed controller to the lifting motor by the wires of No. 21, 22, and 23.
3. Follow List 1 and List 2 to connect the motor driver boards to the host shield by the wires of No. 4 to 10.
4. Wire two servos
a) Follow List 1 and List 3 to connect one servo to the host shield by the wires of No. 11, 13, and 15.
b) Connect the other servo to the host shield by the wires of No. 12, 14, and 16.
5. Wire the two batteries to the motor driver boards and the electronic speed controller
a) Follow List 2, List 4 and List 5 to connect one battery to the electronic speed controller by the wires of No.19 and 20.
b) Connect the other battery to the motor driver board by the wires of No.17 and 18.
6. The overall effect after wiring is shown.
Step 6: Set Up the PS3 Controller


1. Go to the website “https://github.com/felis/USB_Host_Shield_2.0”, follow its instructions, and install the PS3 libraries.
2. Install the PS3 Driver
a) Run the Motioninjoy (http://www.motioninjoy.com/)
b) Plug the PS3 controller via the USB cable to the computer.
c) Choose the “driver manager” button on the top.
d) Click the “install all” button.
e) After installing drivers, go back to the main page. You can see the connecting status is “1.Dualshock 3/sixaxis (USB)”.
3. Test the Controller
a) Connect the controller onto the USB Host Shield via USB cable.
b) Install the USB host shield onto the Arduino Mega Board.
c) Connect the Arduino Mega to the computer.
d) Upload the test file “Controller_test.ino” from the attachment into the Arduino mega board.
e) Open the Serial Monitor on the Arduino IDE
f) Try the buttons. You can see buttons’ names popping up every time you click.
Step 7: Set Up the Bluetooth


1. Set up the Master
a) Choose one of the Bluetooth modules. You can see pin names on the package of the Bluetooth modules.
b) Connect the pin VCC to the pin +5V on the Arduino Mega.
c) Connect the pin GND to the pin GND on the Arduino Mega.
d) Connect the pin RXD to pin TXD2 on the Arduino Mega.
e) Connect the pin TXD to the pin RXD2 on the Arduino Mega.
f) Upload the “Bluetooth_Setup_Master.ino” from the attachment to the Arduino Mega.
g) Open up the serial monitor. There you will see the feedback.
2. Set up the Slave
a) Choose another Bluetooth module.
b) Repeat b) to e) in 1 with the Arduino Uno.
c) Upload the “Bluetooth_Setup_Slave.ino” from the attachment to the Arduino Uno.
d) Open up the serial monitor. There you will see the feedback.
Step 8: Program the Controller


1. Upload the program into the Arduino boards
a) Download the “master.ino” and the “slave.ino” from the attachment.
b) Check the “readme.txt”, and the key setting of the hovercraft is inside it.
c) Upload the “master.ino” to the Arduino Mega, and the “slave.ino” to the Arduino Uno.
2. Test the program
a) Power your Arduino Mega by batteries, and connect the Arduino Uno to the computer. Open up the serial monitor.
b) Wait until the blue LED lights on Bluetooth modules stop twinkling.
c) Try pressing buttons. See whether the response is the same as suggested in the “read-me” text.
d) If the Bluetooth does not work, re-upload files into the Arduino boards.
Step 9: Debug and Test
- Place the hovercraft on the open ground.
- Power the Arduino Mega and PS3 controller.
- Power the hovercraft and Arduino UNO by batteries on it. You can see servos' angles adjusted to the default.
- Enjoy your work and run the hovercraft!
