

Introduction: Paintball 'Flamethrower'


More by the author:

About: You have no reason to know this information. Or do you!?
Generally its a make-it yourself Co2 Spraypain gun. It has a range of about 15-20 ft. So very CQB.
On the plus side, it sprays continously, soaks everything and cannot be defeated CQB style, also great because it doesent hurt, so its safe on all fields.
On the plus side, it sprays continously, soaks everything and cannot be defeated CQB style, also great because it doesent hurt, so its safe on all fields.
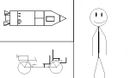
Step 1: The Exterior.

It generally will look like this, also, if you make two, you can use them dual-wielded. Ahh... If only it were the same on Halo...
For this piece you will need some wooden dowels (5).
A small piece of wood, roughly a half-inch thick and a 2 by 2 inch square.
A funnel.
A wooden block.
A spring.
a (It doesent really matter how wide) aluminum or plastic hollow dowel.
A wooden circle, make sure its a inch thick, and slightly larger than the open end of your funnel.
A second funnel, keep this one small.
A nail.
A hacksaw, A chisel, Gorrilla glue (Or super glue/Hobby glue), A drill.
Step 2: The Interior


The interior should look roughly like this, the trigger will be used to open up the paint hopper, by pulling out a stopper, and the T-Section is used to keep the Co2 from leaking.
Picture #2 shows the exat movements, and shows an AIRSOFT Co2 tank inserted into the handle, but now, on to the construction of your fun.
Picture #2 shows the exat movements, and shows an AIRSOFT Co2 tank inserted into the handle, but now, on to the construction of your fun.
Step 3:

First, carve out a basic L-shaped weapon from your wooden block.
Next, Drill down where the barrel will be inserted, make sure its bg enough.
Now, saw off the bottom inch or so of the handle, dont mutilate this, and take a large drill until you can see the hole you made for the barrel, Insert youre smaller funnel int this.
On the inside of this funnel, attach your nail. Make sure it points directly downward, and doesent block off the small end of the funnel.
Insert your barrel.
Drill a second hole down the end of the barrel, make it big enough for the small end of your larger funnel to fit in, and make sure it reaches your barrel.
Then use your saw to cut an incision in the tube of the funnel, dont completely chop it off, but make it large enough for your little wooden square to fin it, and stop most of the flow downwards.
Drill another hole for your pull cord, and insert the pull cord, make sure it COMPLETELY seals off your barrel.
Remember that little piece of wood you took off of the handle? Grind it down until it fits inside the hole you made for the Co2 tank, this is you seal.
Take your large wooden circle, and grind it down till it is an EXACT fit of the upper end of your large funnel (Hopper).
Build your trigger in the way shown, its a large L shape, with the smaller line attached to the wooden square, and the end of your larger line attached to the trigger. Glue on the spring behind the triger.
-The grey box shows the pull cord, the red box the nail, and the purple box is the Co2 tank.
Step 4: From the Front

If you look down the barrel of your gun, it should look like a much better version of this, telling you that you are done!
Step 5: Enjoy!

Fill your hopper with a simple Latex paint, put on your armor, load up the Co2, and shoot away!
Always remember to clean out the ENTIRE gun after use.
Always remember to clean out the ENTIRE gun after use.
