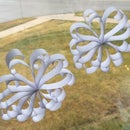
Introduction: Paper Trees
These gorgeous trees are easy to make, but look like they took you hours! Easy-peasy holiday decor in minutes.
Step 1: What You Need...
Paper
Scissors
Trimmer (optional) - to trim your paper into squares.
The smallest square I've used is 4"x4" and the largest is 12"x12".
Step 2: Fold Your Square...
Fold your square four times:
1. In half, vertically
2. Diagonally
3. In half, horizontally
4. Diagonally
Your paper should then start to look more like a tent when placed on the table.
Step 3: Fold to a Triangle...
Pop your square up into a "tent". Fold two opposite sides inwards, gently bringing your paper to a triangle. Crease all your folds.
Step 4: Shape the Tree - Step One
Your triangle should have four points (two per side). Fold each point into the center fold line and crease. Flip over and do the same on the other side.
Step 5: Shape the Tree - Step Two
This part gets a little tricky, but now you're going to fold each triangle in on itself (similar to the first step where you folded the "tent" in to created a triangle).
1. Chose a triangle and open it up.
2. Lay the opened triangle flat over the opposite side.
3. Bring back over to the side you started at by folding in half.
4. Repeat on remaining three triangles.
Step 6: Trim the Tree...
Cut the bottom tails off to form your tree.
Step 7: Cut Your "branches"...
With your scissors, cut your "branches" down each side of your tree. There is no exact measurement with this and how many you cut depends on the size square you started out with.
For this tutorial, I started with a 6"x6" square and cut 6 slits down each side. You will cut through all four layers of paper per side. Don't cut too close to the top, or into the middle of the tree.
Step 8: Give Your Tree Dimension...
1. Separate your sides from each other (there should be four per side of the tree).
2. Start gently bending/folding each branch into the center. I didn't crease these flat, but this is matter of preference.
3. Continue bending/folding each branch from bottom to top, on all pieces of your tree (you should have 8).
4. Once you're finished bending/folding, gently shape your tree. You're done!
Since I use double-sided paper, I thought it was shameful not to showcase the other side (as you'll see on the biggest tree in the opening picture). To accomplish this, I cut a sliver off down each triangle and then bent my "branches" as explained above, making sure to show the opposite side of my paper.

Participated in the
Papercraft Contest

Participated in the
Homemade Gifts Contest


