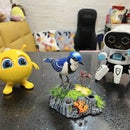
Introduction: Photo Pop Up Card
This instructables show how to make your own photo pop up card.
Step 1: Preparation
- selected photos
- some 160 gsm printer paper
- cutter
- cutting mate
- ruler
- scissors
- glue
This instructables use the technique from YouTube "The Pop-Up Channel", please at least study Pop-Up Tutorial 1 before make this card.
Step 2: Print Template
You may print one the docx or pdf file, they are identical. Word document provided in case you need modify your own version.
P.S.: The image with blue legend for easy reference only, you should not print those image directly.
Step 3: Cut It Out
Cut alone the hard line, do not cut any dot line.
Step 4: Mark the Dot Line
Mark alone the dot line with a ball pen, we just need the mark, if you have a ball pen run out of ink, you should use it.
Step 5: Fine Tune Folding Parts
Fold alone the dot line in both direction and then use scissors cut out the folding parts a little bit for easier folding.
Step 6: Glue Layer 1 Support 1
Glue "Layer 1 support 1" alone the "Layer 1 platform" first v-shape line.
Step 7: Glue Layer 1 Support 2
Glue "Layer 1 support 2" alone the "Layer 1 platform" second v-shape line.
Step 8: Glue Layer 1 Panoramic Photo Support
Glue "Layer 1 panoramic photo support" alone the "Layer 1 platform" third v-shape line.
Step 9: Glue Layer 2 Platform
Glue "Layer 2 platform" on the "Layer 1 support 1 & 2".
Step 10: Glue Layer 2 Support 1
Glue "Layer 2 support 1" on the "Layer 2 platform".
Step 11: Glue Layer 2 Support 2
Glue "Layer 2 support 2" on the "Layer 2 platform".
Step 12: Glue Layer 3 Platform
Glue "Layer 3 platform" on the "Layer 2 support 1 & 2".
Step 13: Glue Layer 3 Support
Glue "Layer 3 support" on the "Layer 3 platform".
Step 14: Glue Layer 1 Right Photo Support
Glue "Layer 1 right photo support" between "Layer 1 platform" and "Layer 1 support 2"
Step 15: Glue Layer 1 Left Photo Support 1, 2 & 3
Glue "Layer 1 left photo support 1, 2 & 3" between "Layer 1 platform" and "Layer 1 support 2"
Step 16: Stick the Photo
Stick all selected photo to the photo support.
Step 17: Happy Memories!
It's time to share your memorable photos to your friends!

Participated in the
Papercraft Contest 2017


